Easy Chart - Pen Names and Groups
To learn more, go to the Tag and Set up Tags to Log pages. The examples below use OPC tags from the Generic Simulator driver, but Memory, Expression, and Query Tags can be used instead.
Pen Names and Group Overview
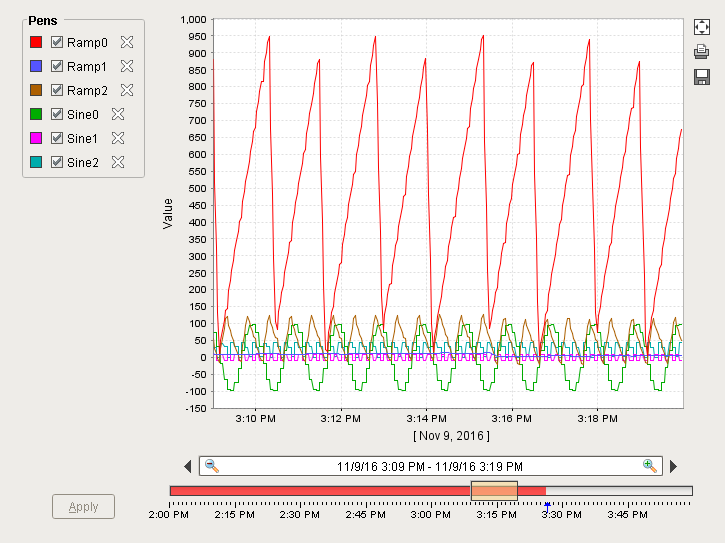
You can organize pens on the Easy Chart by creating custom names and groups for each pen. By default, when you drag Tags from the Tag Browser on to the Easy Chart component, the pen name is the same as the Tag name and organized into a single group called ‘Pens.' One of the great things about pens is you can change pen names and organize pens into different groups making it easier for the operator to quickly analyze the data.
Configuring Pen Names and Groups
For each Tag on the Easy Chart, let's create unique pen names and organize each pen into a group using the Easy Chart Customizer.
-
Right click on the Easy Chart component, and scroll down to Customizers > Easy Chart Customizer.
-
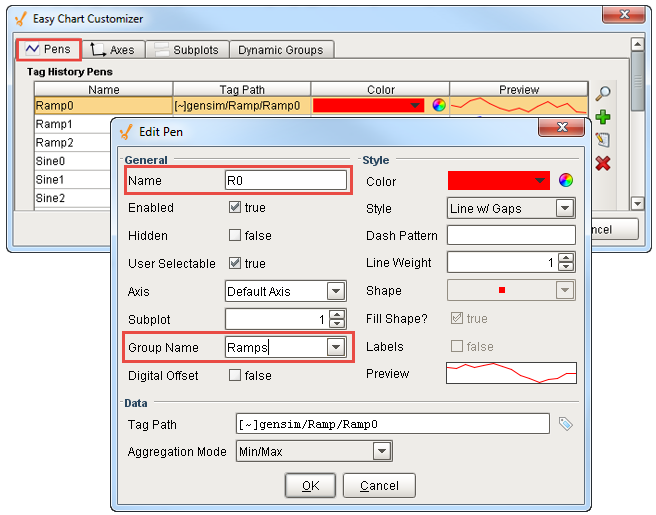
On the Pens tab, edit each of the individual pens and give them a different name as well as put them inside a different group.
Select the first pen row, click the Edit icon, and rename the first Tag from ‘Ramp0’ to ‘R0’ as shown in the following example. At the bottom of the Edit Pen window, next to Group Name, create a new group called ‘Ramps.’ If other groups exist, you can select one from the dropdown list or enter your own. In this example, this is the first group to be created, so simply type ‘Ramps,’ and press OK.
Repeat this step for each Ramp pen assigning each pen a new name.
-
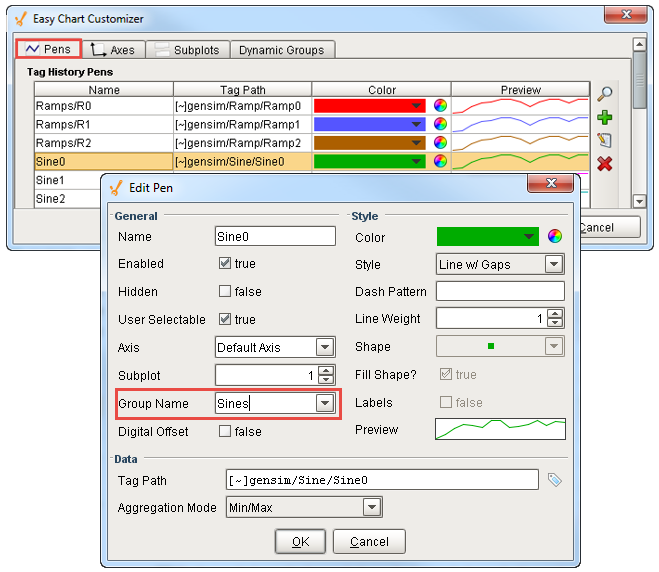
Lets keep the Sine pen names the same as the Tag name, but add them to a group. Select the Sine0 pen row, and click the Edit icon. Create a new group name called 'Sines.'
Repeat this step for each Sine pen assigning each pen to the Sines group. Click OK.
 Quick Tip about Editing Pens
Once you customized the Pen and the Group name for each of the pens, you can see all your updates in one view under the Pens tab. You can update the pen and group names on this view by double clicking on any of the fields. It’s a faster way to edit this information then having to go to the Edit icon for each pen.
-
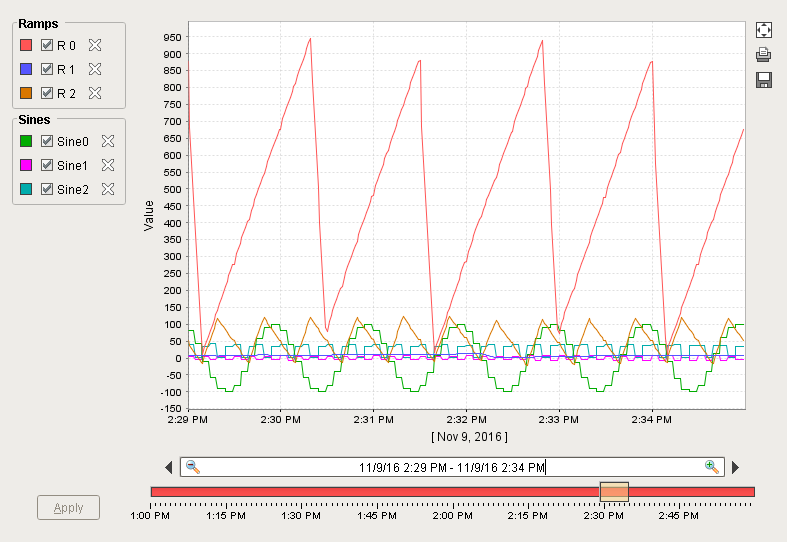
Once you have all your pens configured, click OK. Now the operators will see the Pen and Group names well organized on the Easy Chart.
 Tip for Viewing Specific Pen Values
To see specific Pen values on the Easy Chart, uncheck the Pen and click the Apply button. To see all Pen values, make sure all Pens are checked, and hit the Apply button.