9. Add History to Tags
Storing history for your Tags is simple, and once that's done we can display it on screen in a variety of ways. Let's add history to some of our Sine Tags.
Add History to your Tags
-
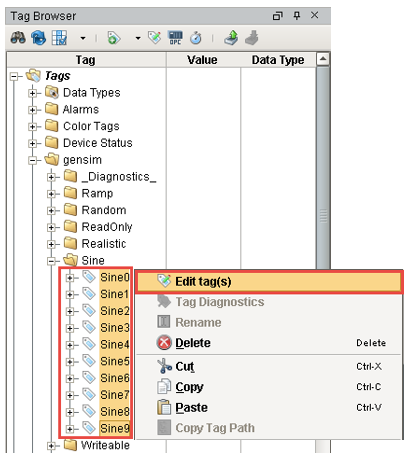
In the Designer's Tag Browser, select one or more tags.
For example, select all the Sine tags in the Sine folder by holding the Ctrl key and clicking on several tags.
-
Right-click on the selected tags, and then select Edit tag(s).
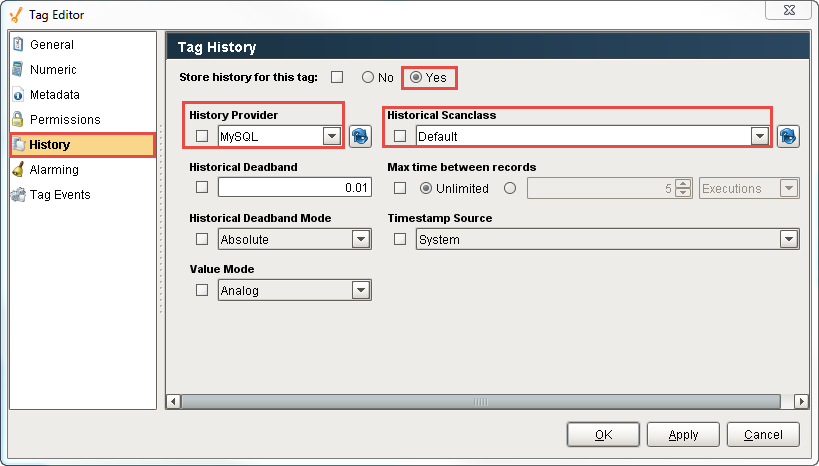
The Tag Editor window is displayed. Here, you can edit the tag and change the name, data type, scaling options, metadata, permissions, history, and alarming.
-
Click on History on the left side of Tag Editor.

-
Click Yes for the Store history for this tag field. This will enable all of the fields.
-
Choose a database from the History Provider dropdown.
For example, choose MySQL as the database you want to log to.
-
Choose Default for Historical Scanclass. This sets the rate at which data is logged. This Default is set to 1 second which means data is logged every second.
-
Click OK.
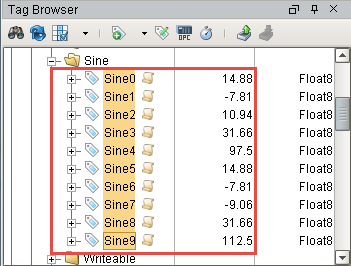
Now look in the Tag Browser. To the right of each Sine tag that is storing history, an icon appears letting you know it is set up.
If you were to look in your database, you can see all the tables and data Ignition has created for you.