6. Create Tags
With the Designer open, a great first step is to create some Tags. You'll use these tags for realtime status and control and to store history with the Tags Historian. You can use Drag and Drop to bring Tags into Ignition with the Designer. Once there, Tags are all configured in the Tag Browser panel.
Click and Drag Tags into the Designer
If you have created a device in the earlier step, the easiest way to create some Tags is by dragging the tags from the OPC Browser.
On the left side of the Designer you will see 3 panels, the Project Browser, the Tag Browser, and the Property Editor.
-
In the Tag Browser, select the Tags folder then click the Browse OPC Servers icon.
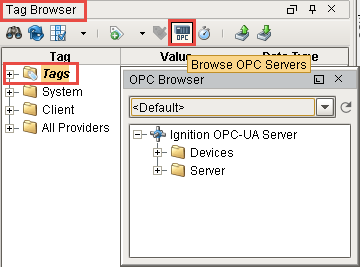
The OPC Browser is displayed and you can browse all of your OPC connections.
By default, you've got a connection to the internal Ignition OPC-UA Server, which has any devices in it that you created earlier. Expand the Devices folder and find some tags that you're interested in.
-
From the OPC Browser, highlight the Tags you want (for example, as in the picture below, the entire Sine folder is selected) and drag them to the Tags folder in the Tag Browser.
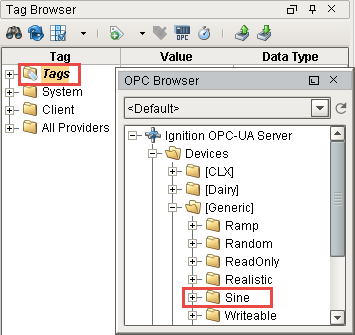
You can drag individual Tags or whole folders. When you drag folders, Ignition keeps the same hierarchy as the PLC.
-
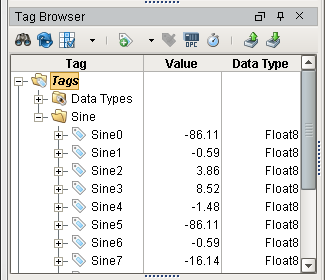
That's it! You now have some Tags. Expand the Tags folder and the new Sine folder to see what you have added. You can see their values come in and start updating automatically. By default, they update at a 1 second rate.