Tag Security
Tag Access Rights
Tag security is often the best way to configure security for data access. By defining security on a Tag, you affect the Tag across all windows in all projects, as opposed to configuring component security on each component that displays or controls that Tag.
If a user opens a window in the Client that has components that are bound to a Tag that the user doesn't have clearance to read or write to, the component will get a forbidden overlay.
![]()
See also: Quality Overlays, Permission Properties.
To Set the Access Rights to a Tag
You can add read/write security to individual Tags or multiple Tags in the Designer. In order to change permissions on a Tag, you have to make changes in two places. 1) Set the Access Rights property to Custom. 2) Add Role(s) to the Permissions page.
-
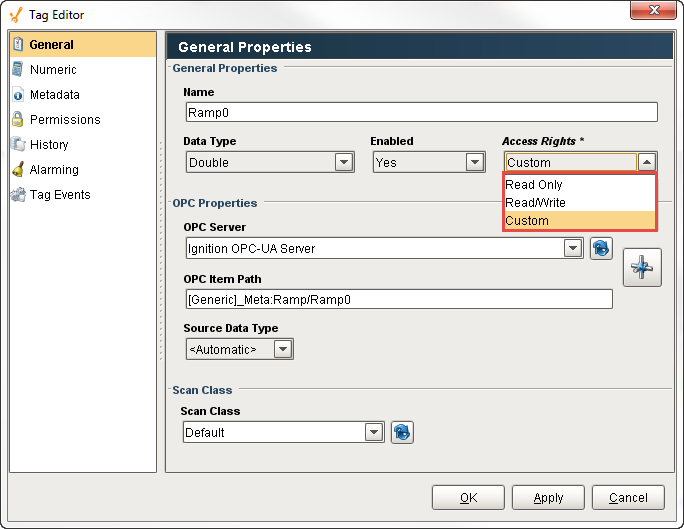
In the Tag Browser, edit a Tag by double-clicking on the Tag.
-
In the General tab, from the Access Rights drop-down, select Custom.
-
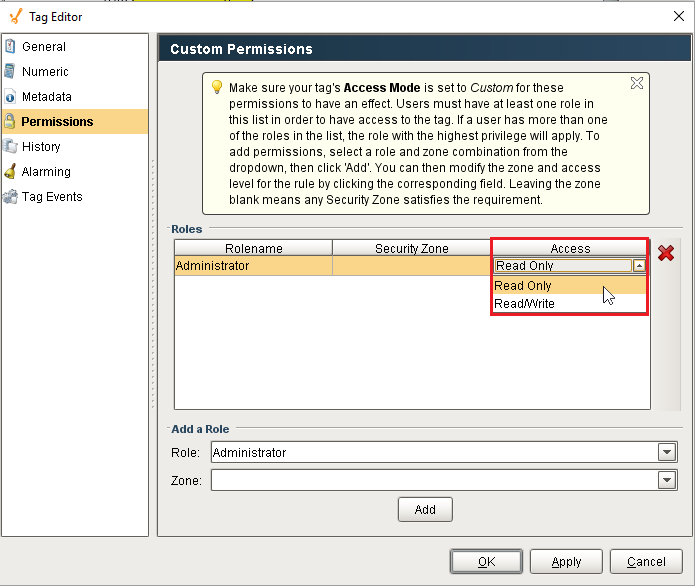
Select the Permissions tab on the left side, and from the Add a Role drop-down select a role. Click the Add button.
-
Change each role's Access rights by selecting the Read Only or Read/Write option. If a user does not have any of the listed roles, they will be denied both read and write permissions.
-
Click OK. Now the user has the Read/Write permission to interact with the Tag.
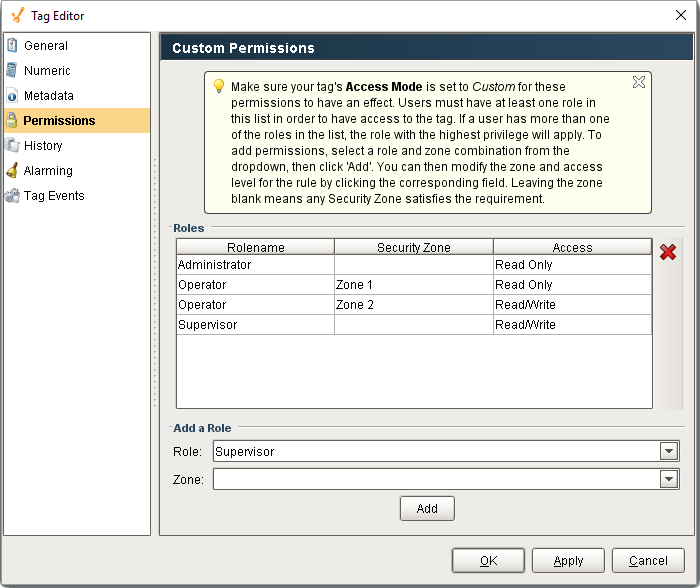
Tag Access Rights with Security Zones
Tag permissions can also include Security Zones. Security Zones allow you to not only limit Tags by a user's role, but also by area. They are setup in the same way as setting the Access Rights just for a user, except a zone must also be specified. It does require that Security Zones be configured, and a few Gateways connected in a Gateway Network. Leaving the Security Zone empty will assume the access permission is for all zones.