Project Security in Designer and Gateway
When several users are all working on the same project, managing changes to the project can become cumbersome. By default, all users with Designer access can modify, delete, save, and publish all resources available in the Designer. In some situations, it is desirable to limit what each user can do in the Designer. Ignition has several built-in Designer restriction methods to help in these scenarios.
Designer Project Permissions
Actions such as publishing, viewing, saving, deleting, and editing of project resources are restricted to users who have sufficient roles to do so. Editing of the these required roles is done in the permissions section of the Project Properties dialog in the Designer. If required roles are not set for an action, then all users with Designer access can perform the action.
The Designer does not poll for role changes, so if a user who is currently logged into the Designer has their roles changed, they will need to re-launch the Designer for the new role(s) to take effect.
Controlling Project Edits by Role
You can control who gets to login to a project by assigning roles and giving permissions to those roles in the Required Designer Roles property which you set up in the Designer.
-
In the Designer, from the menubar, choose Project > Properties.
-
Go to the Project > Permissions area, and under the Required Designer Roles, enter the appropriate roles next to each project level restriction, as required. In the text boxes on this page, enter a comma-separated list of role names that are required to access the project. As you start typing, matching role names will pop up.
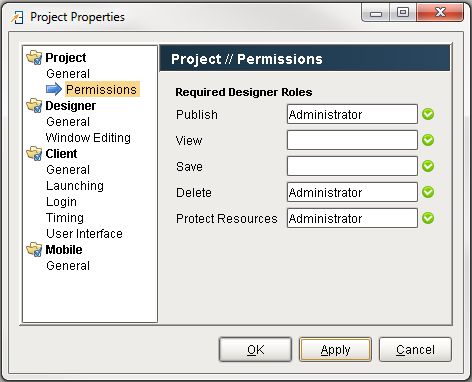
The following table describes each of these five options
| Option | Result |
|---|---|
| Publish | User must have at least one of these roles to publish the project. |
| View | User must have at least one of these roles to view the project in the Designer. |
| Save | User must have at least one of these roles to save the project. |
| Delete | User must have at least one of these roles to delete the project. |
| Protect Resources | User must have at least one of these roles to access protected resources. |
To Lock Global Resources on the Gateway
Before assigning any roles in the Global Resource Protection property, you need to keep in mind all the different roles in your project, what level of access they need in each area of the project, and that it agrees with your security policy. Typically, the Administrator, identifies what role is required, and the user(s) who have that role so the proper protection is placed on global resource objects.
- To block certain users, a role requirement must be added on the Gateway Webpage under the Configure section Configuration > Gateway Settings, otherwise, other users who have Designer access, can edit a protected resource. Scroll down to the Global Resource Protection option.
Add or modify the roles in the Global Resource Protection field to protect the global resources. In this example, you can enter multiple role names separated by commas.
Once you enter the required roles, anyone without one of these roles will not be able to modify protected objects. Click Save Changes.

The roles you identify in the Global Resource Protection property to protect or modify any of the protected global resources (i.e., alarm pipeline, scripts, etc.), will supersede all of the individual locks that were applied in the Designer.
Restrict Project Creation
The ability to create new projects can also be restricted by role. In cases where multiple users have Designer access, this property can prevent each user from creating a large amount of 'test' or 'sandbox' projects. This is ideal for production systems where you don’t want other users creating new projects.
Granting Permission for Project Creation
The Create Project Role(s) property can allow users with one of the specified roles to create new projects on the Gateway. To grant permission to create new projects in Designer, you must assign a role in the Create Project Roles(s) property of Gateway Settings. On the Configure section of the Gateway, go to Configure > Gateway Settings, and scroll down to Create Project Role(s) property. Enter a role that users should have to create a new project, and click Save Changes.

Protecting Project Resources
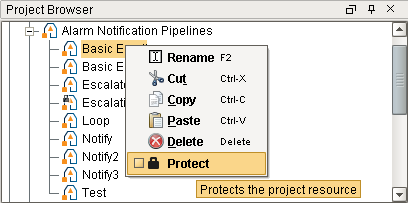
You can lock individual project resources from inside Designer by opening the Project Browser, and right clicking on any of the objects that you want to lock in. Select the Protect option to protect it. Once it's protected, it cannot be changed except by someone that has the permission to unprotect it, and modify it.

Protected Resources
Protected resources are global or project resources that can only be edited by select users with the required roles. These roles are required to protect resources from being edited in the Designer, and do not apply to the clients. This means you can prevent a resource from being edited by other users who have Designer access. It is often used in scenarios where development work is finished on a window or object, and no further changes should be made to it. Other objects like Templates or Alarm Pipelines are often protected so they may be used, but not modified.
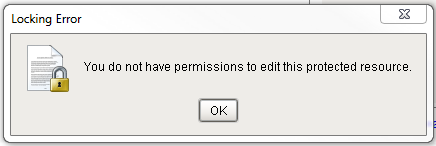
Users without a required role will see the following message in the Designer when attempting to open a protected resource:
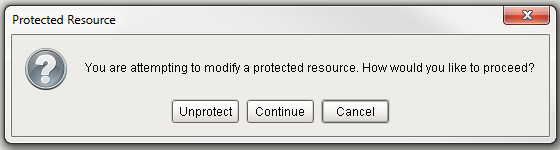
Users with a required role are allowed to modify the resource, but a message will appear informing them that the resource is protected, and will be asked how to proceed:
Additionally, a lock ![]() icon will appear on the resource informing users that it is protected. An example can be seen on the 'Audit Events' window below:
icon will appear on the resource informing users that it is protected. An example can be seen on the 'Audit Events' window below:

To remove the protection, simply right click the object and select the Protect option to unprotect it.
Protecting Global Resources
Just like protecting project resources, you can protect individual global resources using the Protect option. Global Resources can be locked in two different locations: in the Designer and on the Gateway webpage using the Global Resource Protection property as described earlier on this page.
To Lock Global Resources in Designer
-
Go to the Global section of your Project Browser.
-
Right click on one of your Alarm Notification Pipelines, and select Protect. This example uses the Basic Email pipeline object, but any object can be protected. To remove the protection, simply right click the object and select the Protect option again to unprotect it. Once an object is protected, you will see that you can still modify it.