Project Restore
Project Restore/Import
There are two primary ways you can restore / import a project:
- Gateway Webpage - imports the entire project.
- In Designer using File > Import in the Menubar - lets you import an entire project or select only the resources you want to import into your project.
To restore a project backup file in the Gateway Webpage
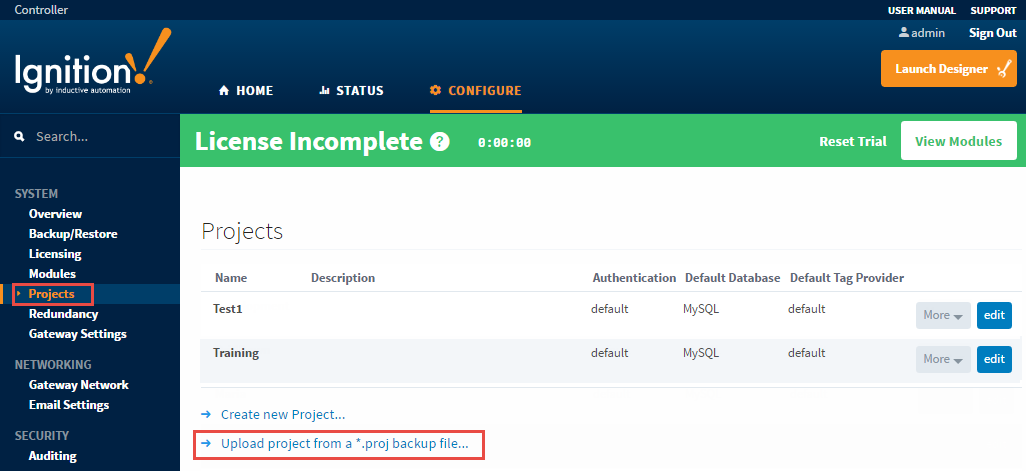
- Go to the Configure section of the Gateway webpage.
- Select System > Projects.
The Projects page is displayed and you can see your existing projects. - Find the blue arrows at the bottom of the list of projects, and click on Upload project from a
.projbackup file....
The Upload Project page is displayed.
- Click on Choose File, select your
.projfile from your browser, and click Open. - On Upload Project page, click on Upload.
If there is already a project with the same name, the Project Name Conflict page is displayed giving you the option to Rename the project or Overwrite it.
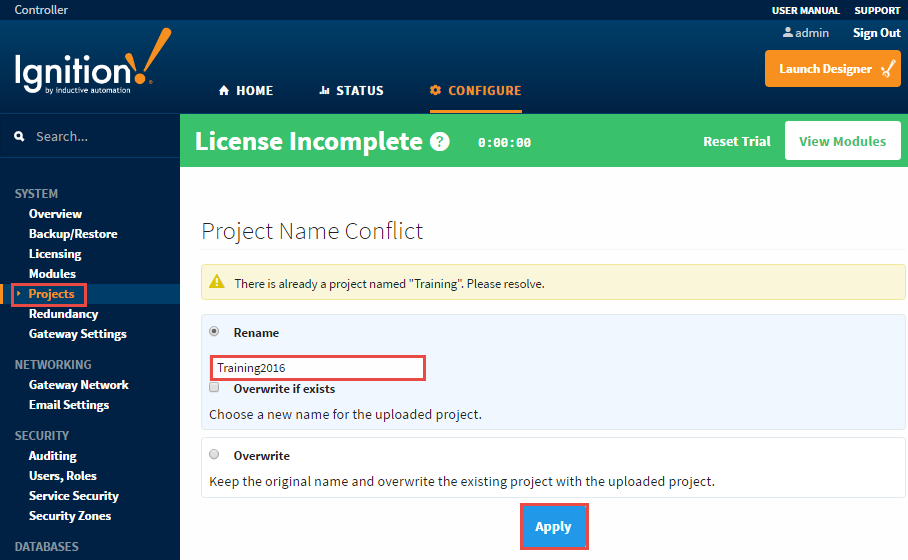
- Click Apply.
The Projects page is displayed again and you will see your new project is added to the list along with the other the projects.
To restore a project backup in the Designer
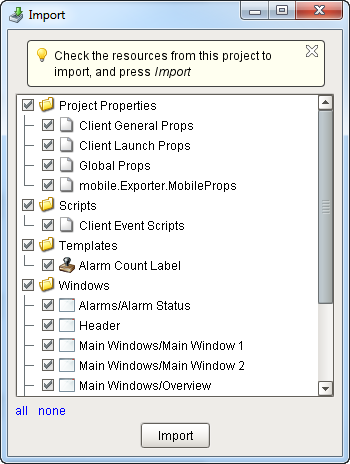
In the Designer, you can restore an entire project or selected resources from a project backup. This example shows all the resources that were exported that you can restore from the project backup.
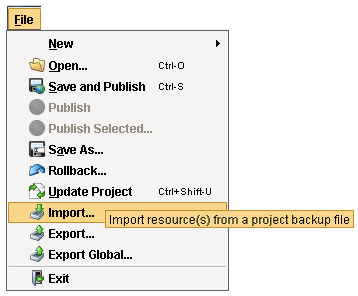
- In Designer, select File > Import.
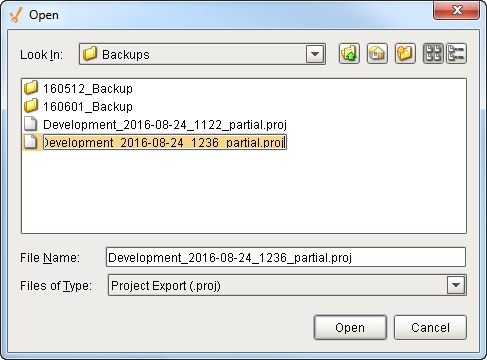
- Select the project backup file (
.proj) from the default folder, and click Open.
- Select the resources from the project that you want to import. Press Import.
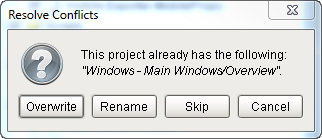
- If there are any conflicts when importing your project resources, a dialogue box will appear and ask you to either Overwrite, Rename, or Skip the affected items. Once all conflicts have been resolved, save your project.
New in 7.9.8
As of 7.9.8, you can now Overwrite All or Skip All.

