Component and Window Security
Role-based security inside of Ignition works on multiple levels: component, group, container, and window levels. Each of these levels also have special categories of security that help with tuning security to various design considerations.
Each window and component can define its own security settings. These settings determine who can see and/or use the component. It's good business practice to have a well thought out security policy for your project.
Changing Security Settings on a Component
To define a security for a component that is different from that of the parent, use the following steps.
- Right-click on a component and select Security. The Security Settings panel is displayed in the bottom section of the Property Editor.
- Deselect the Inherit Permissions check box to override the permission settings so no permissions are inherited from a group, container, or window. (By default, Inherit Permissions uses permissions from whatever container a component is in).
- Select the role that the user must have from the list of roles displayed under the Inherit Permissions section. If the roles you created do not appear, it's probably because the Designer was open before those roles were created, so right-click in the Inherit Permissions section and select Refresh.
- In the Restrictions section, choose the option that will enact if the user does not have the selected role.
- Disable - sets the Enabled property to false when the window opens up.
cautionIf you choose to disable the security on a component, make sure that it is a component that actually does something different when it is disabled. For example, buttons and input boxes can't be used when they are disabled, but disabling a Label component has no effect.
- Disable Events - prevents event scripts from running when the user doesn't have security clearance.
- Hide - acts the same way the Disable restriction does, but it sets the Visible property to false on the component.
- Access Denied Overlay - shows an opaque overlay on top of the component when the user doesn't have security clearance.
- You can keep the panel open or close it. The security settings take effect immediately.
Here are several examples of what different security permissions and restrictions would look like on a Multi-State Button component in a Client.

In the Client, if the user does not match the role filter that you define, the component will be disabled or hidden and disabled. When a user with higher permission logs in, the component will be usable again.
Setting Security on a Window
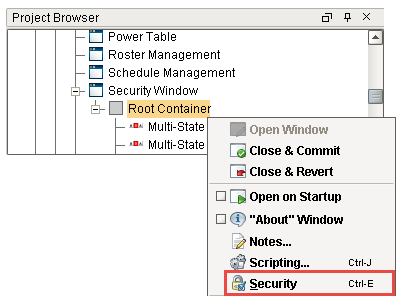
You can configure security settings that control who can and who can't open a window. While in the Designer, right-click on a window in the Project Browser and select Security. Window Security is configured the same way that Component Security is configured.
Select the permissions based on your business requirements. Windows only have one Restriction option: Do Not Open. This means unless the user has one of the selected roles, they cannot open the window. They will see a warning message instead.
