Images in Vision
Image Manager
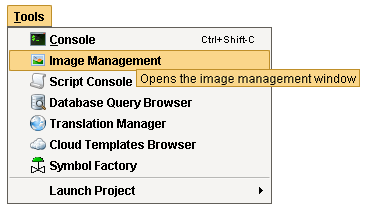
Images such as PNGs, JPGs, or GIFs can be uploaded to the Image Management tool and used inside of windows in Ignition. Once uploaded, these images may be used on windows and in templates. The Image Manager tool, available from the Tools > Image Management, provides an interface to upload, download, or select images.
The Image Manager process does not support bitmap files.
Exporting and Importing Projects
Uploading an image involves storing the file in the Gateway's internal database. This means that project exports do not contain any referenced images.
When exporting a project for use in another Gateway, it is recommended to also export any images that the project uses, and upload them into the new Gateway at the same directory. Examples of uploading and downloading images can be found on this page.
Using Images in the Designer
Uploading an Image to the Image Management Tool
There are two ways to upload an image into the Image Management tool. Both ways involve having the Image Management tool open. At the top of the Designer in the Menu Bar, select Tools > Image Management.

Upload on Drag and Drop
Images can simply be dragged and dropped from the local file system into the Image Management window.
Manual Upload
Alternatively, the Image Management window has an Upload button to pass images in. Locate the directory you wish to upload the image. You may use the root folder, or create a new folder to keep your images organized. When ready, click on the Upload Image button.
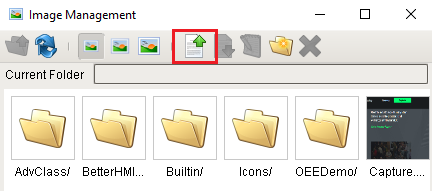
An Open dialog window will appear. Simply find your image on the local system and click Open to upload the selected image.
Using the Image Component on a Window
-
Drag an Image component from the component palette onto the window.
-
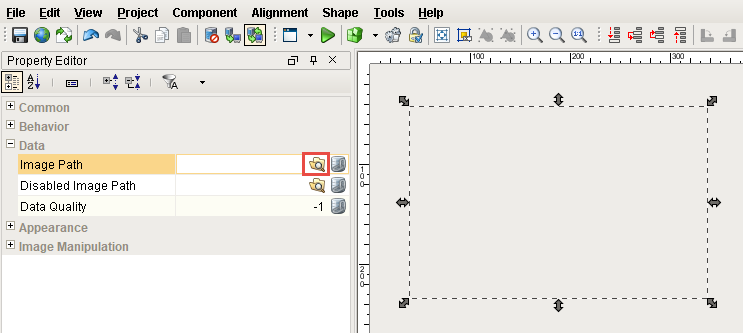
From the Property Editor, select the image component's Image Path property, click on the Browse icon.
-
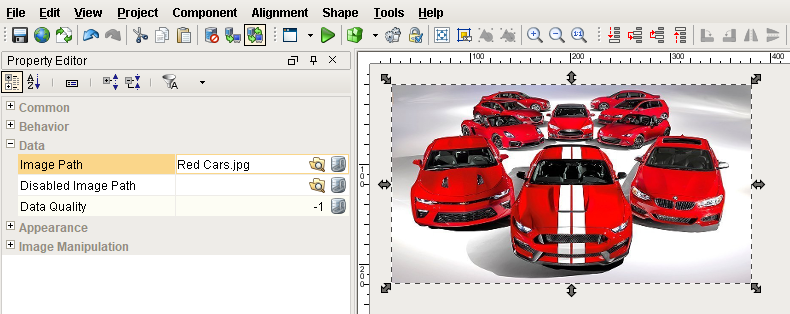
From the Image Browser, look through the different folders for an image file you want and double-click on it to display it in your window.

-
The path to the image is now displayed in the components Image Path property.
Using Local Images
Instead of using images in the Image Management Tool in Image Path properties of components, you can use the file path to a local image. This is done by prefixing the file path with file:///. An example Image Path would look like this:
file:///C:/Users/Public/Pictures/Sample Pictures/Chrysanthemum.jpg
It is important to understand that this will only work if the image is accessible from where the client is running. So if you access an image from the designer on the local machine, clients that launch elsewhere may not have the image stored in the same location.
Downloading Images from the Image Management Tool
Single images, as well as entire directories, may be downloaded from the Image Management tool. This is useful when migrating a project to another Gateway.
Image downloads can be taken from either the Image Management or Image Browser windows. If at least one folder or image is selected, the Save button (![]() ) will become enabled. Click the Save button, pick a local directory to save the images to, and click the Save button again. Note that all images and subfolders in the selected folder will be copied to the selected directory.
) will become enabled. Click the Save button, pick a local directory to save the images to, and click the Save button again. Note that all images and subfolders in the selected folder will be copied to the selected directory.