Driven Scan Class
Driven Scan Classes
The Driven scan class is a very flexible and powerful scan class type in Ignition. It allows Tags to run at a fast or slow rate based on a Tag and some condition. This allows for better system performance, while still giving you high resolution data when needed.
Driven scan classes set the polling rate dynamically for Tags based on a comparison between the driving Tag's value and a value. In simple cases, when the logic comparison is true, the Fast Rate applies, otherwise, the Slow Rate applies. There are two exceptions to this: the Any Change operator and the one-shot mode. Using either of these exceptions, the scan class does not run at a rate. 'Any change' will execute once each time the value changes, and 'one-shot' will execute once when the comparison condition is true, and not again until the condition becomes false and subsequently true. This is not the same as setting the slow rate to 0, which means the values should not be polled at all. Having a rate of 0 can be useful (such as when a line is not running), but make sure your Tags are still polling if you are storing history or have alarms set up.
A driving Tag can be an OPC Tag, or an Expression Tag that performs complex calculations and references other Tags. It's possible to create robust scan class triggering using Expression Tags.
Make sure the driving Tag is never using the scan class it is driving. The driving Tag should be set to a separate scan class that runs at an appropriate (fast) rate. Changes to the driving Tag will be recognized by the system faster, and the change in poll rate on the Driven scan class will occur faster.
If the Driving Tag is using a scan class that has a 0 rate, it will never have it's value checked, and the scan class it is driving will never update.
We have examples of three common ways to run a Driven scan class: by Machine State, Manual Trigger, and Time of Day. Each has a description of the scan class, how to set it up, as well as how to setup the driving Tag.
Driven Scan Class - Machine State
Driven scan classes that are based on a machine can be very important when you only want to poll values when a machine is ON or OFF. A machine state scan class is when the Tags are polled at one rate with the machine ON, and a different rate when the machine is OFF. You can easily see the rate change in the Designer using this type of condition.
To Create a Machine State Tag
First, you need to create a driving Tag if you don't already have one.
-
In the Tag Browser, right-click on the Tags folder, then go to New Tag > Memory Tag to create a memory Tag. The Tag Editor window is displayed.
-
In Tag Editor, enter the following:
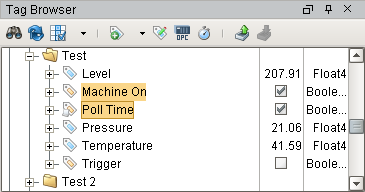
- Name: Machine On
- Value: false
- Data Type: Boolean

-
Click OK to add the Machine On Tag to the Tag Browser.
To Add a Driven Scan Class based on the Machine State
Once you have your driving Tag created, add a Driven scan class that updates the Tags based on when the machine is ON.
-
In the Tag Browser, click on the Timer icon (
 ) to open the Scan Class Editor.
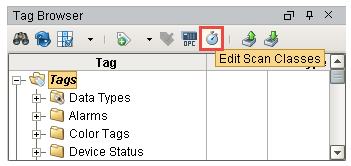
-
To create a new scan class, click on the green + icon on the lower-left of the window.
-
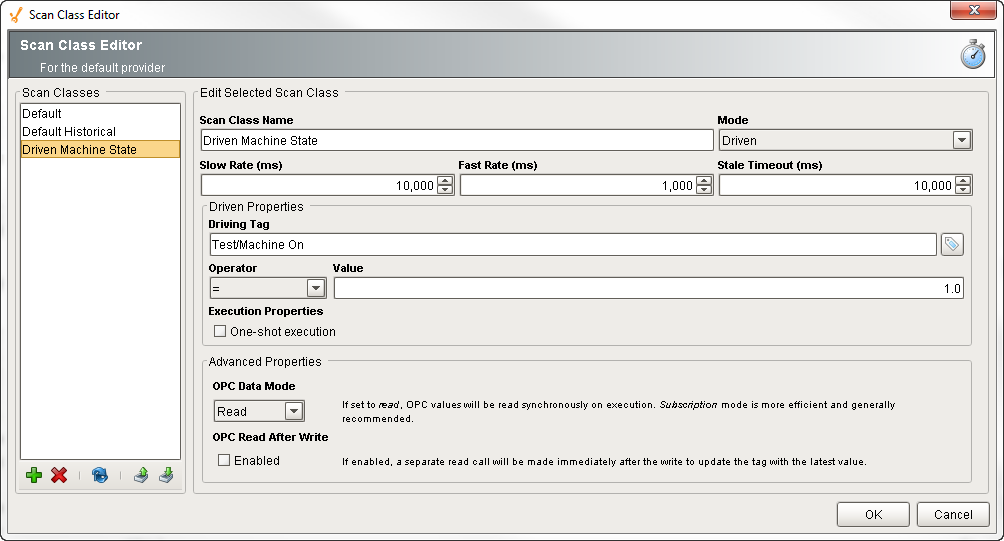
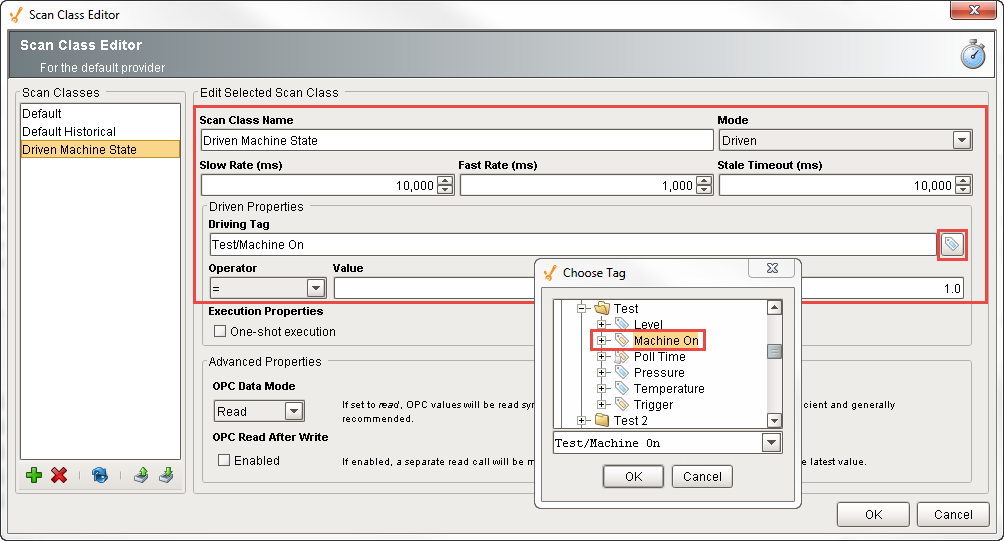
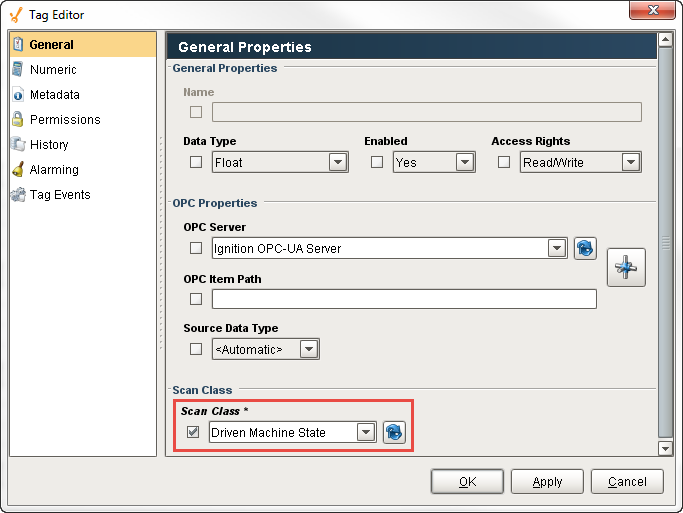
Enter the name of the scan class. For example, you can name it Driven Machine State, and set the Mode to Driven. This scan class executes based on the condition you set on the Driving Tag.
-
Click on the Tag icon next to the Driving Tag box, and choose the Tag you want to set the condition on, and click OK on the popup. This example uses the Machine On Tag that was just created.
-
Set the Slow Rate to 10,000 (10 seconds) and the Fast Rate to 1000 (1 second).
-
Set the Operator property to = and the Value property to 1. When the machine is ON it will use the Fast Rate, and when the machine is OFF it will use the Slow Rate. Click OK on the Scan Class Editor window.
-
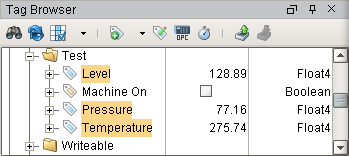
Next, select all the other Tags that you want to use the scan class for (i.e., Level, Pressure, and Temperature). Right click on one of the selected Tags and choose Edit Tags. To change the scan class, choose our new Driven Machine State from the Scan Class dropdown, and click OK.
-
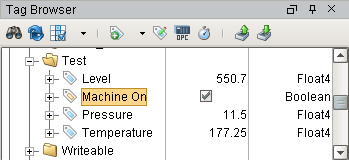
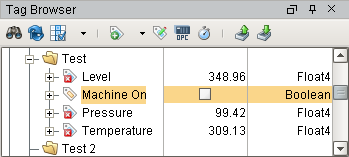
In the Tag Browser, mark the checkbox next to the Tag (i.e., Machine ON), that you created to turn the machine ON. Now, when the machine is ON, polling will be a at the 1 second rate. When the machine is OFF, polling will be at the 10 second rate. Test it by toggling the Machine Tag ON and OFF.
You can also set the Slow Rate or the Fast Rate to a value of 0, which means polling is stopped when the condition is false. So for example, when the machine is OFF, you will see the Tags stay at the last known value, and a overlay will appear on the affected Tags.
Once the machine is turned back ON, the Tag overlays disappear. The overlay will only appear on the affected Tags one time, and that is when the slow or fast polling rate was run for the first time after initially being set to a value of 0.
Driven Scan Class - Manual Trigger
Using a Manual Trigger is another example of a Driven scan class that can be used to allow operators to speed up or slow down polling rates on demand based on a trigger value. A Manual Trigger is similar to the Driven scan class for Machine State, but rather than get the trigger from the PLC, you get the trigger from Ignition. When the Trigger value is equal to 1, it will use the Fast Rate, and you can see the values changing very fast. When the Trigger is equal to 0, it will use the Slow Rate.
A good example of using a Manual Trigger is where the operator uses a 2-State Toggle Button component on a window to turn the Trigger ON to poll at a fast rate, and then to turn the Trigger OFF to poll at the slow rate whenever necessary.
To Create a Trigger Tag
In order to get the trigger from Ignition, you need to create a driving Tag.
-
In the Tag Browser, right-click on the Tags folder, then go to New Tag > Memory Tag to create a memory Tag. The Tag Editor window is displayed.
-
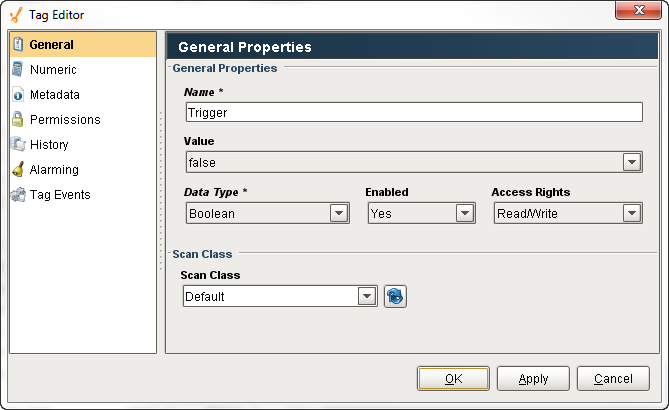
In Tag Editor, enter the following:
- Name: Trigger
- Value: false
- Data Type: Boolean
-
Click OK to add the Trigger Tag to the Tag Browser.
To Add a Driven Scan Class based on a Trigger Value
Now that you have your Trigger Tag, add a Driven scan class that changes based on the value of the Trigger Tag.
-
In the Tag Browser, click on the Timer icon (
) to open the Scan Class Editor. -
Create a new scan class, by clicking on the green + icon on the lower-left of the window
-
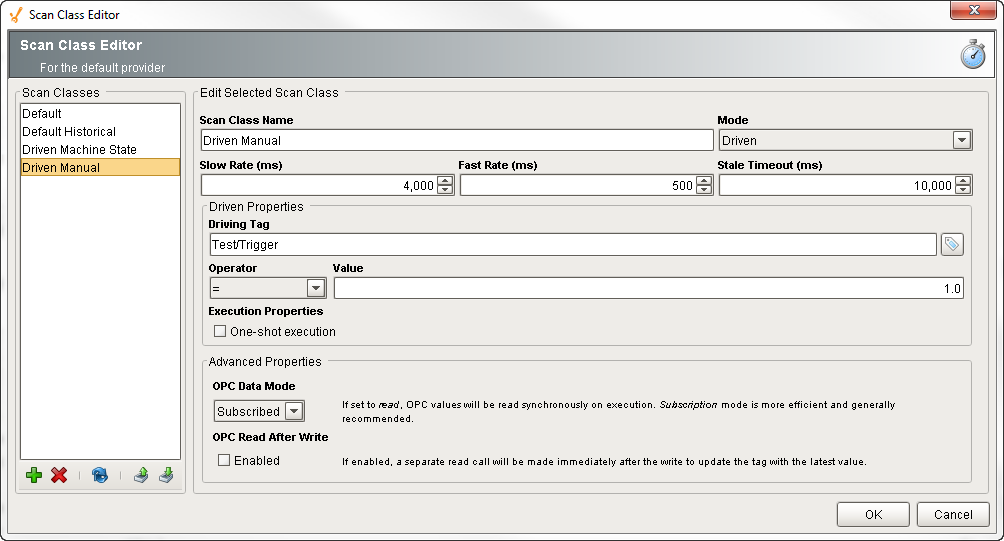
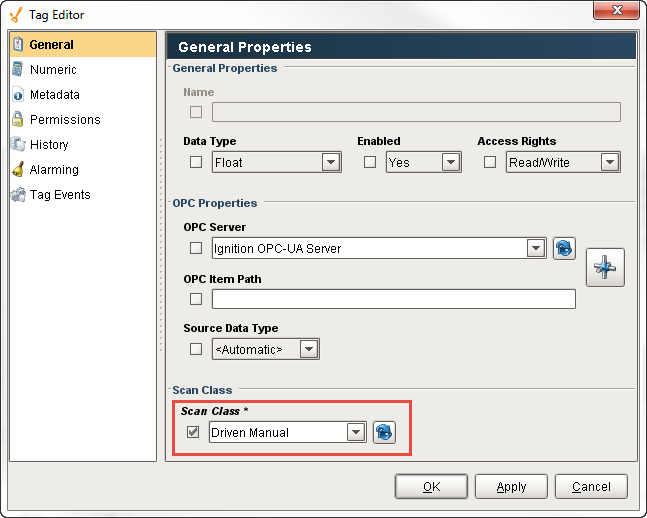
Name the scan class, for example, you can name it Driven Manual, and set the Mode to Driven. This scan class executes based on the condition you set on the Driving Tag.
-
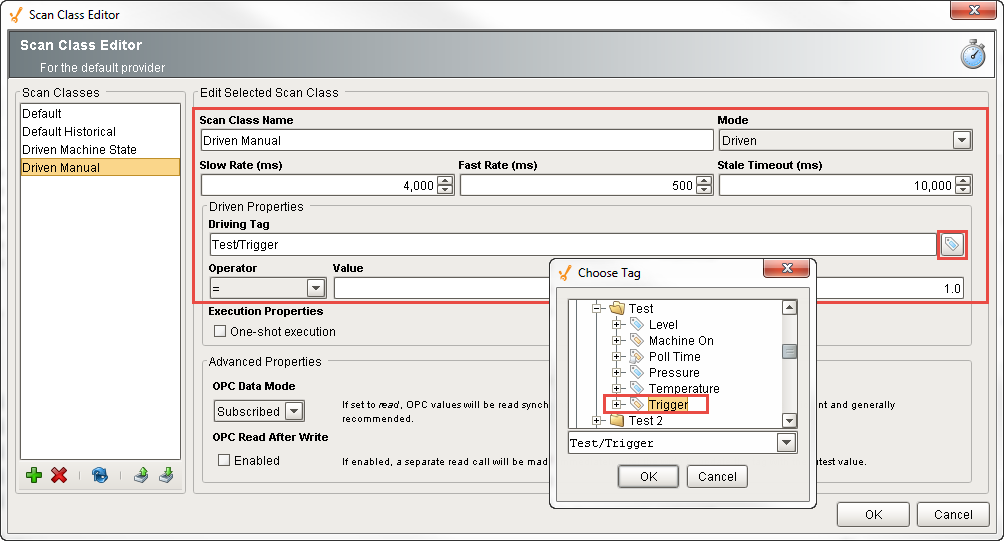
Click on the Tag icon next to the Driving Tag box, and select the Tag you want to set the condition on, and click OK. This example uses the Trigger Tag that was just created. Click OK.
-
Set the Slow Rate to 4000 (4 seconds) and the Fast Rate to 500 (1/2 second, a very fast rate).
-
Set Operator property to = and the Value property to 1. When the Trigger is equal to 1 it will use the Fast Rate, and when the Trigger is equal to 0 it will use the Slow Rate. Click OK.
-
Next, select all the other Tags that you want to specify in the scan class (i.e., Level, Pressure, and Temperature). Right click on the selected Tags, and the Tag Editor will open. To change the scan class, choose Driven Manual from the dropdown, and click OK.
-
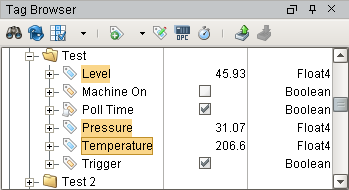
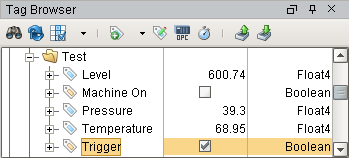
Now, in the Tag Browser you will see a checkbox next to the Trigger Tag which you can set the ON/OFF condition. So when the Trigger is set to ON, you are going to run at the Fast Rate of 500 ms. If the Trigger is set to OFF, it will run at the Slow Rate of 4000 ms.
-
Lastly, you can drag the Trigger Tag onto a window and select the Control > Two-state Toggle button to allow your operators to control the scan class speed.
Driven Scan Class - Time of Day
Driven scan classes can be used as the polling rate for Tags to trigger at different rates at different times of the day. They can also be used as a one-shot event at a specific time of the day. You can accomplish this by setting the condition of the Driven scan class to be true at certain times of the day, and false at other times.
Keep in mind, that if you use a Driven scan class based on the time of day with a 0 Slow Rate for history, the Tag will only store history during those specified times.
To Create a Time of Day Tag
Let's use an Expression Tag to drive the condition. You can use the functions that are in the expression language to poll the PLC during the hours of 8am to 5pm, and if the machine is ON. In this example, both of these conditions must be true for the value to poll. This example assumes you already have a Machine On boolean Tag in the same folder.
-
In the Tag Browser, create an Expression Tag that is a Boolean. Right click on the Tag folder then go to New Tag > Expression. The Tag Editor window is displayed.
Enter the following:
- Name: Poll Time
- Value: false
- Data Type: Boolean
-
Click on Expression from the menu on the left, and enter the expression below. The condition is true when the time is between 8am and 5pm, and the machine is ON, otherwise it is false at other times, and/or when the machine is OFF. Click OK.
timeBetween and Machine On expressiontimeBetween(now(0), "8:00:00 am", "5:00:00 pm") && {[.]Machine On}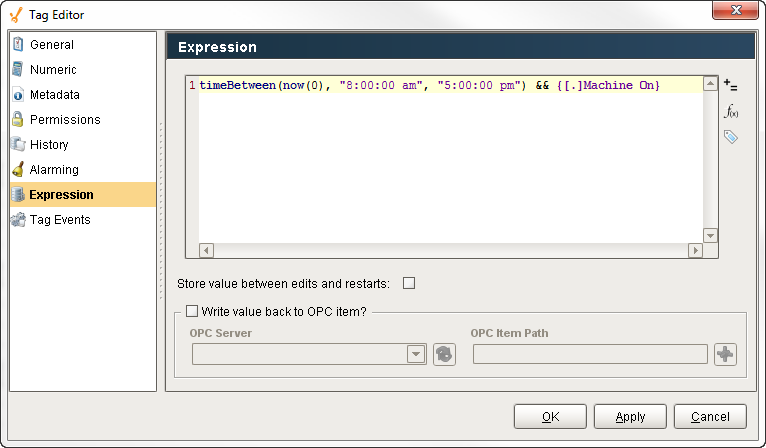
To Add a Driven Scan Class based on the Time of Day
Now that you have your Poll Time Tag created, add a Driven scan class that updates the Tags based on a time of day and when the machine is ON using the expression.
-
In the Tag Browser, click on the Timer icon (
) to open the Scan Class Editor. -
To create a new scan class, click on the green + icon on the lower-left of the window
-
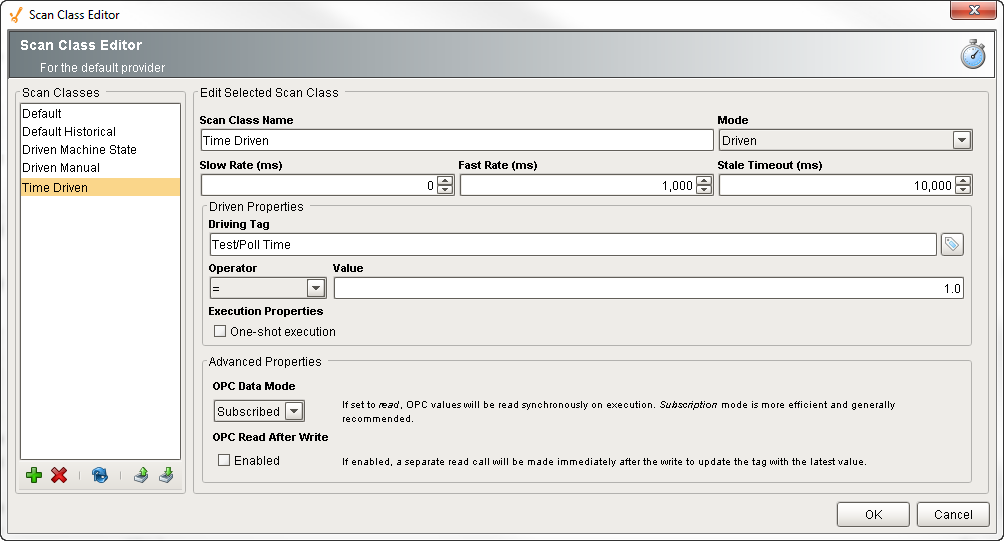
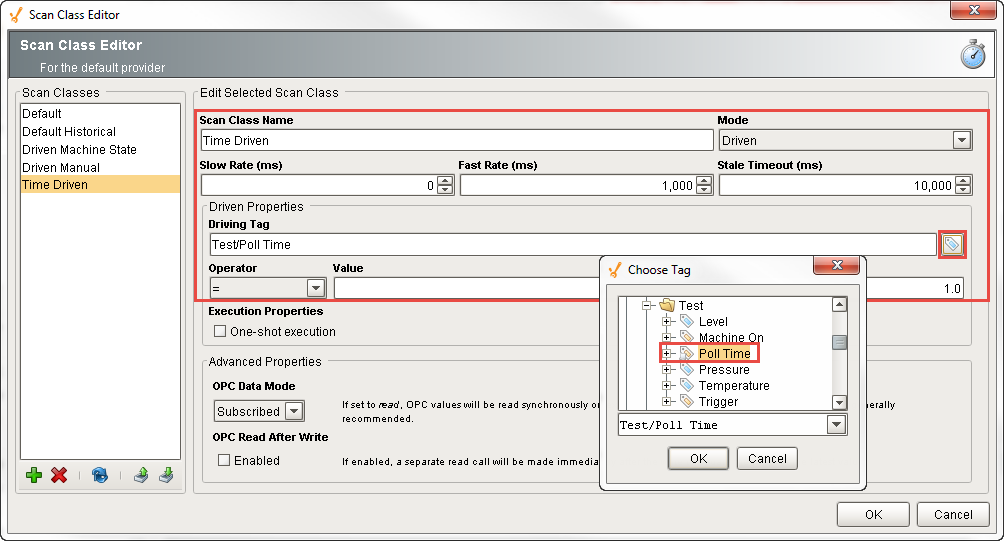
Enter the scan class name to Time Driven, and set the Mode to Driven. This scan class executes based on the condition of the Driving Tag.
-
Click on the Tag icon next to the Driving Tag box, and select the Tag you want to set the condition on, and click OK. This example uses the Poll Time Tag that was just created.
-
Set the Slow Rate to 0 so you don't poll the condition when it is false. Set the Fast Rate to 1000ms.
-
Set the Operator property to = and the Value property to 1.0. Click OK.
-
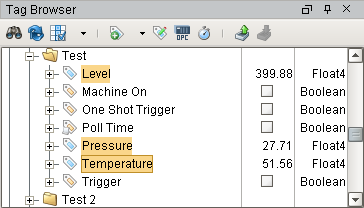
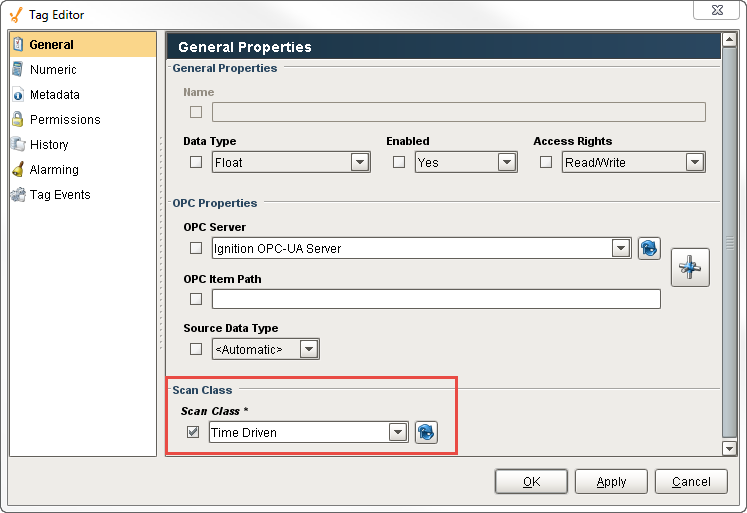
Next, select all the other Tags that you want to specify in the scan class (i.e., Level, Pressure and Temperature). Make sure you don't select the Machine On Tag since it is helping to drive the Scan Class. Right click on the selected Tags, and the Tag Editor will open. To change the scan class, choose Time Driven from the dropdown, and click OK.
-
In the Tag Browser you will see checkboxes next to the Poll Time and Machine On Tags. When the driving conditions are true, that is the time between hours of 8am and 5pm, and when the machine is ON, polling is at the Fast Rate of 1000 ms. When both conditions are false, polling is stopped, and the last known value is displayed.