Indirect Tag Binding
Binding Properties to a Dynamic Set of Tags
An indirect Tag binding is very much like a standard Tag binding, except that you may introduce any number of indirection parameters to build a Tag path dynamically in the runtime. These parameters are numbered starting at one, and denoted by braces, for example, {1}. The binding will be linked to the Tag represented by the Tag path after the indirection parameters have been replaced by the literal values they are bound to. An indirection parameter may represent a property on any component in the same window. Indirect Tag bindings can use bidirectional mode just like standard Tag bindings. Making bindings indirect is an important part of the binding system. Indirect Tag, Expression, and SQL Query bindings can all be made indirect. All this means is that what the binding is linking to can be changed based on the value of something else.
For example, instead of binding straight to a Tag's path, like
[TagProvider]MyPlant/EastArea/Valves/Valve4/FlowRate
You can use other properties to make that path indirect. Suppose the "area" and valve number that we were looking at was passed into our window via parameter passing. Then we might use those parameters in the Tag path, like this:
[TagProvider]MyPlant/{1}Area/Valves/Valve{2}/FlowRate
{1}=Root Container.AreaName
{2}=Root Container.ValveNumber
Now our binding will change which Tag it is pointing to based on the values of those Root Container properties.
Creating Indirect Tag Bindings
Indirect Tag bindings are an important part of Ignition and the binding system. This means that what the binding is bound to, can be changed based on the value of something else. For example, you can have a selection from a drop-down list to choose which Tags to look at on the screen.
We have four motor UDT Tags and a motor template. Let's create a single window with one drop-down list and one motor template. The drop-down list gives the option of which motor to look at. The motor Tags look like this:
Motors/Motor 1
Motors/Motor 2
Motors/Motor 3
Motors/Motor 4
The only difference between each motor is the number.
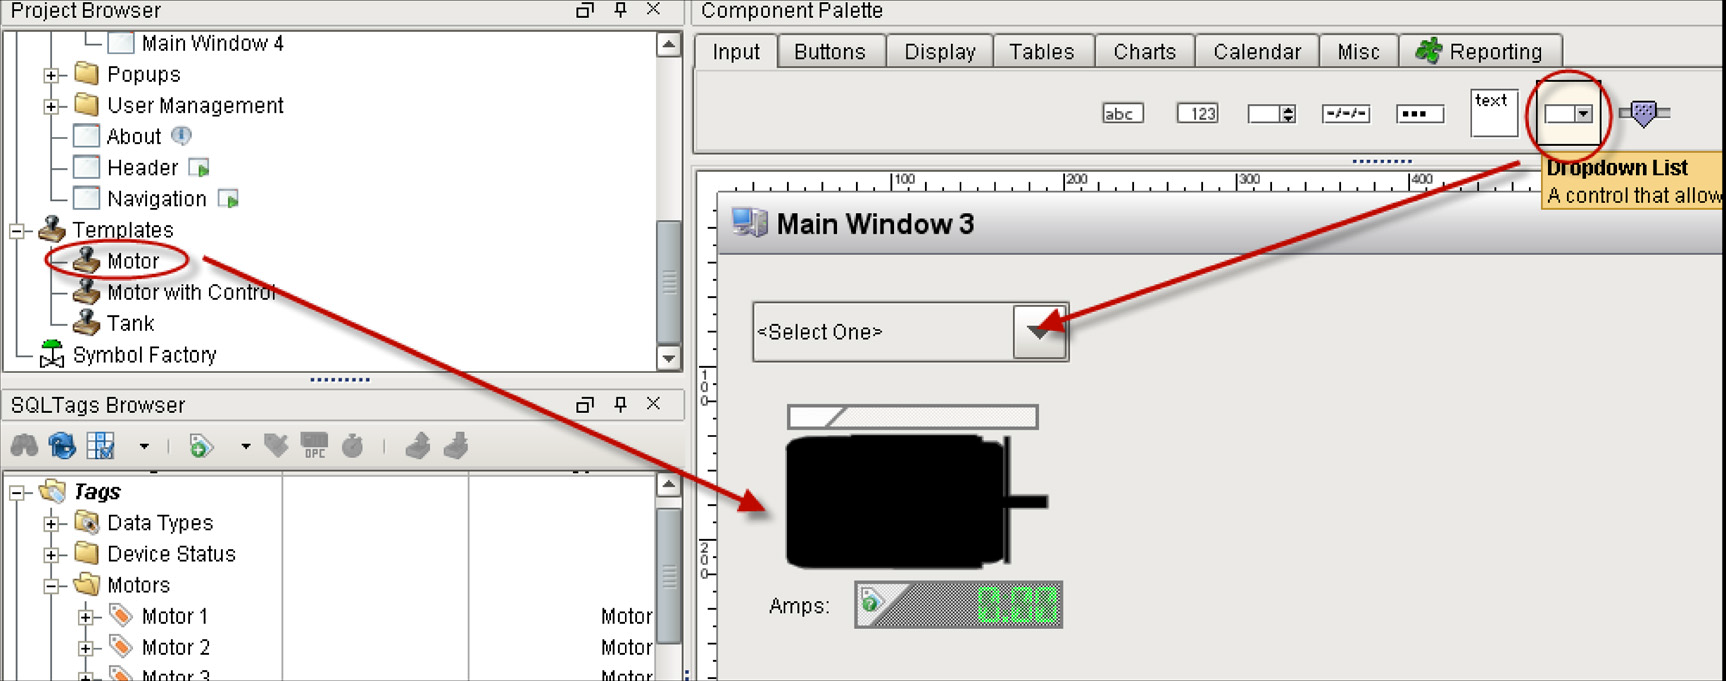
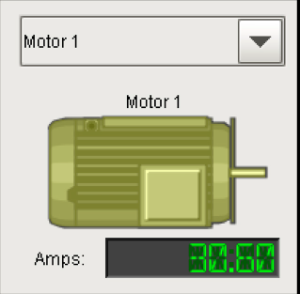
To Create a Window with a Drop-down list and a Motor Template
From the Project Browser, under Templates, drag in a template. In this example, it is a Motor template.
From the Input tab of the Component Palette, drag a Dropdown List component.
Now we need to setup the options for the drop-down list in the Property Editor. The drop-down component has the Data property which is a dataset. There are three ways to set up the dataset and the corresponding behavior is as follows:
Column Details Example Description One Column [String] Apples
Oranges
Bananas- Drop-down displays values from the first column.
- Selected Value is undefined.
- Selected String Value represents value from first column.
- Selected Label represents value from the first column.
Two Column [Integer, String](Default) 201 Apples
202 Oranges
203 Bananas- Drop-down displays values from second column.
- Selected Value represents value from first column.
- Selected String Value represents value from second column.
- Selected Label represents value from second column.
Two Column [String, String] APL Apples
ORN Oranges
BAN Bananas- Drop-down displays values from second column.
- Selected Value is undefined.
- Selected String Value represents value from first column.
- Selected Label represents value from second column.
Let's use the default mode which is the second option above. Two Columns [integer, string], to set up the options in the drop-down list.
Select the drop-down component and click the Dataset view icon next to the Data property.
On the right side of Dataset Viewer window, click the + green row icon four times to add 4 rows.
Set the rows to the following values:
Row Number Value 1 Motor 1 2 Motor 2 3 Motor 3 4 Motor 4 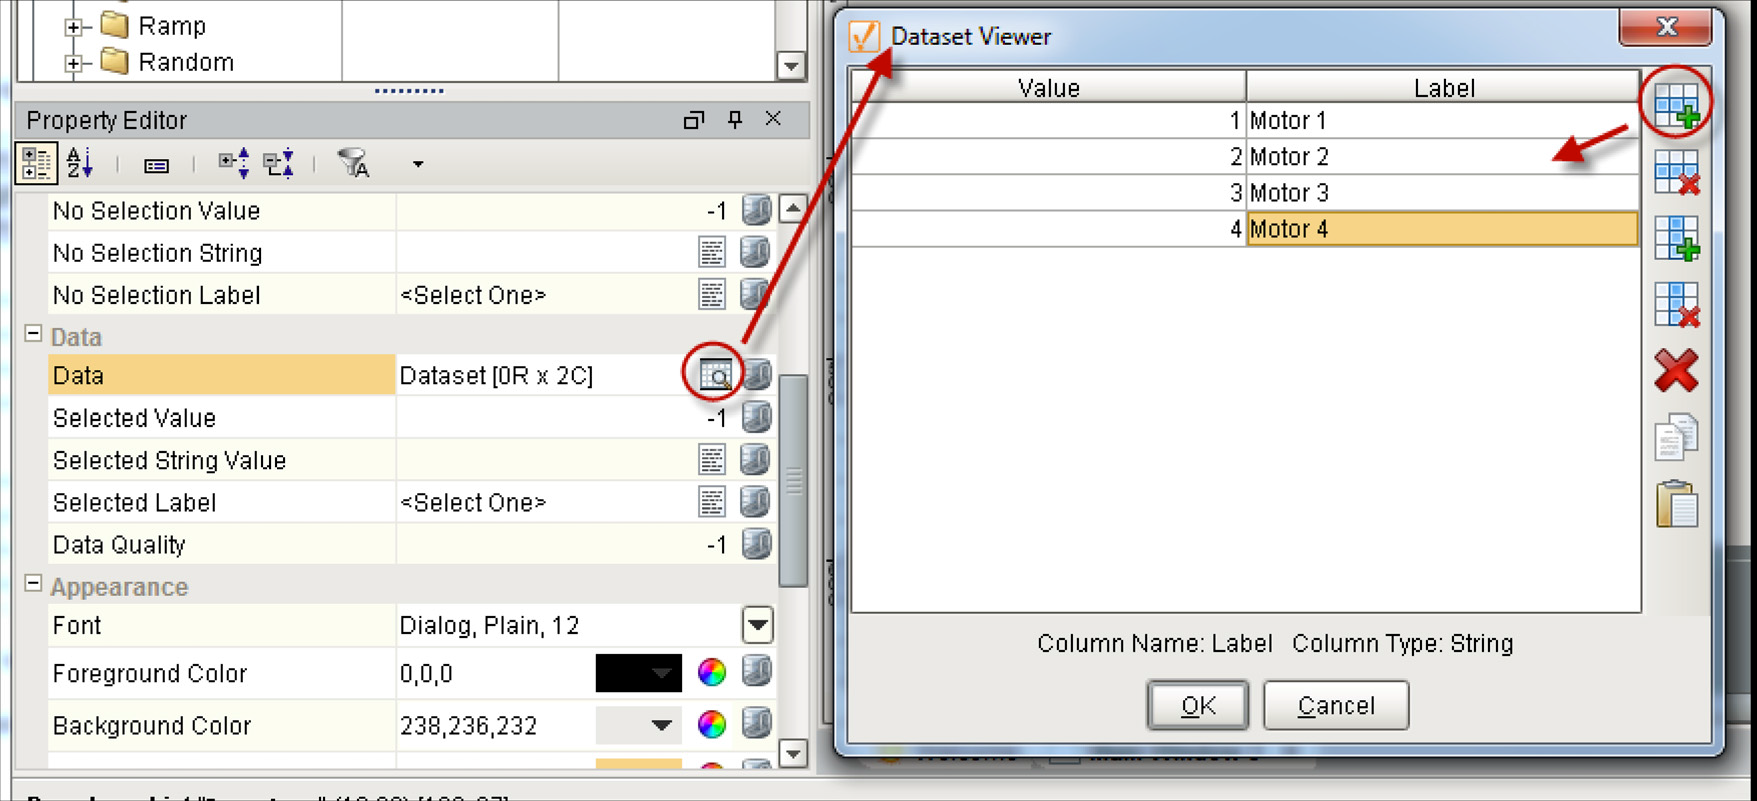
Click OK to save.
Set the Selected Value property to 1. Notice the values for Selected String Value and Selected Label fill in for you.

We want to use the Selected Value in an indirect binding on the template to dynamically select which motor to look at.
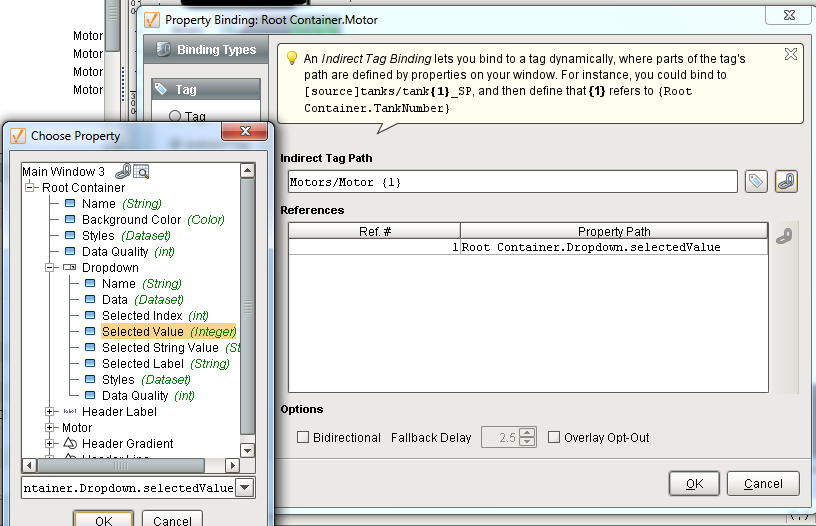
Select the Motor template on the window and bind the Motor UDT property to an Indirect Tag.
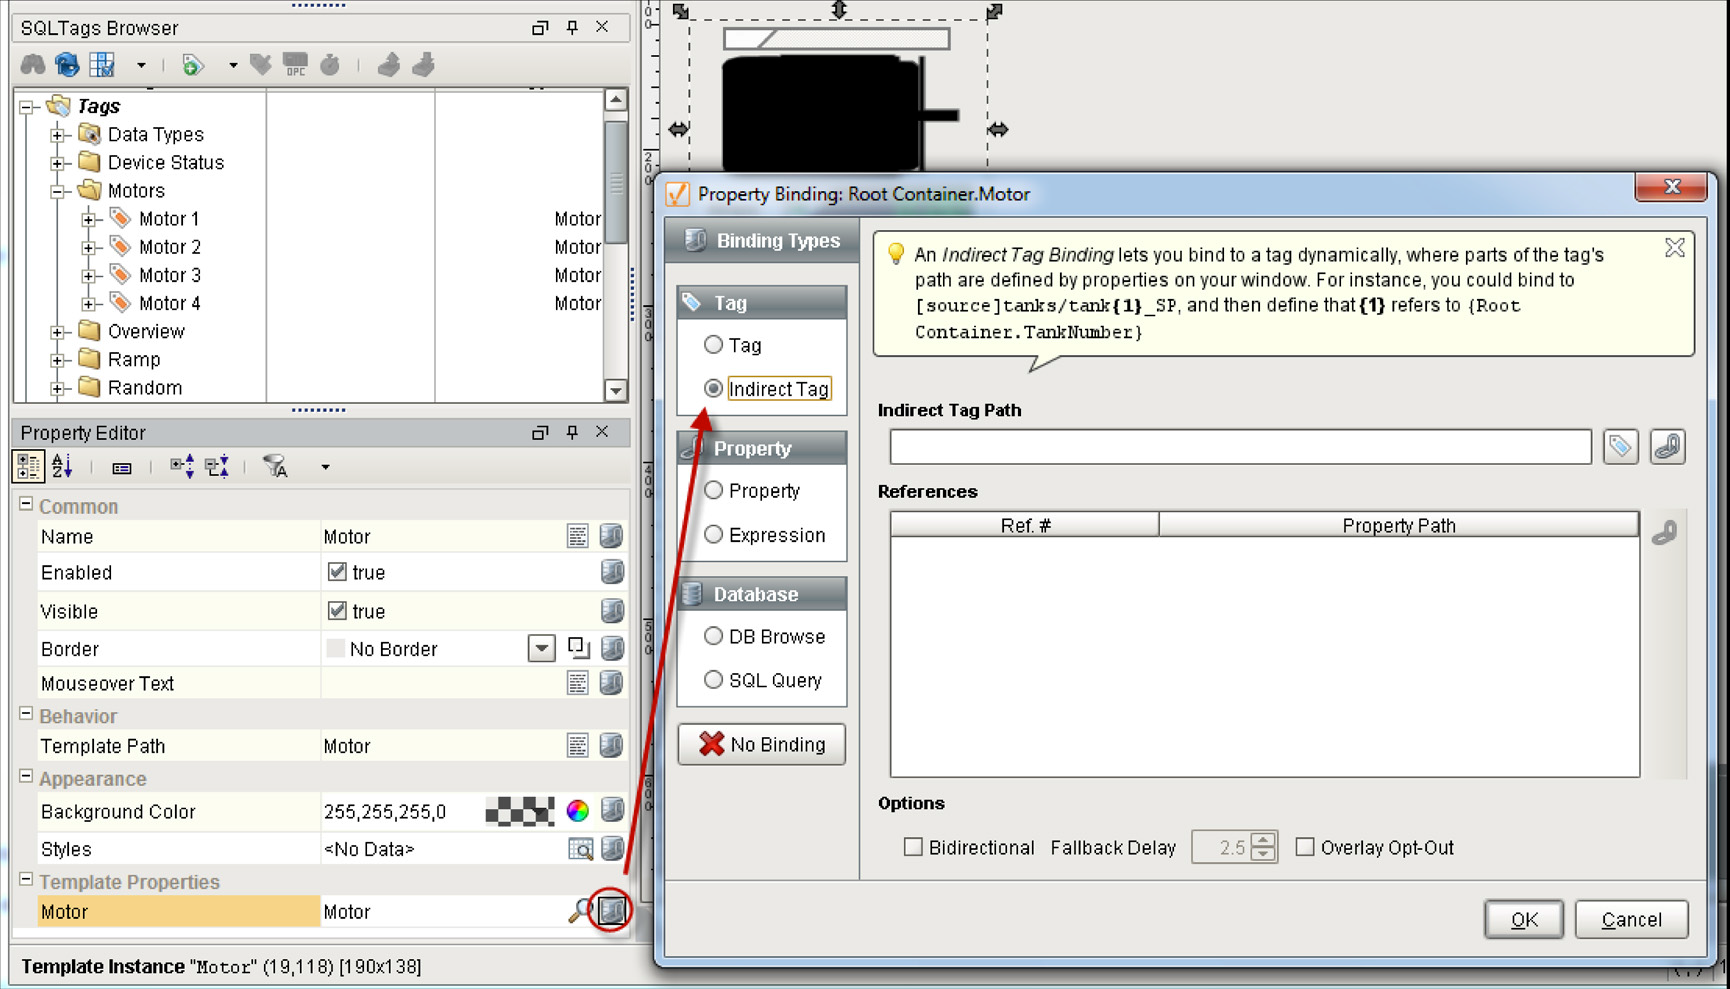
The easiest way to use the indirect Tag binding, is to select a Tag as a starting point and then make it dynamic.
Click the Tag button on the right of Indirect Tag Path and select the Motor 1 Tag as the reference.
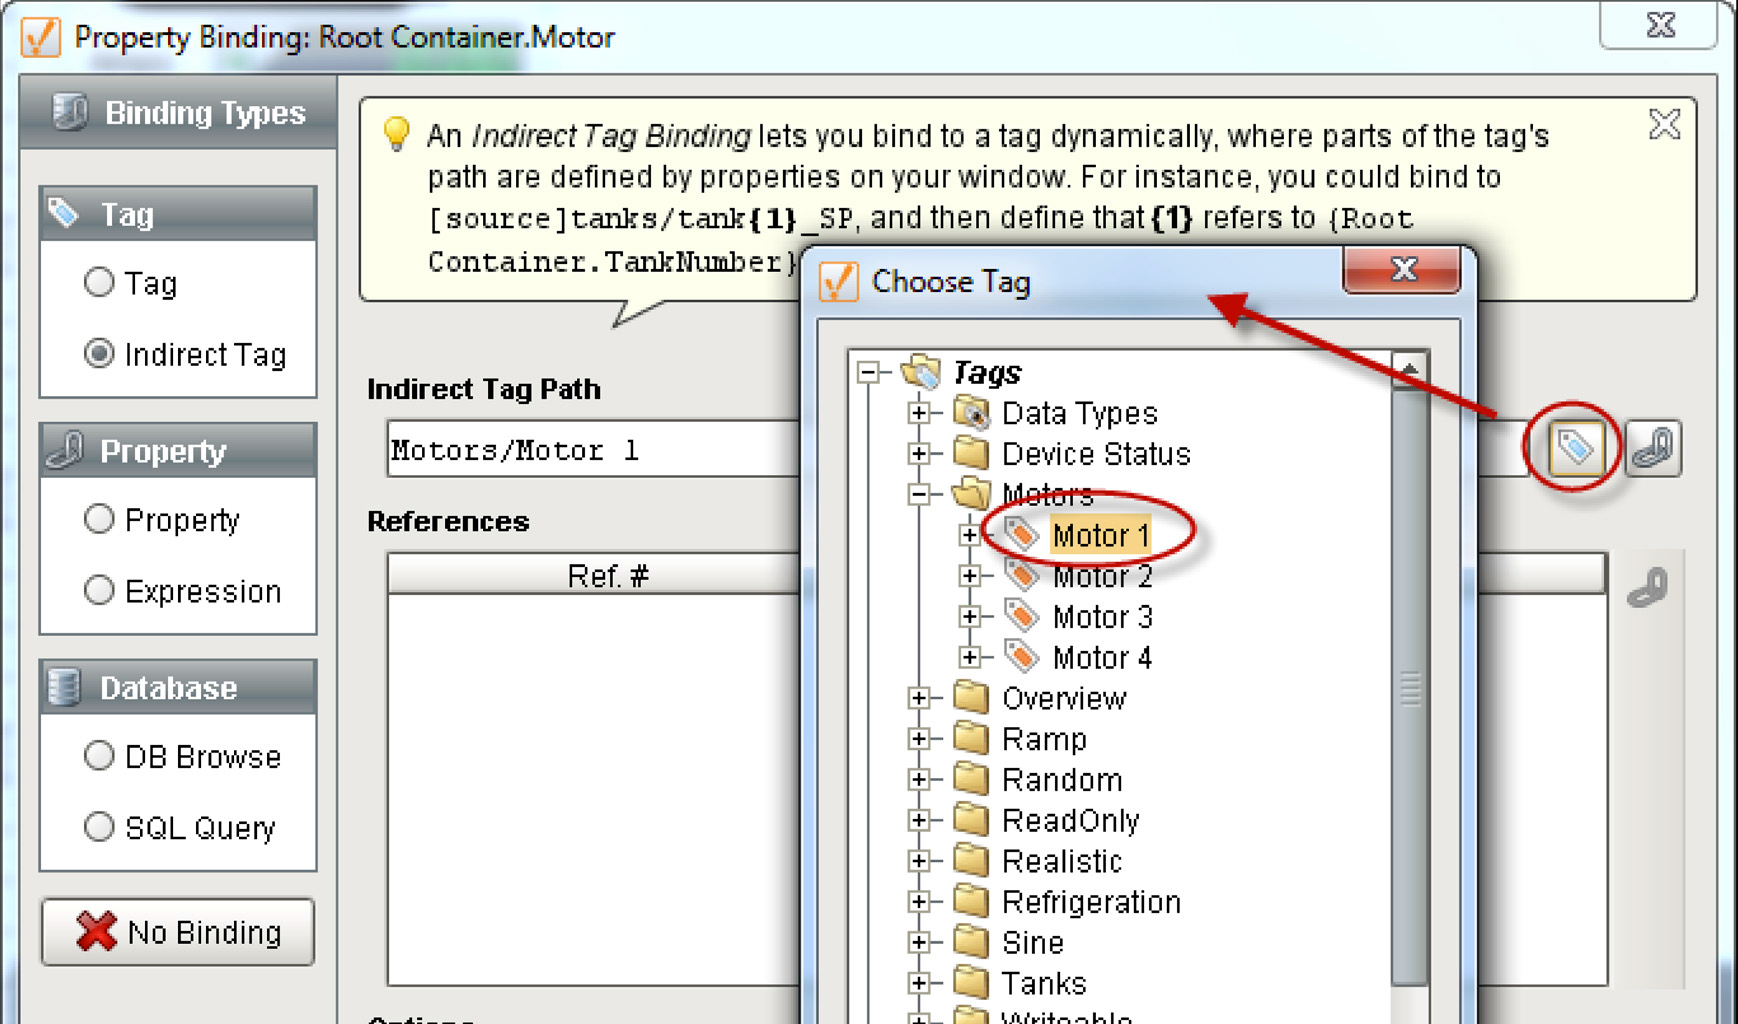
The drop-down list contains which motor number to look at. So we need to link the Motor Tag number to the drop-down’s selected value.
Highlight the number 1 (in Motors/Motor 1) in the Indirect Tag Path, then click on the link button to the right to bring in the drop-down's Selected Value property.
Ignition replaces the 1 with a {1} and links it to the drop-down. That means Ignition substitutes {1} with the value of the drop-down allowing it to select which motor Tag to look at.
Click OK. Now you can try it out.
Save your project and open the runtime. You can change the drop-down list and it will select a different motor.

It is as easy as that to setup Tag indirection. You can apply this method to popups or anywhere in Ignition.
See also: Parameterized Popup Windows