Alarms in UDTs
Configuring an Alarm on a UDT Member
When you configure the contents inside of a UDT definition, every instance of that UDT will automatically inherit that same configuration. This can be useful in cases where you need to create many tags, but don't want to manually create each tag one by one. The same concept works for alarms on a UDT. If an alarm is configured inside a UDT, every instance of that UDT will automatically have that same alarm configuration. Even if a new instance is created, it will automatically get that same alarm configuration.
Configuring an Alarm on a UDT
This example uses a Motor UDT. The Motor UDT contains two OPC tags: Amps and HOA. Let's configure an alarm on the Motor UDT when the Amps setpoint goes under 25.
-
In the Tag Browser, go to the UDT Definitions tab, and double-click on a UDT (i.e., Motor UDT) to edit the definition.

-
Double-click your tag (i.e., Amps), and scroll down to Alarms.
-
Click on the Edit
 icon next to your alarm to open the Alarm UI.
 -
Click on the Add
 icon to create a new alarm.
 -
Enter an Alarm Name, Display Path, Priority, Mode, and Setpoint. UDT configurations are set up the same way as the normal alarm configuration on a tag.
 Display Path
In this example, since you have multiple instances of a Motor, you need to make sure that the Display Path is unique for every instance. Otherwise, every instance of the UDT will have the same Display Path name, and the operator won't know which Motor alarm to respond to. There are a couple of ways to address this. You can leave the Display Path blank, in which case, Ignition will use the full Display Path to the instance of that tag, or you can bind a property to an expression involving a UDT parameter (i.e.,
Motor+{MotorNumber}). -
Click Apply to save your alarm edits.
-
Click OK to save your Motor UDT edits.
Now, all instances of the UDT will have a similar alarm setup, but each alarm can be unique to that UDT instance by changing the Below Setpoint value.
Dynamic Setpoints in UDTs
Instead of using a hardcoded setpoint, you can configure alarms with dynamic setpoints inside of a UDT definition. It is similar to configuring a UDT alarm, however, configuring a UDT alarm with a dynamic setpoint requires additional tags to serve as these setpoints in all the deployed UDTs.
Configuring Dynamic Setpoints Inside a UDT
In this example, we'll use the Motor UDT in the above section to create a Memory tag inside the UDT definition to serve as the setpoint.
-
In the Tag Browser, go to the UDT Definitions tab, and double-click on your UDT to edit the definition.
-
Click the Add Tag
 icon and select Memory Tag from the dropdown.
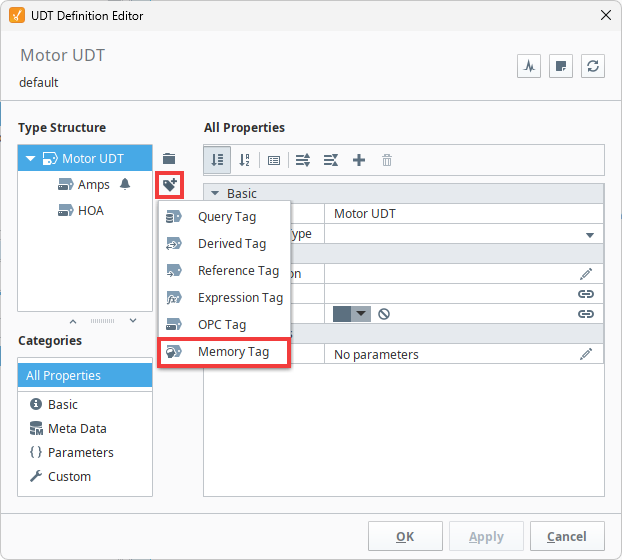
-
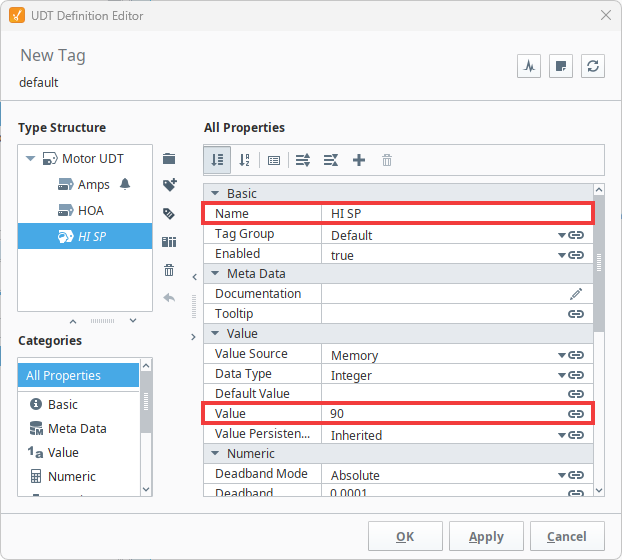
Enter the Name of the tag (HI SP) and a Value (90).
-
Click Apply to save your changes.
-
In the Type Structure area, select the tag you want to associate with the dynamic setpoint (i.e., Amps).
-
Under the Properties table, scroll down to Alarms. Click on the Edit
icon next to Alarms. -
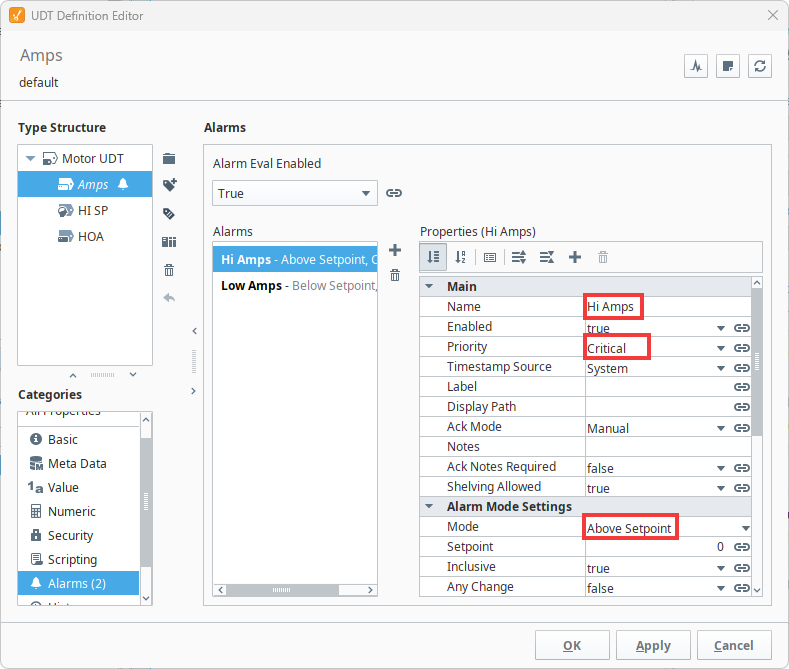
Click on the Add icon to create a new alarm for the high setpoint and name it Hi Amps.
-
Set the Priority as Critical and the Alarm Mode as Above Setpoint.
-
Click Apply to save your changes.
-
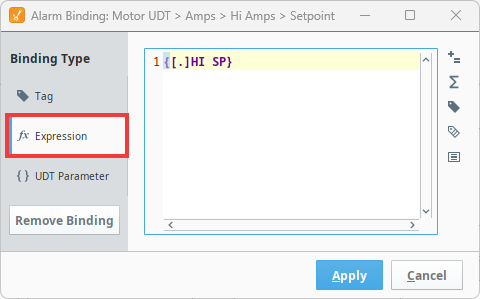
Bind the Setpoint property to the new UDT Memory tag (HI SP) by clicking on the binding
 icon.
icon.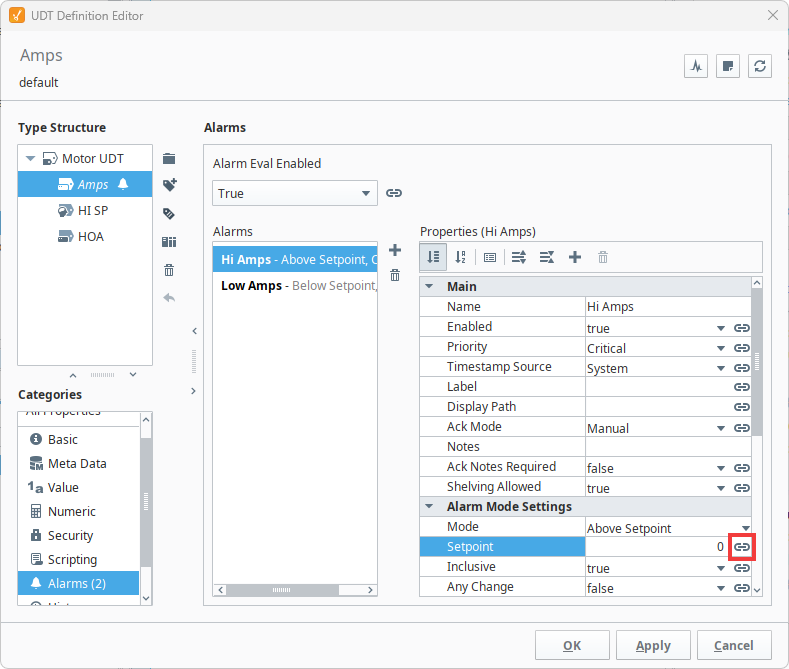
-
You can either create an Expression binding or use a Tag binding to select the HI SP Memory tag. This example uses an expression as shown in the image below.
-
Click Apply to save the expression.
-
Click Apply again to save your alarm edits.
-
Click OK to save all your UDT updates.
Now you're ready to create instances of your UDT. All of the UDT instances will now have Memory tags that serve as alarm setpoints. You can test it out by dragging an Alarm Status Table component into a window and locating your alarm.
Overriding UDT Alarm Properties
After creating your UDT instances, there may be situations where you want to change some alarm properties for your UDT members. This process is similar to overriding inherited tag properties.
Configuring an Alarm Setpoint Override
This example will use the HI SP Memory tag configured in the section above and assumes you have already created instances of your UDT. To learn more about creating UDT instances, see Creating an Instance.
-
In the Tag Browser, go to the Tags tab and double-click your UDT instance to edit it. In this example, we will edit Motor 1.

-
In the Type Structure area, select the tag you want to override the properties for. We will chose HI SP.
-
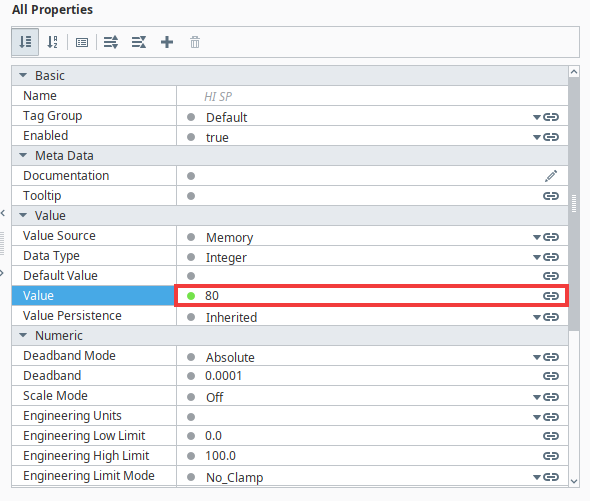
Go down to the Value property and change it to the desired value. We will change our Value to 80.
-
Note that the gray circle next to the Value property has turned green. This indicates that Ignition detects an overridden value for that property.
-
Once you finish configuring your properties, click Apply and then OK.
Our Motor 1 instance is now using a different high setpoint than our other Motor instances. You can also confirm that the the HI SP tag has an override because of the half-filled circle in the Tag Browser (![]() ).
).