UDT Multi-Instance Wizard
The multi-instance wizard provides a powerful, but simple mechanism for rapidly generating many instances of a UDT at the same time by specifying patterns for UDT parameters.
Value Patterns and Tag Names
Value Patterns
In order to define values for parameters (and the Tag names), you can use several different types of patterns (and combinations of patterns):
| Name | Value | Description |
|---|---|---|
| Range | number1-number2[/step] | A numeric range of values, such as 1-10. Optionally, a step parameter can be included, in order to only generate numbers at certain multiples. For example, 0-100/10 would generate 0,10,20, and so on. |
| Repeat | value\*count | A value (numerical or string), and the number of times to use it. For example, North Area\*10 would use the parameter North Area for 10 items. |
| List | value1, value2, value3 | A comma separated list of values (or other patterns) to use. |
Examples:
| 1-10,20-30,30-40 | Results in 30 Tags being created, with the specified value ranges (so, for example, there would be no parameter 15). |
| A,B,C | Results in 3 Tags, with each of the values. |
| 0-100/5 | Results in 21 Tags (because range is inclusive), with values 0, 5, 10...100. |
As mentioned, the size of the pattern will dictate how many Tags will be created. If some patterns are smaller than others, the last value will be repeated for the other Tags.
Tag Names
The names of the generated instances can be specified using a system similar to that of the parameter patterns. If you just want to use sequential names, you don't need to specify a pattern, as values will be generated automatically starting at one. You can also set the pattern to simply be the starting number to generate sequential names from there.
Base Name
A string base for the Tag name. This can also be a list of names, in which case the names will be used directly, and the name pattern won't be used.
Name Pattern
A pattern that will be used to generate values that will be appended to the base name.
At any time, you can use the Preview button to view the Tag names and parameters that will be created. Once you are satisfied, click OK to generate the Tags under the selected folder in the Tag provider.
How to Make New Instances of a UDT
Now that we have the Motor UDT (see Creating User Defined Types - UDTs) we can make instances of it. Instances are running copies of a data type with concrete data for all members.
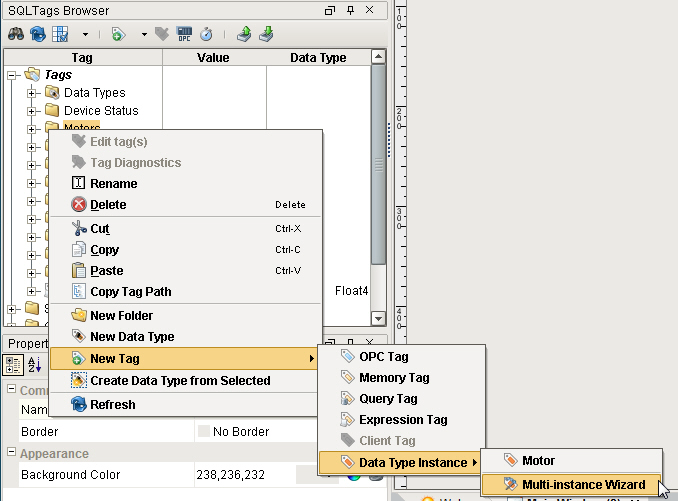
In the Tags Browser, right-click on Tags and select New Folder to create a new folder called Motors.
You can create a single instance of the motor or use the Multi-Instance Wizard to rapidly create all four at the same time. In this example, we will use the Multi-Instance Wizard.Right-click on the Motors folder, and select New Tag > Data Type Instance > Multi-Instance Wizard.
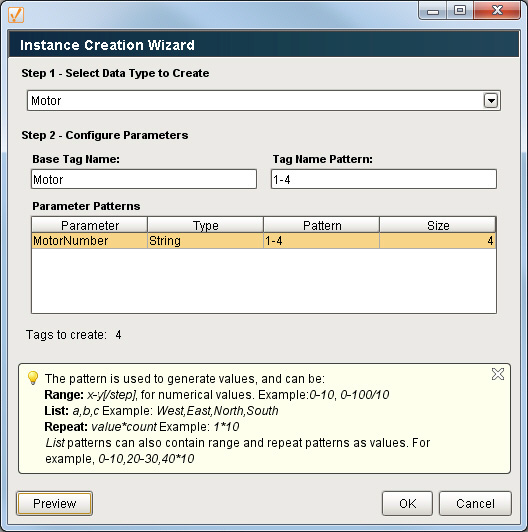
The Instance Creation Wizard is displayed. From the Step 1 - Select Data Type to Create, select Motor from the dropdown list.
Configure the following parameters:
- Base Tag Name: Motor
- Tag Name Pattern: 1-4 (This creates four Tags: Motor 1, Motor 2, Motor 3, Motor 4.)
- Parameter: MotorNumber (This is used to reference specific Tags in the PLC.)
- Pattern: 1-4 (This assign Motor 1 Tag a parameter of 1, Motor 2 a parameter of 2, and so on.)
Click Preview to see how Ignition creates the Tag name and the Parameter Value.
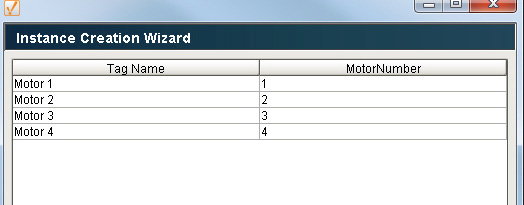
Click the Back button to exit the Preview screen to go back to the Instance Creation Wizard screen.
Click OK to create your instances. Now, expand all your Motor Tags to see if all the members of the UDT were created and are running.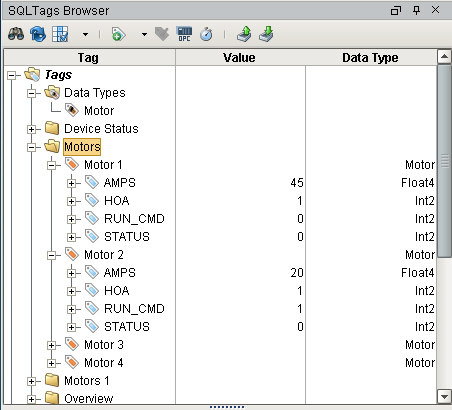
How to Edit an Existing UDT
If you make a change to a UDT, all your instances will automatically get updated because they are all of the same UDT type.
To make a change to your Motor UDT, go to the Tag Browser and double click on Motor. This example adds a new Memory Tag.
The Tag Editor will open. Click on the green + button on the top-left of window, and select New Memory Tag.
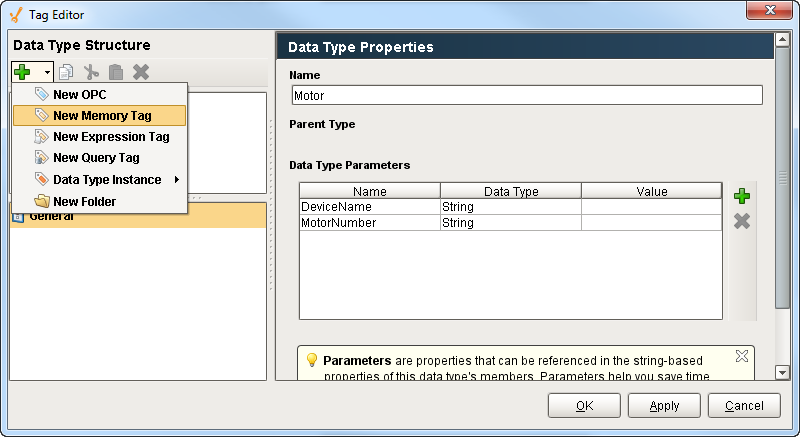
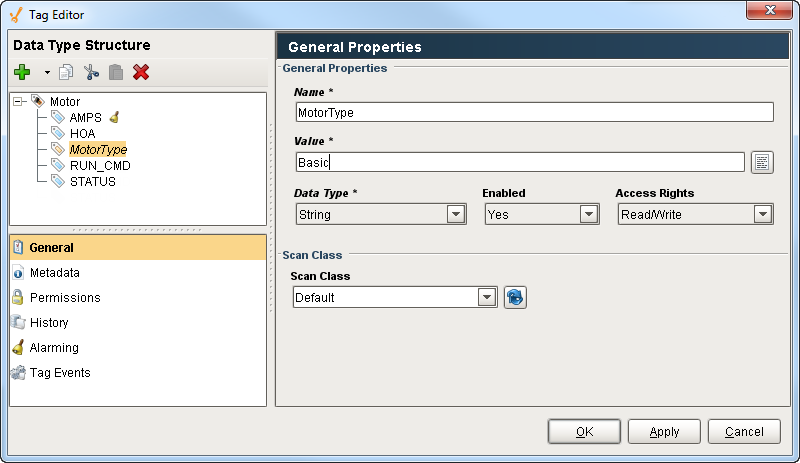
Configure the following properties:
- Name: MotorType
- Data Type: String
- Value: Basic
Click OK.
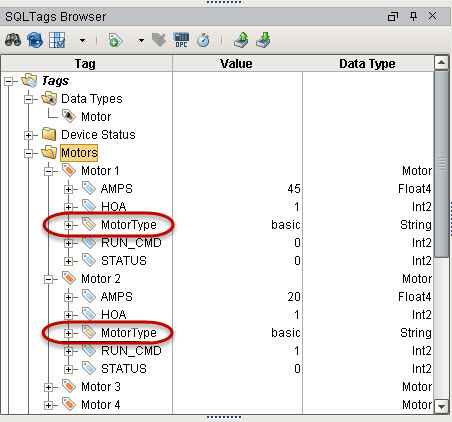
- Now, each instance automatically gets the new Memory Tag. Expand each of your Motor Tags to see the new MotorType.
You can make rapid work of making changes to instances using a UDT.