Saving and Publishing Projects
Once you created the windows, Tags, templates, and anything else that goes into your client, you need to save and publish the work. Saving your progress means pushing the changes from your Designer into the Gateway. Publishing the changes means telling all of the clients that they can use the new updates to your project. By default, these two items are linked, but that can be changed so they happen independently. If they are not linked, it's possible to publish individual resources on a project as they are finished instead of publishing the entire project. This is particularly helpful if you want to get resource updates to users quickly, or parts of a project into production sooner rather than waiting for the entire project to be completed.
In the Project Properties of the Designer, there are two Publish Modes to choose from:
- Auto - saving performs both a save and a publish of the entire project. This is the simplest way to push your changes, and is the default setting.
- Manual - splits the save and publish commands into two operations. Save will take any changes you have made and push them to the Gateway, and Publish will push any saved changes out to the Clients. Additionally, Manual mode gives you the option to select certain resources and perform a publish on just those.
You also have options on how to perform Client updates. You can choose between notifying the operator of an available update, or automatically pushing updates as soon as it is published making it transparent to the operator. This page assumes you are using the default Notify mode, see Client Update Modes for more information.
Auto Publish Mode
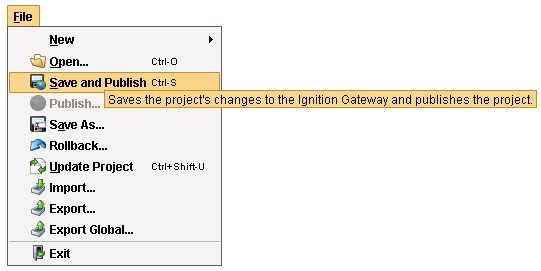
Publishing in Auto Mode allows you to save and publish an entire project with one button press. You'll notice that the Save and Publish option (under File) is available when the Publish Mode is set to Auto. By default, the Publish Mode is set to Auto.
Publishing in a Project in Auto Mode
Let's publish an entire project using Auto Mode.
-
Open your Designer and a client. If you don't have a project already, create a new project when opening the Designer, then open a client of it.
-
In Designer, open one of the windows (or create a new one) and make a few edits. You can drag components onto the window for obvious changes. When you're ready to publish your project, go to the menubar, and select File > Save and Publish. Unlike Manual Mode, Auto lets you Save and Publish using one command.
- Now go to your opened client and you'll see the Update bar at the top of the screen. Click it to pull the new changes into the client. Depending on your changes, it may not show the additions automatically. You may have to logout and log back in again.

- That's all there is to it! Depending on how Clients are setup to receive project updates, operators can either be notified that a project update is available and install it themselves, or an update can be pushed/installed automatically which is transparent to the operator. Client updates are described later in this section.
Manual Publish Mode
Publishing in Manual Mode allows you to publish individual global and project resources. It’s important to note that the Publish option (under File) is only available when the Publish Mode is set to Manual. If it is set to Auto, you will not be able to publish your project resources individually.
To Set the Publish Mode to Manual
-
In Designer, go to Project > Properties, and select Project > General.
-
Set the Publish Mode to Manual, and press OK.

Publishing a Project in Manual Mode
Let's manually publish several individual resources.
-
Open your Designer and a Client. If you don't have a project already, create a new project when opening the Designer, then open a client of it.
-
In the Designer, open a window and make a few edits to it. Before you can publish your selected resources, you must Save your project. Go to the menubar, select File > Save.
Note: Closing a window (and selecting commit changes) is not the same as saving the project. You must save the project before you can publish your changes. -
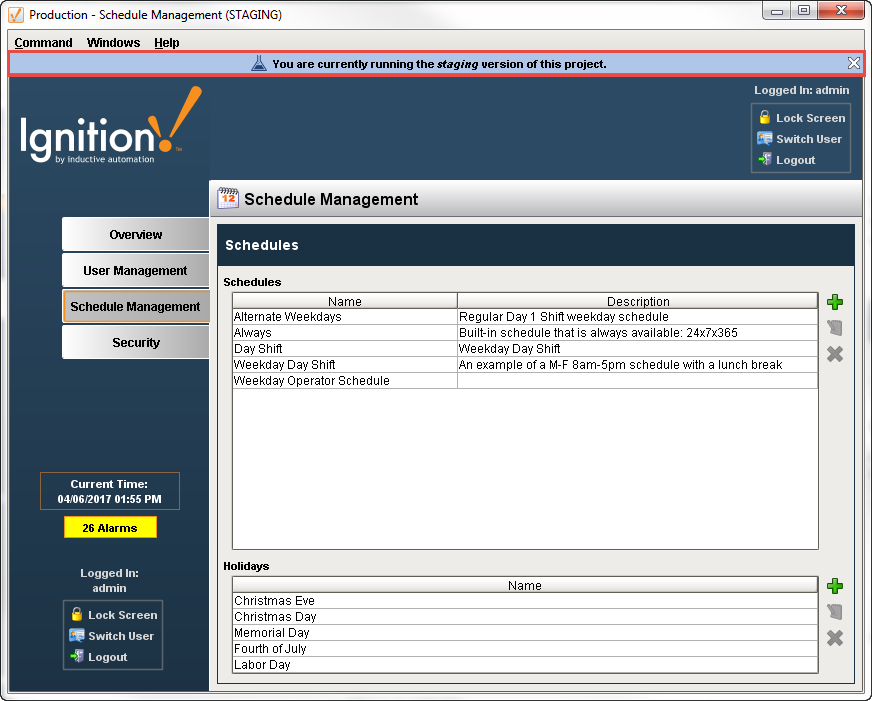
At this point, we have saved but unpublished resources. If you would like to see and test these changes before publishing them, you can open a staged Client from the Designer. Go to the menubar and select Tools > Launch Project > Windowed (Staging). This will give you a Client with a blue banner at the top showing that you are running a Staging Client instead of a normal Client.
-
Now that you have saved but unpublished resources, we can publish them. Go to the menubar and select File > Publish.
-
The Publish Selected Resources window will open. By default, Ignition will select all the resources, both Global and Project Resources, that were saved since the last time any items were published. If you see any resources that are grayed out, it means that those items were committed but not saved. If you want to publish the grayed out items, close the Publish Selected Resources window, save your project, and then go back to the menubar, and select File > Publish.

- If there are any resources you don't want to publish, unselect those resources. When you're ready, click Publish.

- Now go to your standard Client (not Staging) and you'll see the yellow bar at the top showing there is an update. Click it to pull the new published resources from the Gateway.
Your Staging Client will not receive an update when you Publish.