Tree View Example
The Tree View component displays and organizes data in a dataset in a tree hierarchy. The Tree View component is found under the Tables tab of the component palette.
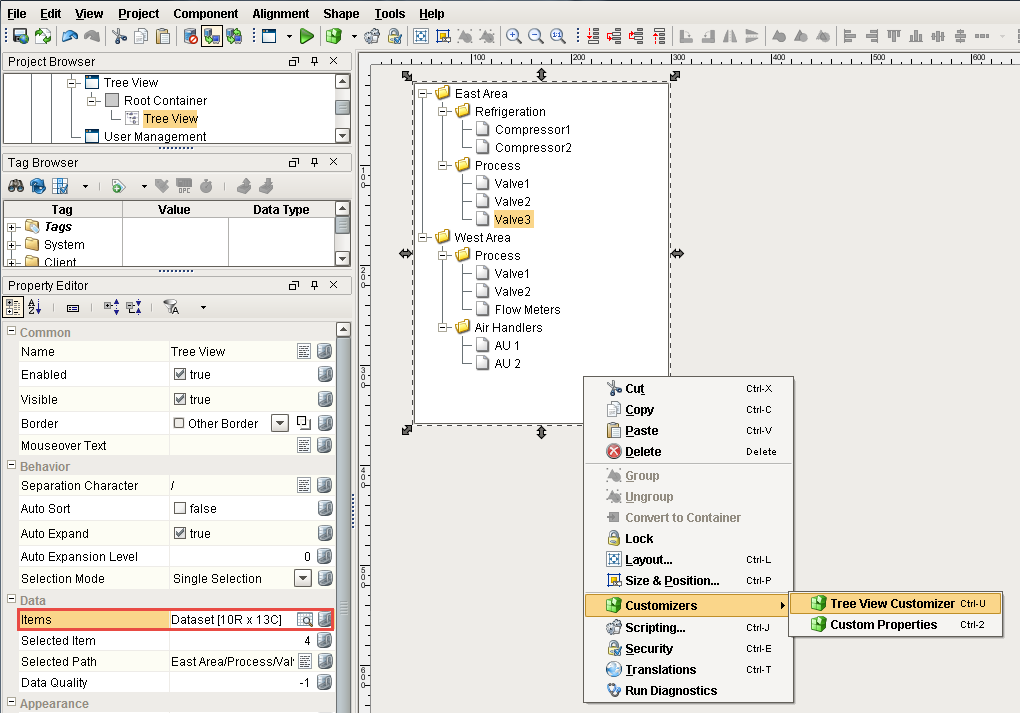
Drag the Tree View component on to your window. In Preview Mode, expand the folders to see the data. The Tree View component can be used for navigation in Ignition.
In fact, Ignition has a built in skeleton project called Multi-tier Navigation that uses the Tree View component specifically for that purpose. There is one difference between the Multi-tier Navigation and the Tree View component. The Multi-tier Navigation has one extra column in the Dataset Viewer called windowPath that does not show up in the Tree View Customizer. You will need to open the Dataset Viewer to modify it.
To configure the Tree View component, go to the Data property called Items next to the Dataset Viewer. This contains all the items in the tree. Right-click on the Tree View component and scroll down to Customizers > Tree View Customizers to configure these items.
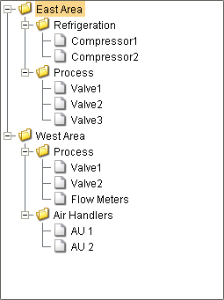
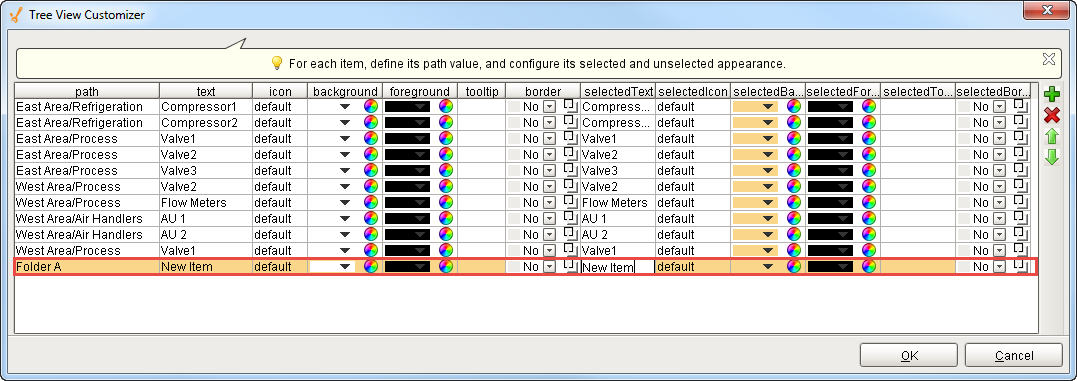
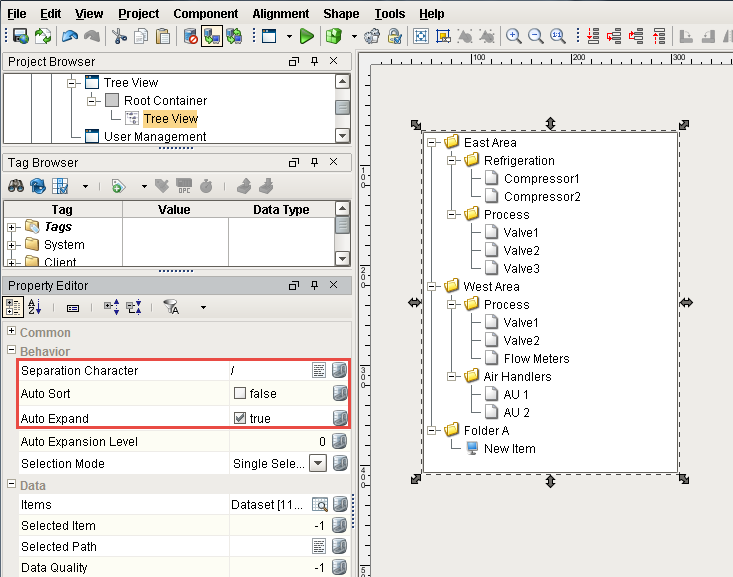
You can add one or more rows of data in the Tree View Customizer. Every row must have a path and text to display. In the example below, look at the first and second rows. The path is East Area/Refrigeration. This path denotes which folder to put an item inside of. The path is separated by a ‘/’ which is a Separation Character by default, and shows that there is an East Area inside a Refrigeration folder containing 2 items called Compressor 1 and Compressor 2. You will notice in the Tree View Customizer that you have other columns you can customize based on how you want particular items to look.

In the following example, you can add another row after the last item in the Tree View Customizer window and set the path to Folder A. For this example, enter the name of your item as ‘New Item’ in the text field.You can also set an icon, the foreground, a tooltip, border, when the item is selected and when it’s not selected if you desire Make sure the name of the item is the same for the text and selectedText fields. You can add one or more rows and move them up and down.
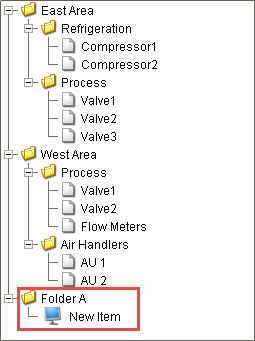
When you press OK, your new row will be saved in the dataset and you can see it on the Tree View. If you expand Folder A, you will see the ‘New Item’ with the icon that you specified.
The Tree View component has a couple of other properties that are important like the Separation Character which we are using in our path name. By using the Separation Character or ‘/’, the path is broken up into folders.
There is a property called Auto Sort that automatically sorts all the items in the tree into alphabetical order. If you uncheck Auto Sort, it will be sorted by the order of the dataset as shown in the example below.
There is another property called Auto Expand. If set to True, the folders will all automatically be expanded. If your Tree View is not expanded, right click to close the window, and by opening it again you will see that all the folders are now expanded in the Tree View.
Now, the dataset has all items shown in the tree view. You can bind this to a SQL query to bring back data from the database in order to organize this data into the tree.
