Agent Task - Backup and Restore
The Backup and Restore tasks are an extremely important part of the Enterprise Administration Module. Performing a Collect Backup is required if you want to do an Agent recovery.
The Gateway Tasks discussed in this section are the Collect Backup, Restore Backup, Install Modules and Restart Agent.
Collect Backup
Collect Backup is a Gateway Task that performs a Gateway backup on the selected Agent's machine. Additionally, this task will archive copies of the Agent's modules. This modules may be used in the Install Modules task.
Transfer timeout is configurable using the system property ignition.eam.task.collectBackup.transferTimeout.
-
On the Controller, navigate to Configure > Enterprise Administration > Agent Tasks, and click on the blue link, Create new Gateway Task at the bottom of the page.
-
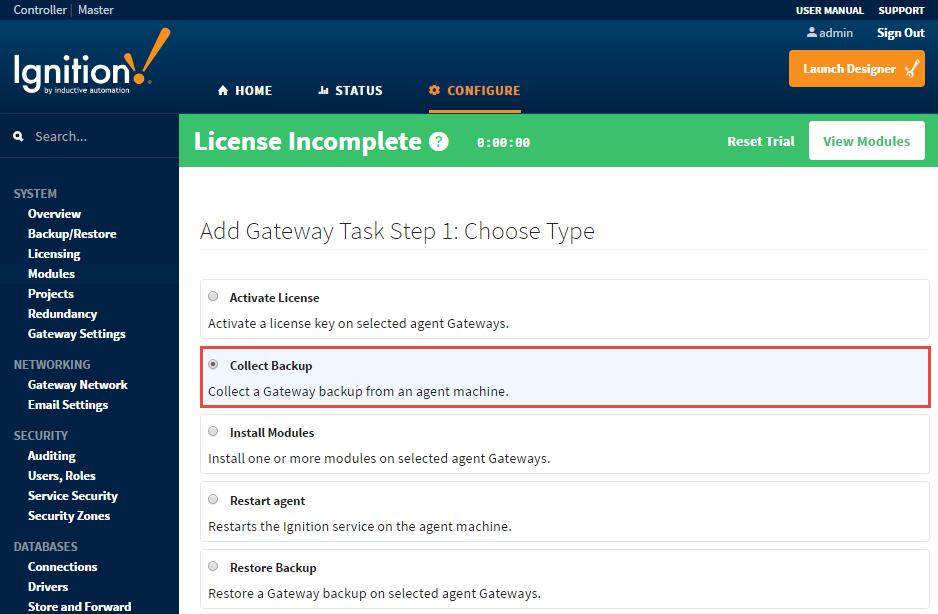
Collect Backup is one of the several Gateway tasks you can perform. Select Collect Backup, and press Next. The EAM Task Wizard will walk you through each step of the Collect Backup process.
-
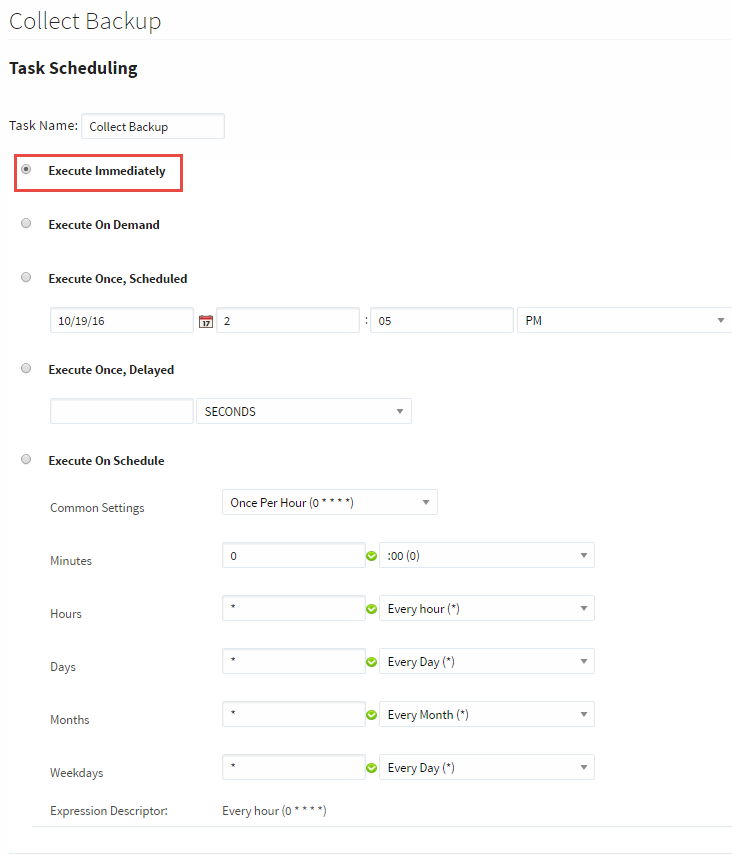
There are several different task scheduling options available. For this Collect Backup example, choose to Execute Immediately, and press Next. If you need more information on other scheduling options, refer to Task Scheduling.
-
Select the Agent you want to perform the Collect Backup on, and press Next.

-
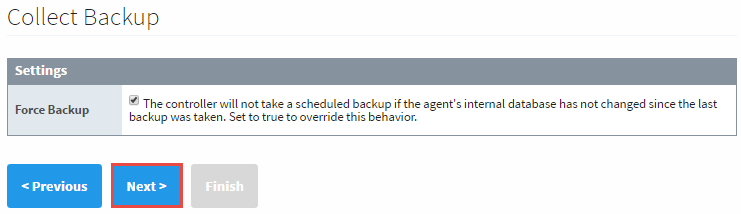
The EAM Task Wizard will prompt you if you want to do a Force Backup even if nothing changed since the last backup. This step is optional, but it is useful when your backups are performed on a regular schedule. It captures the changes between the time the last backup was performed and the unscheduled backup. To be safe, check the Force Backup box, and press Next.
-
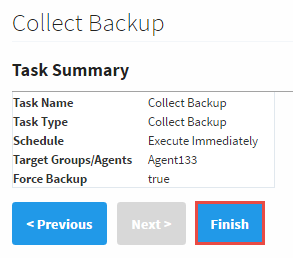
Review the Collect Backup Task Summary information, and press Finish.
-
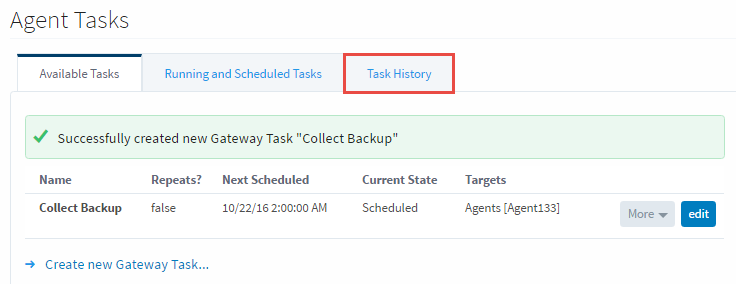
Once the Collect Backup task is complete, a successful message will be displayed. You can even check the Task History which will provide a list of all previously run tasks.
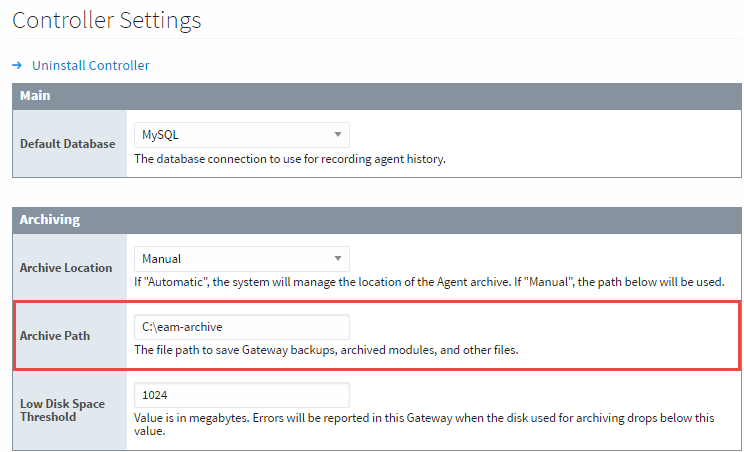
Your new Gateway backup will be stored wherever your Controller settings are pointing to when the Controller was initially created. To check, go to the Controller, and navigate to Configure > Enterprise Administration > Controller Settings. You can have your Archive Path set to Automatic or Manual. If you have it set to Automatic, you can find your backups inside the directory for Ignition, otherwise, it will be the folder location that is specified in the Controller Settings. To learn more about controller settings, refer to Creating a Controller.
Restore Backup
Now, let’s restore a Gateway backup on the selected Agent.
When restoring from a backup using this task, the newly restored agent will retain it's previous name.
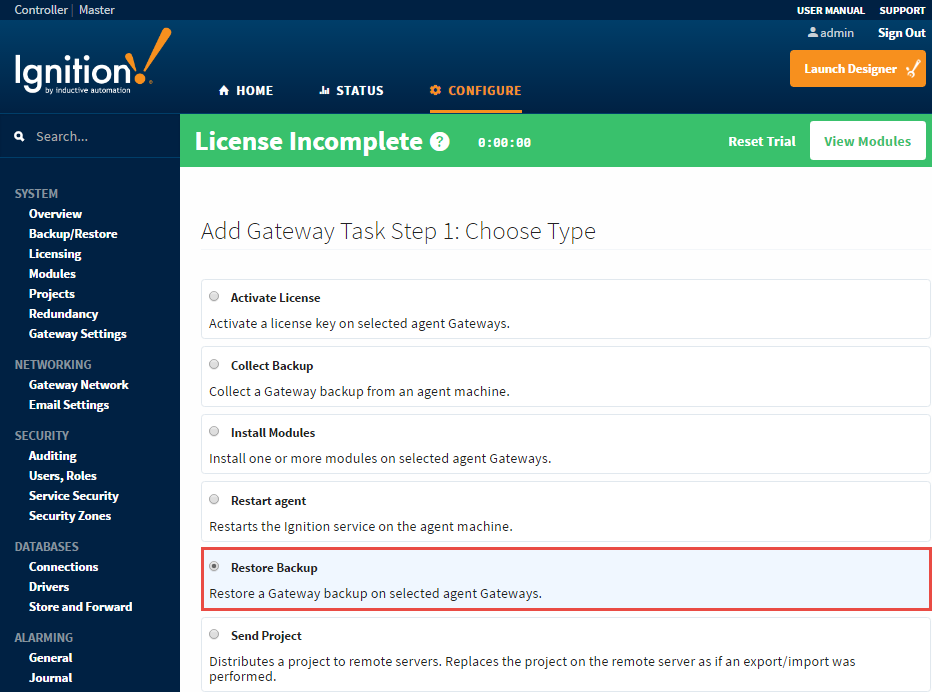
- On the Controller, navigate to Configure > Enterprise Administration > Agent Tasks, and click on the Create new Gateway Task link. Select the Restore Backup, and press Next.
Some screenshots will not be duplicated. You can refer to the screenshots in the Collect Backup section as you work your way through each topic.
-
Schedule the Restore Backup task from any of the listed scheduling options. This example uses Execute Immediately, and press Next.
-
Select the Agent, and press Next.
-
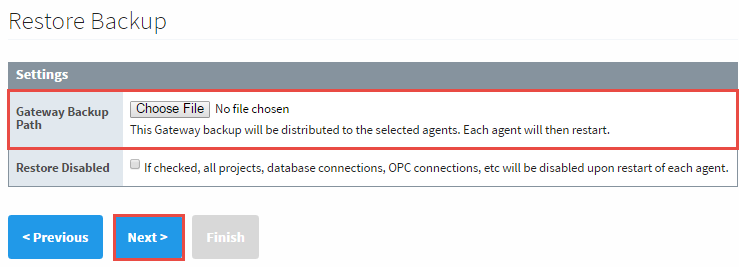
If your Archive Path was set to Manual when you created your Controller, you will have to select the Choose File button, and navigate to the folder on your computer to locate the Gateway Backup file. If you are unsure about your Archive Path, refer to your Controller Settings.
-
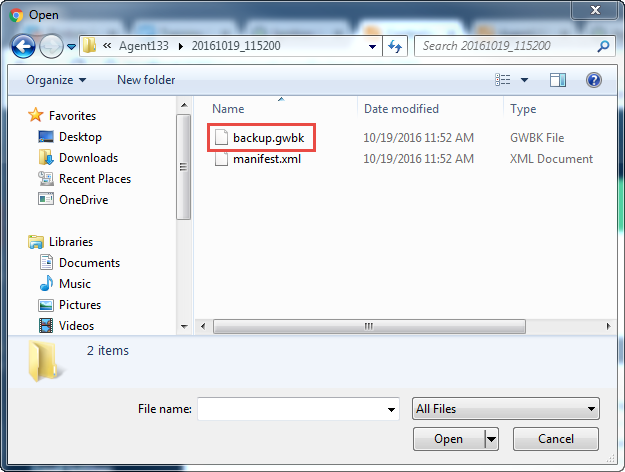
Navigate to the folder on your computer to locate the Gateway Backup file. Select the backup.gwbk, and click Open. Press Next on the Restore Backup task.
-
Review the Restore Backup Task Summary, and press Finish. Once the Restore Backup task completes, you will receive a successful message from the Gateway Task.
-
Now go to your Agent, and click Home. It takes a few moments to bring up the Gateway. You will see a progress bar while the Gateway is starting up. Once it’s complete, you will see all your projects uploaded and ready to go.
The following feature is new in Ignition version 7.9.13 Click here to check out the other new features
Restoring an Agent Backup with the Option to Install Modules
You can also restore a Gateway backup on a selected Agent with the option to install modules, giving you the opportunity to install modules while, at the same time, restoring from an Agent backup.
Restoring an Agent backup with the option to install modules works where the Controller and the Agent(s) are on versions 7.9.13 or newer. This functionality is not backward compatible.
-
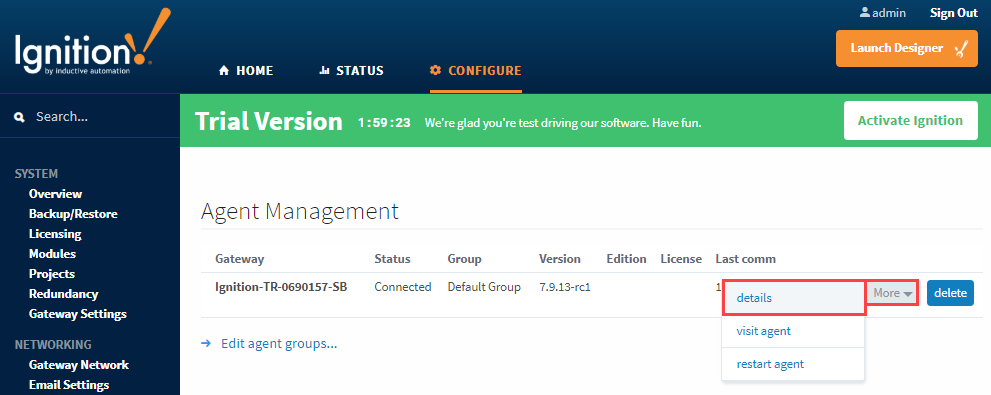
From the Controller, go to Configure > Enterprise Administration > Agent Management. You'll see a list of all your Agents and their status.
-
Click the More button and select details for the Agent that you want to restore the backup for.
-
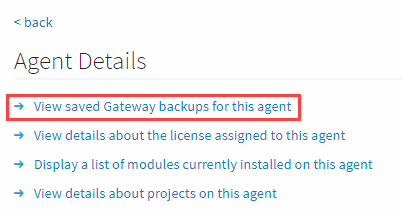
This opens the Agent Details screen with a list of options for the selected Agent. Click the link for the View saved Gateway backups for this agent.
-
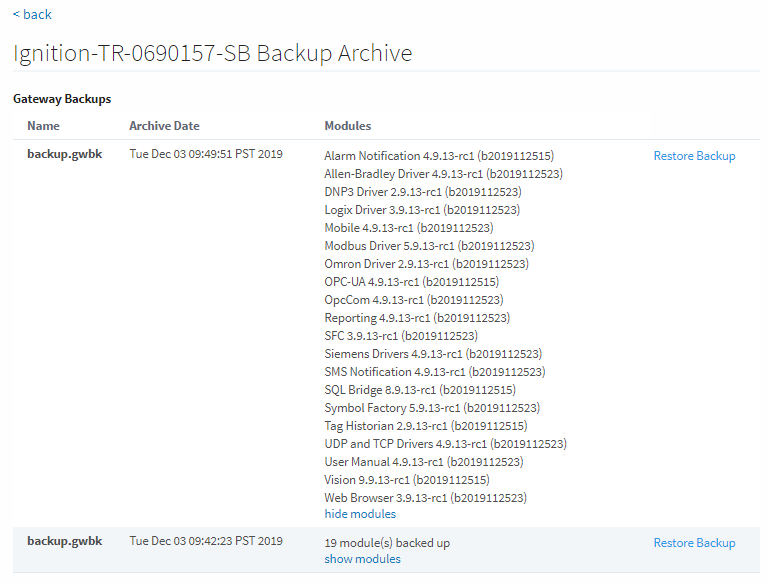
Here you'll see a list of Gateway Backups for the selected Agent. Under the Modules column, you'll see the number of modules included in each backup. Click the show modules link to see all the modules that are included in the Agent backup, then click hide modules to close the module list.
-
To restore the Agent backup, click the Restore Backup link to the right of the Module column.
-
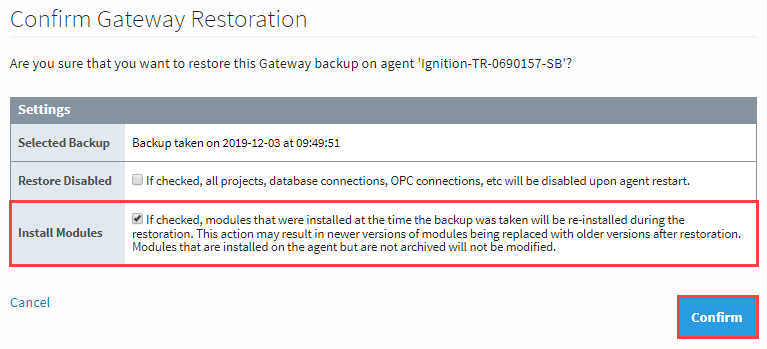
The Confirm Gateway Restoration screen will popup and ask you to confirm restoring the backup on your Agent. Be sure to check the Install Modules box if you want to install all the modules that were running on your Gateway at the time this specific backup was taken. Click Confirm.
-
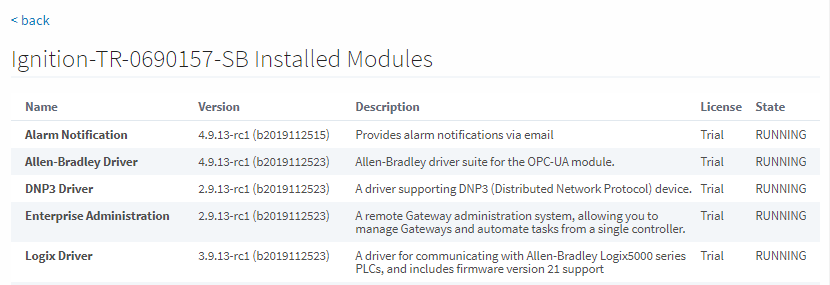
After the backup is complete, go back to the Agent Details screen to see the list of modules installed. Click on the Display a list of modules currently installed on this agent link.
Install Modules
This task allows you to install one or more modules on an Agent. You may pass in the modules to install while creating the task, or choose from the archived modules. Modules are archived in the Collect Backup task.
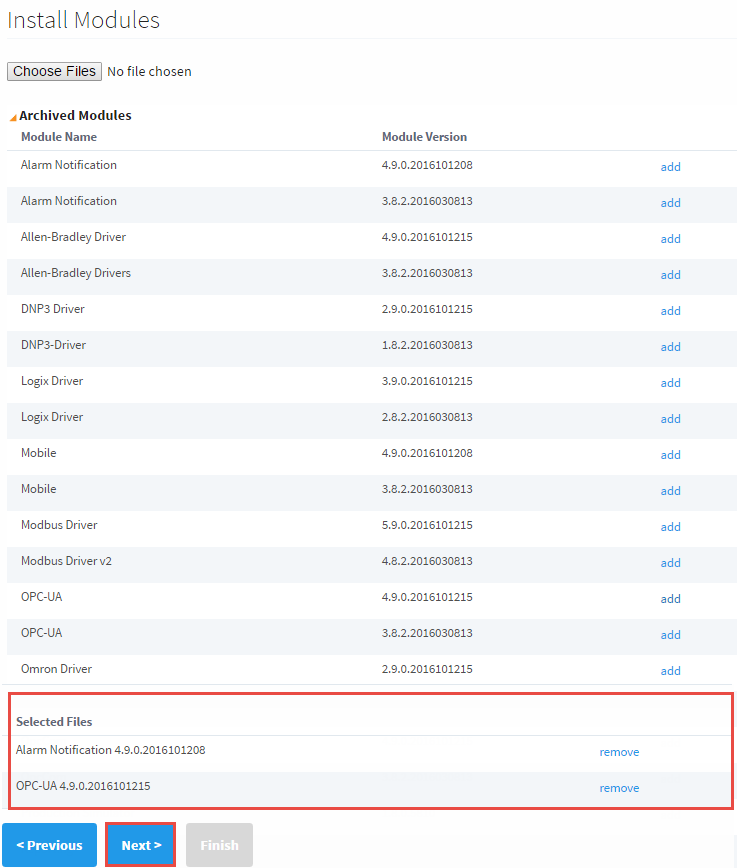
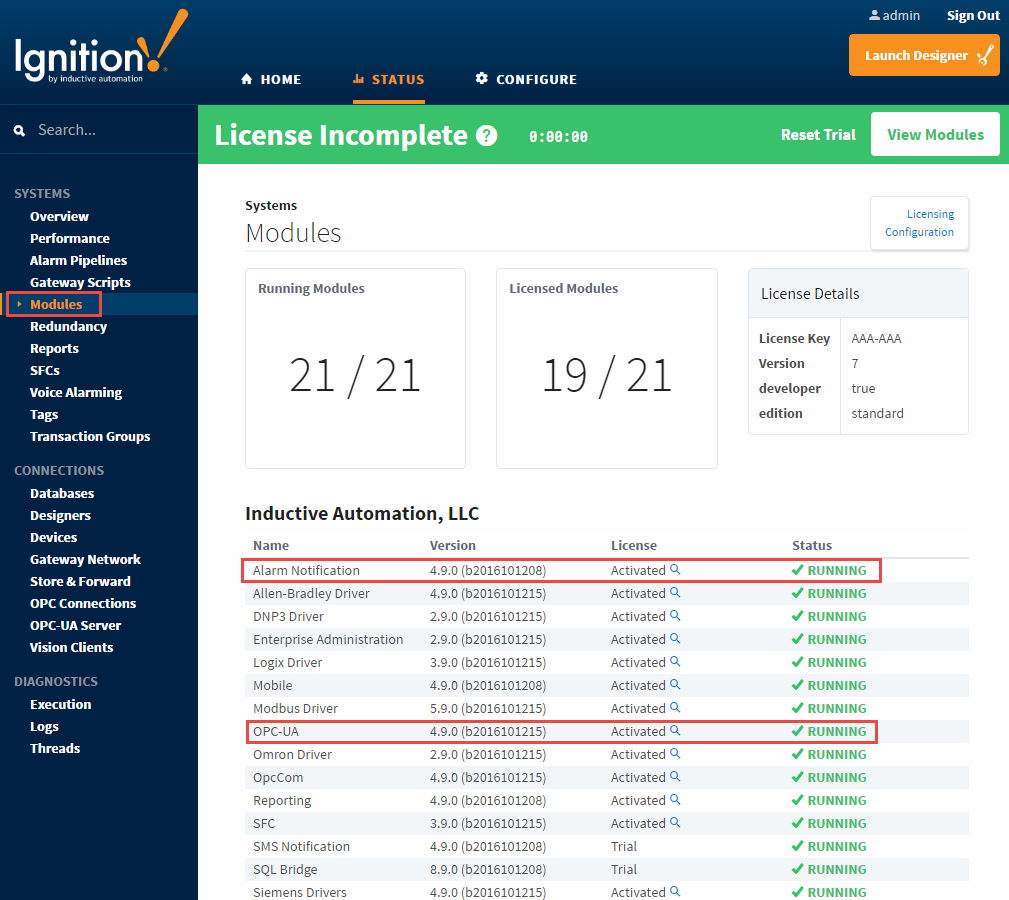
As an example, suppose you accidentally uninstalled the Alarm Notification and OPC-UA Modules from your Agent. Let's go ahead and reinstall them using the Install Modules task.
-
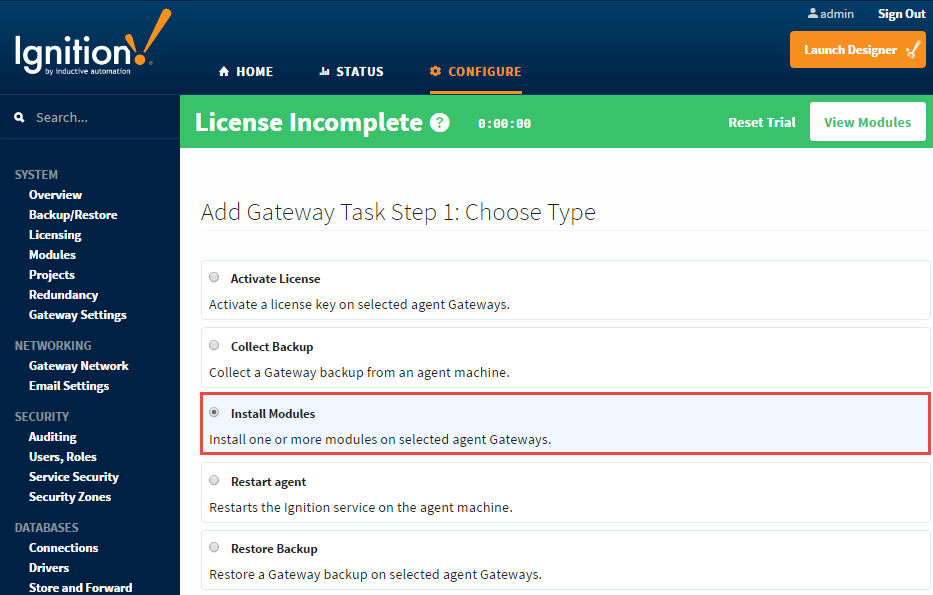
Go to the Controller, and navigate to Configure > Enterprise Administration > Agent Tasks. Click the Create new Gateway Task link. Select the Install Module task, and press Next.
-
Schedule the Install Modules task from any of the listed scheduling options. This example uses Execute Immediately, and press Next.
-
Select the Agent, and press Next.
-
From the list of Archived Modules, click the Add buttons for Alarm Notification and the OPC-UA modules. You will notice, that once you click the Add button next to a module, it will show up in the Selected Modules box at the bottom of the screen. You can choose as many modules as you need, and when you're finished, press Next.
-
Review the Install Modules Task Summary, and press Finish. Once the Install Module task completes, you will get a successful message from the Gateway Task.
-
Go back to your Agent, and navigate to Status > Modules to verify that both the Alarm Notification and OPC-UA modules were installed and are running successfully.
Restart Agent
On the Controller, lets create another Gateway Task to restart the agent. This task will stop the Ignition service on the Agent and start it back up again.
-
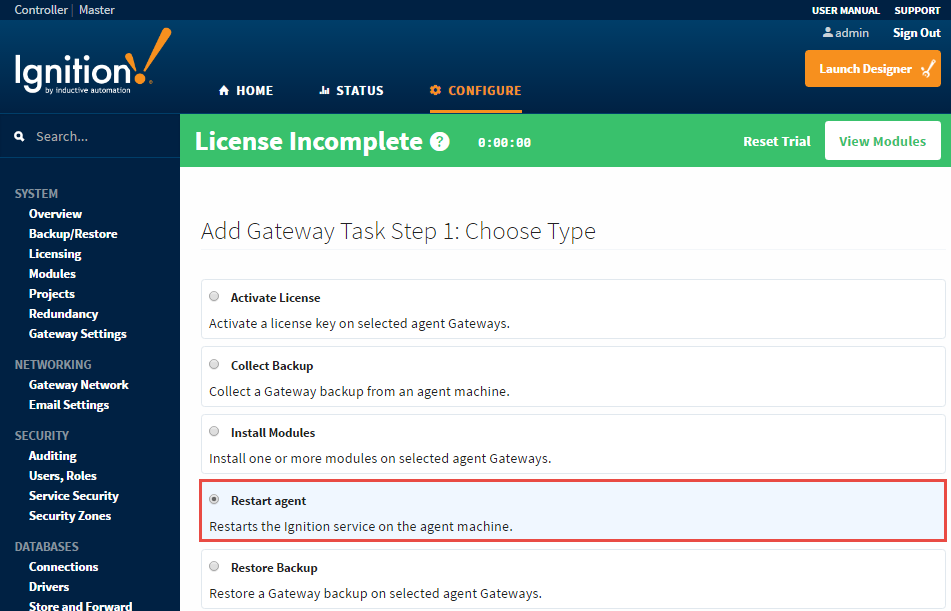
Go to the Controller, and navigate to Configure > Enterprise Administration > Agent Tasks. Click on the Create new Gateway Task link. Select the Restart Agent, and press Next.
-
Schedule the Restart Agent task to Execute Immediately, and press Next.
-
Select the Agent, and press Next.
-
Review the Restart Agent Task Summary, and press Finish. Once the Restart Agent task completes, you will receive a successful message from the Gateway Task.
-
Go to your Agent and refresh your page. You will see a progress bar while the Gateway is starting up. This will take a few moments, and once this task completes, your Agent will be up and running.