Dynamic Alarm Attributes
Dynamic Setpoints
You can configure alarms with dynamic setpoints inside of a Tag definition. It is similar to configuring an alarm, however, configuring an alarm with a dynamic setpoint requires additional Tags to serve as these setpoints. A good example of this is when an operator changes a high or low setpoint, it also changes how the alarm is evaluated.
To Configure Dynamic Setpoints on an Alarm
Suppose you want to alarm a tank level if it goes above or below a certain setpoint. Rather than hardcoding a value in the high and low Setpoint properties, you can bind them to either a Tag in the system or an Expression to make them dynamic. This example uses a Tag.
-
Double-click on your Tag to edit it. The Tag Editor window is displayed.
-
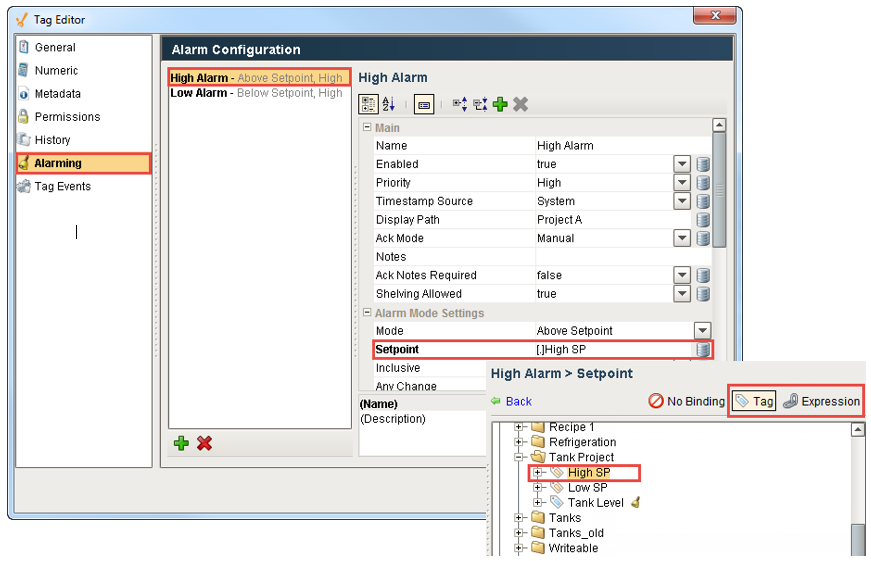
Select the Alarming tab and the alarm that you want to edit to associate a setpoint with. (This example uses the High Alarm).
-
Find the Setpoint property, and click on the binding icon next to it. Select a Tag or Expression. Bind the Setpoint property to a different Tag (we created a Memory Tag called High SP). Click the Back link in the upper left to submit your changes.
-
Repeat steps 2 and 3 for the Low Alarm, selecting Low SP for the different Tag.
-
Click OK. Now, the tank alarm will be evaluated based upon the high and low setpoints of each Tag.
Dynamic Enabling and Disabling
Enabling Based on Machine State
Allowing a dynamic condition to determine if an alarm is enabled or disabled is possible inside the alarm's properties; i.e. like whether or not a machine is on. This example uses two Tags; one for the Alarm, and one to determine the running state of the machine. Two conditions must be true for the alarm in the example below to become active: the value on the Tag must match the setpoint ('True' in the example below), and the Enabled property must evaluate to 'True' (driven by the value of the 'Machine On' tag).
-
Select a Tag that has the alarm you want to configure.
-
Access the alarm properties by double-clicking on the Tag, selecting the Alarming tab and the alarm that you want to associated with this Tag.
-
Find the Enabled property and bind it to a Boolean Tag or an Expression that evaluates a 'true' or 'false' condition. (This example uses a Tag called Machine On).

-
Click OK. Now, the alarm will only be evaluated based upon the state of the Machine On Tag.
Enabling Based on Time of Day
There are occasions when you only want alarms to be evaluated at certain times of the day. In Ignition, you can automatically enable and disable alarms for specific times of the day. This is typically achieved by binding the alarm's Enabled property to a Tag, or Expression. (This example uses an Expression).
-
From the Tag Browser, select the Tag on which you want to configure the alarm.
-
Double-click on the Tag, and in the Tag Editor window go to the Alarming tab. Click the alarm you want to place the binding on.
-
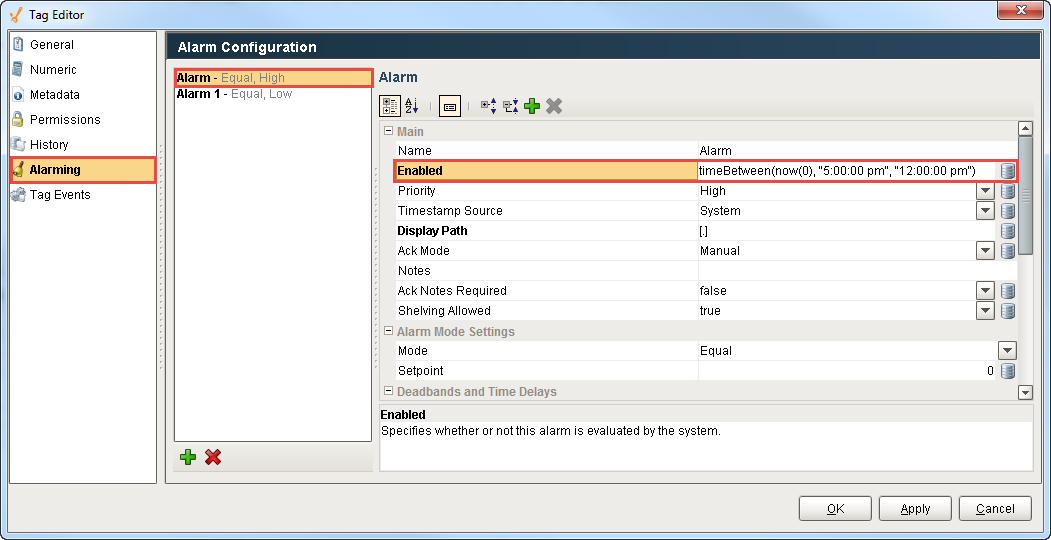
Bind the Enabled property to an expression that evaluates a 'true' or 'false' condition based upon the current time. Click the bind button to the right of the Enabled property, and click on Expression tab on the top right of the screen, and enter your expression. In the expression language, there are various functions for dates that can be used. For example, the following expression would return 'true' if the time is between the hours of 5pm and 12pm, and return 'false' if it is not.
timeBetween(now(0), "5:00:00 pm", "12:00:00 pm") -
Click OK. The alarm will only be evaluated when the system clock falls between the specified time.