Installing MySQL
To Install the MySQL Server and Workbench
- Go to the MySQL website at http://dev.mysql.com/downloads/mysql/.
- Scroll-down to Windows (x86,64-bit), MySQL Installer MSI.
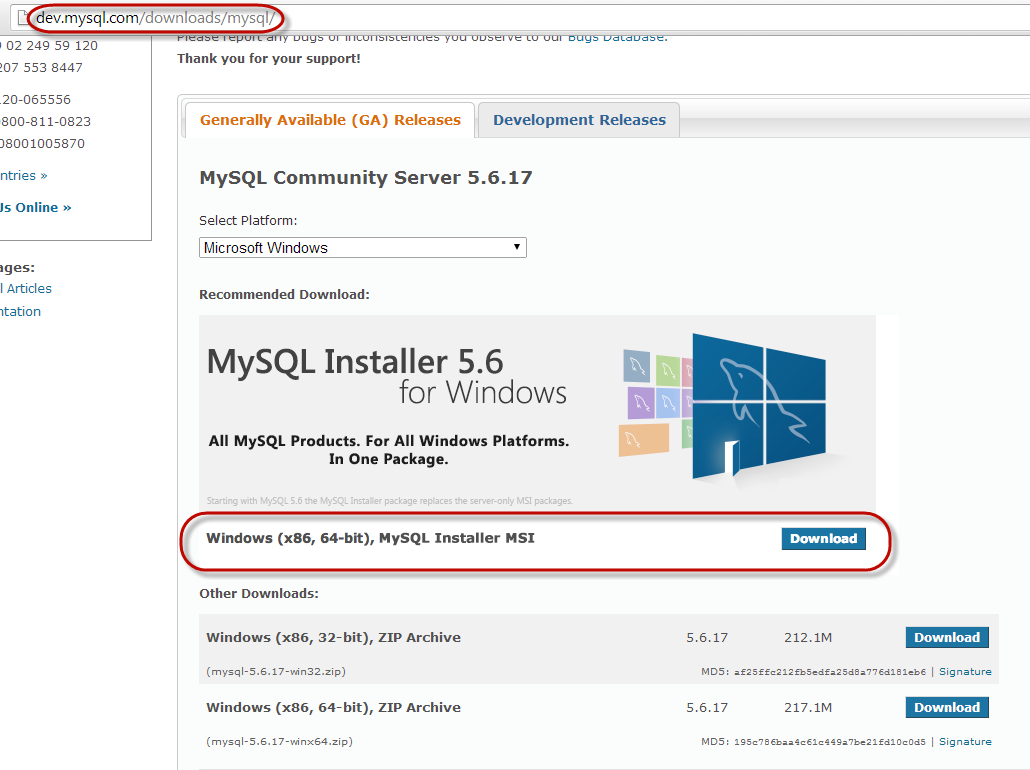
- Click on the Download button.
- Scroll-down to mysql-installer-community-x.x.xx.x.msi.
note
MySQL Installer is 32-bit, but will install both 32-bit and 64-bit binaries.
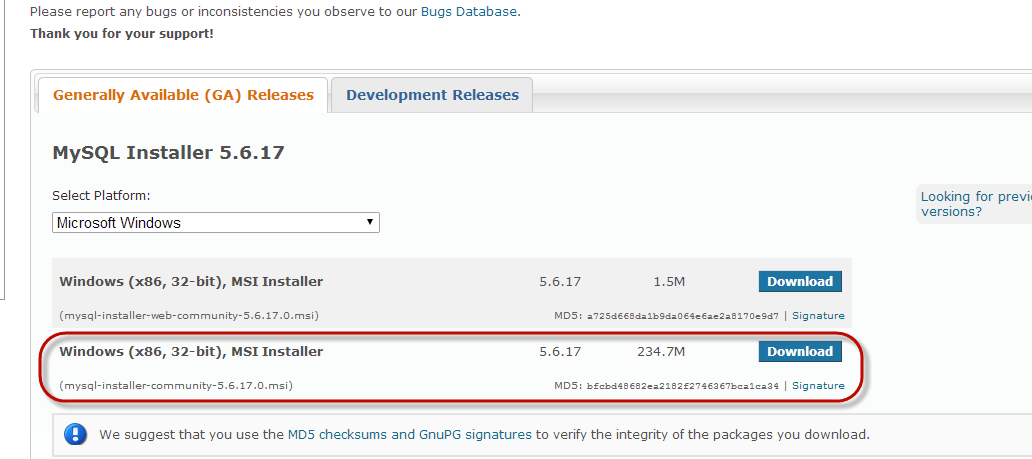
- Click the Download button.
- On the next page, click the No thanks, just start my download.
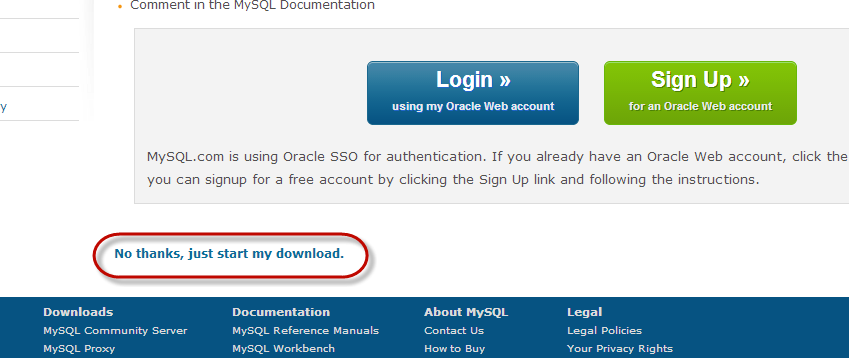
The .msi file will start downloading.
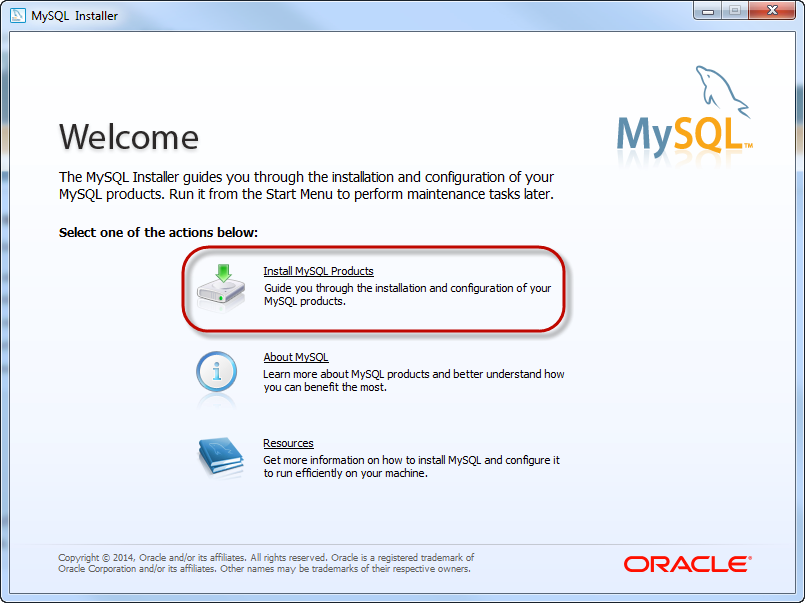
- Click the .msi file to run it and to configure the installer.
The Welcome window will be displayed. - Select the Install MySQL Products action.
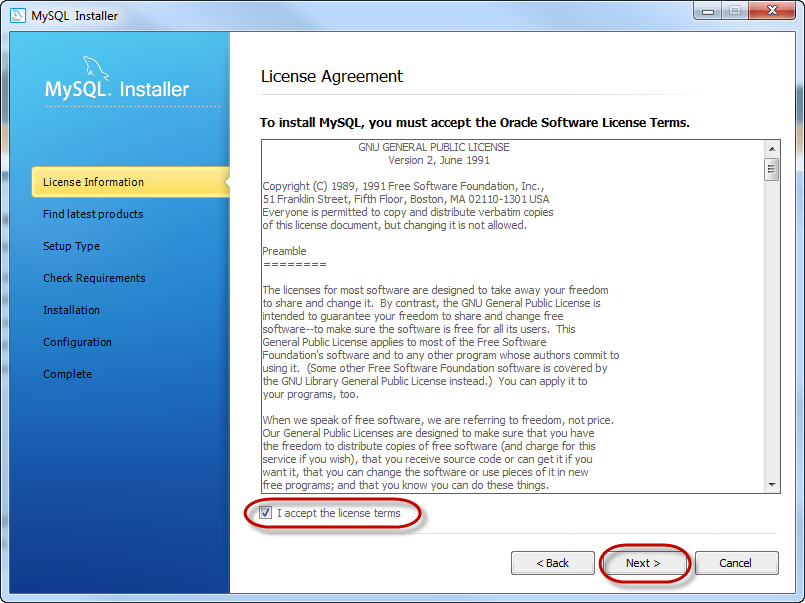
- On the License Agreement page, click the I accept the license terms box and click Next.
- On the Find latest products page, click Execute to check for installer updates from MySQL. If you want to use the version you have, you can select the skip option. When checking is complete, click Next.

- On the Choosing a Setup Type page, the simplest option is to select Developer Default and click Next. The only drawback is that the install will be much larger.
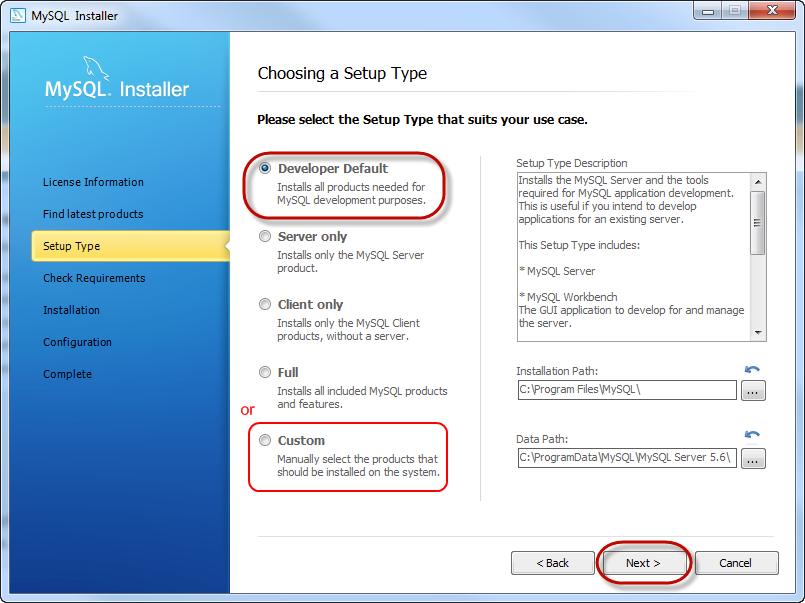
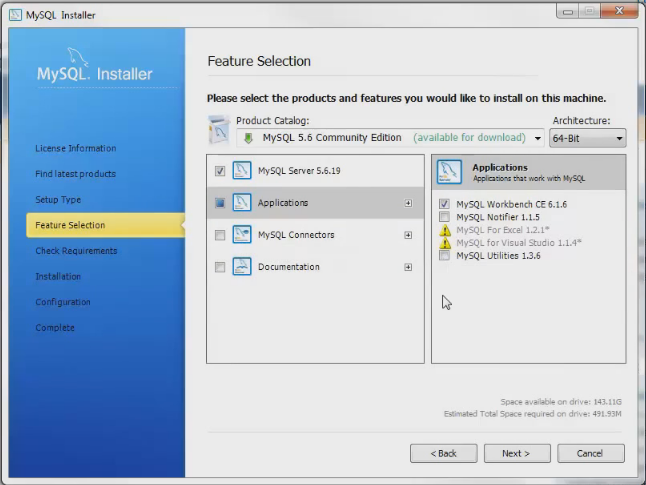
Optionally, you can select the Custom option and remove everything except the MySQL Server object. You can include the MySQL Workbench if you want, it is nice to have if you ever want to modify the raw structures.
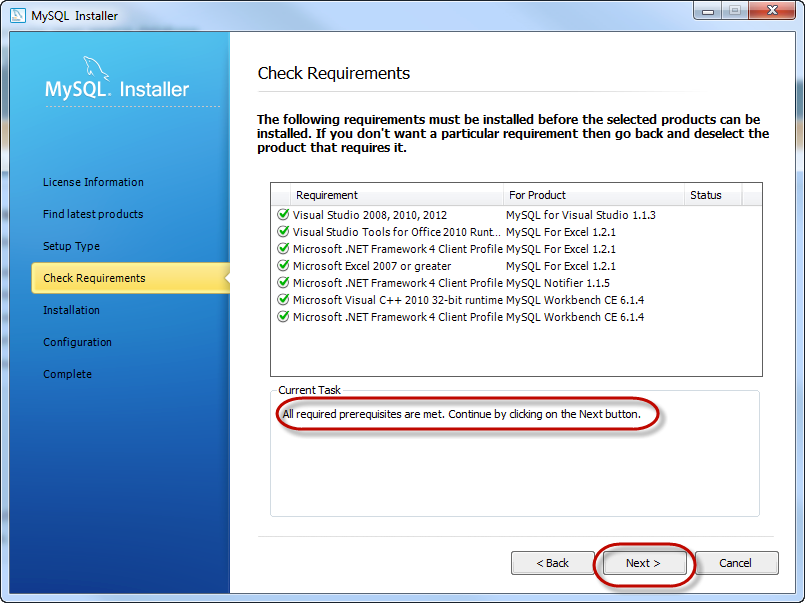
- On the Check Requirements page, click Execute to make sure all required prerequisites are met. Follow any instructions to install any missing prerequisites. Click Next once all prerequisites are met.
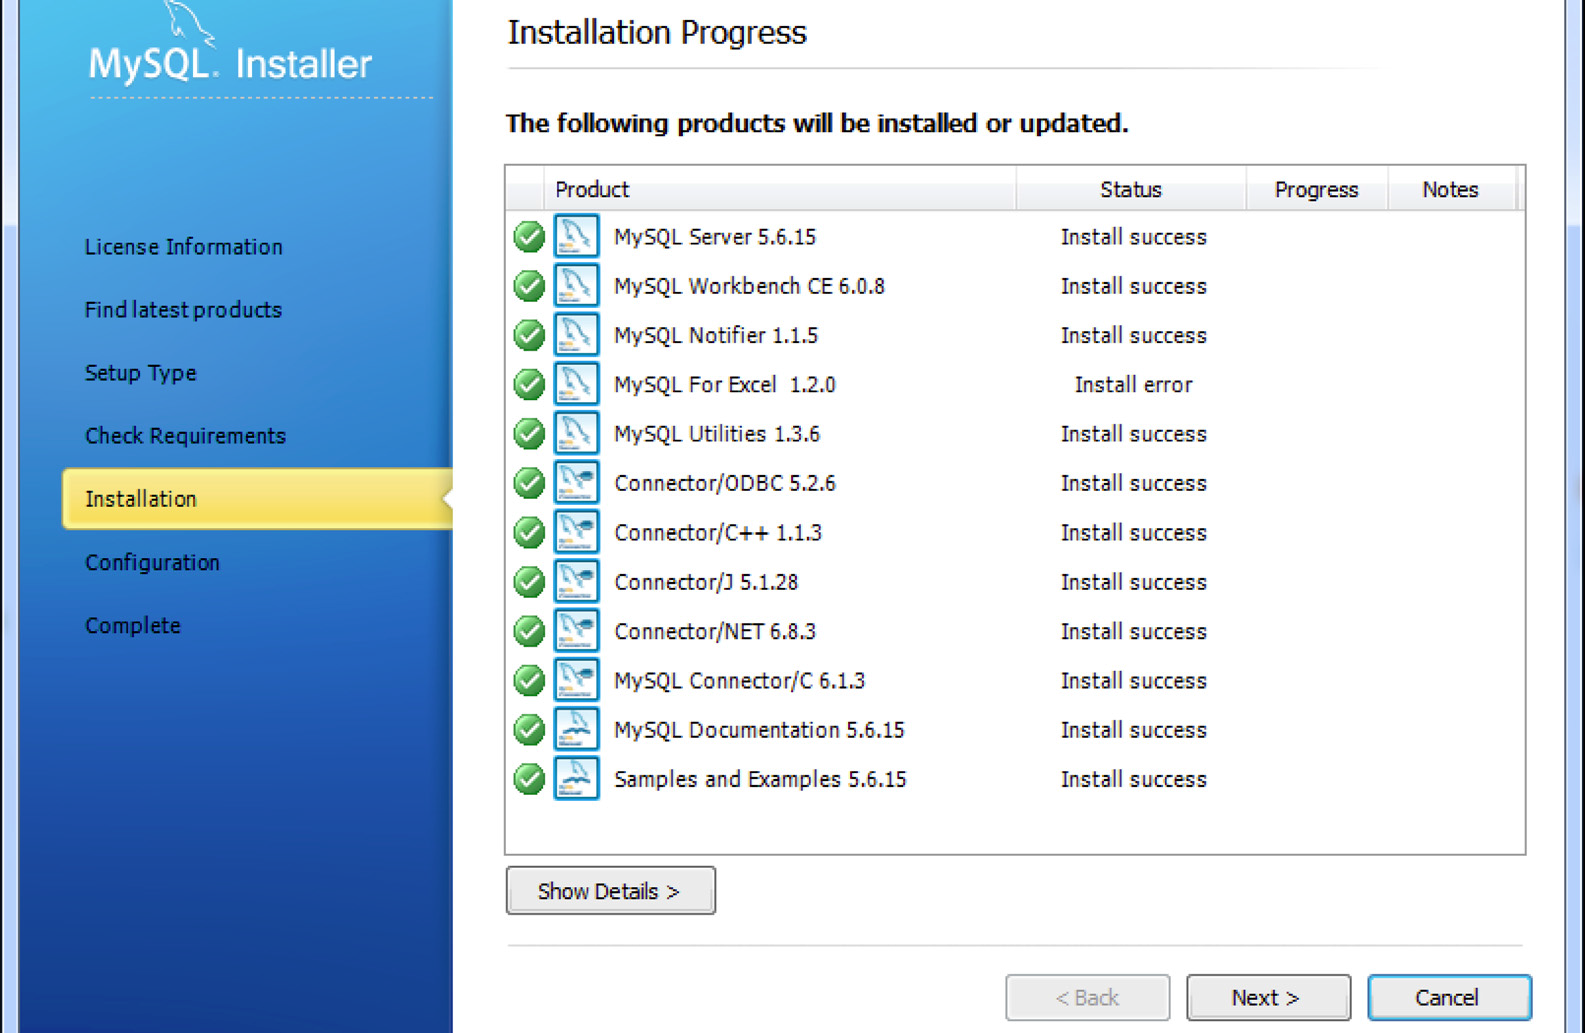
- On the Installation Progress page, click Execute to install all of MySQL products.
The MySQL Server and the MySQL Workbench will both be installed. Once all of the products are installed click Next.
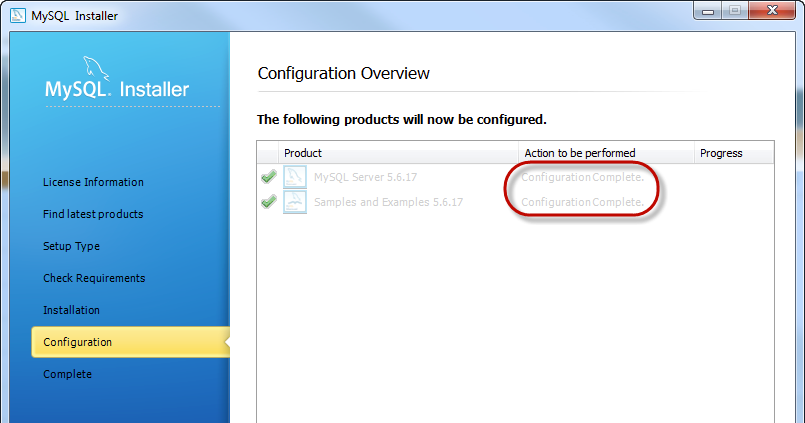
- On the Configuration Overview page, click Next to setup the configuration.
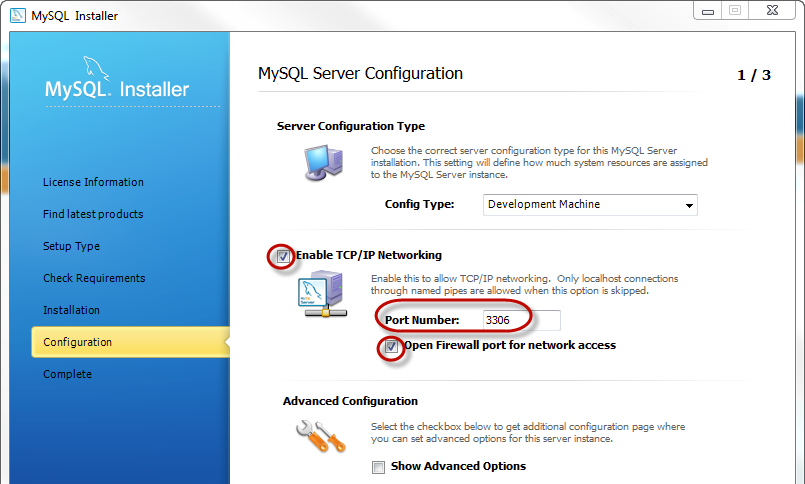
- On the MySQL Server Configuration page (1/3), make sure the default Port Number is 3306, keep all the defaults and click Next.
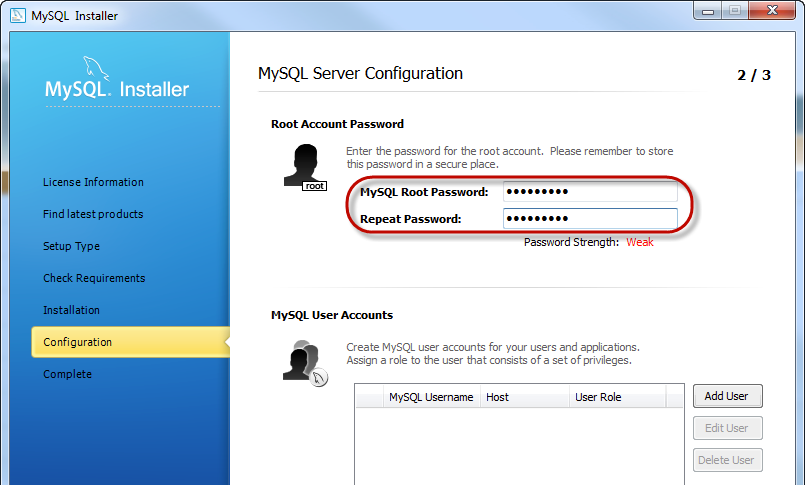
- On the next MySQL Server Configuration page (2/3), choose a password for the root user, type it in, and write it down so you have it for future, then click Next.
- Make sure the following two items are selected by default:
- Start the MySQL Server at System Startup
- Standard System Account
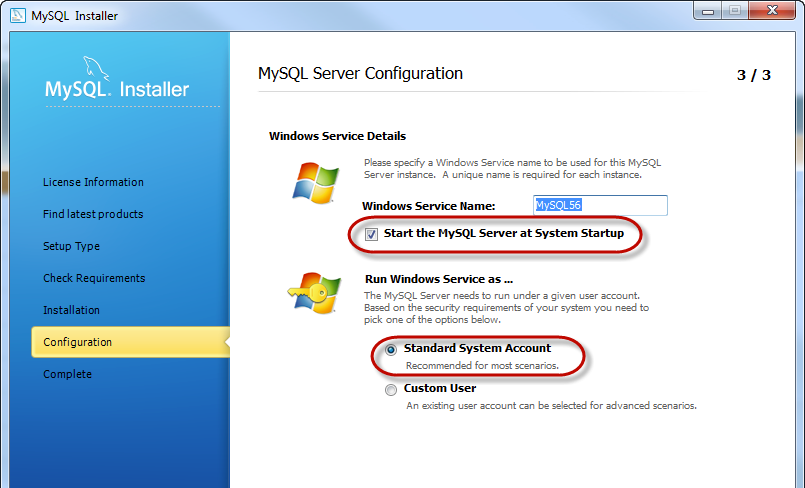
This installs MySQL as a Service and starts MySQL automatically each time you start your computer.
- Click Next. The Configuration Overview page is displayed and shows the MySQL server installation is complete.
- Click Next.
- The Installation Complete window is displayed and shows the check box for Start MySQL Workbench after Setup is selected.
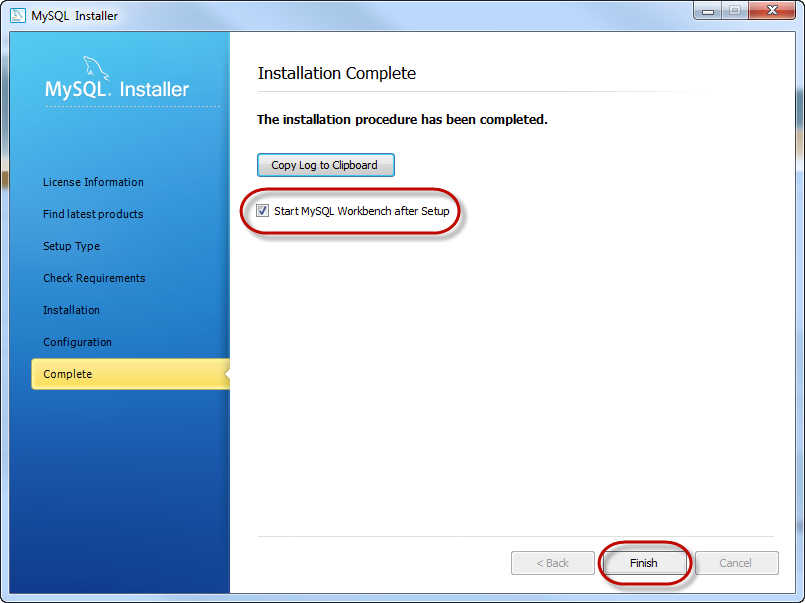
- Click Finish to close the Wizard and complete the installation.
The MySQL Workbench window is displayed. MySQL Workbench lets you to administrate the MySQL server. - Click on Local instance MySQL to connect to the newly installed MySQL server.
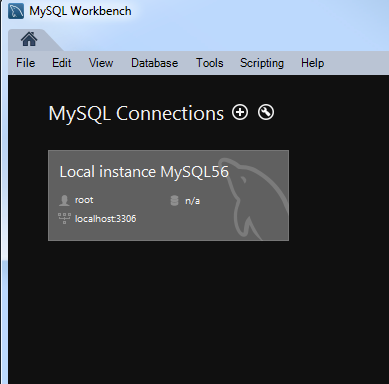
- Enter the root password you earlier entered into the installer and click OK.
- The Local instance MySQL graphical user interface is displayed.
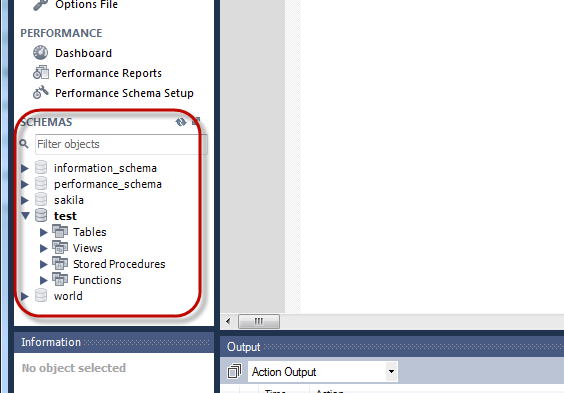
You are now connected and can see, in the Navigator, the default databases. Older versions of MySQL will start with a database named test where new ones may not.
- If you want to create a new schema with a new name (like test), right-click in the white background of the Object Browser (next to the rest of the schemas) and select Create Schema. Name it and click the Apply button in the lower right.