Voice Notification Profile
For the Voice Notification Module to work, a compatible Voice Module and Text-to-Speech (TTS) voices must be installed. See the Voice Notification Downloads Knowledge Base article for more information on TTS voices available to download.
The Voice Notification Module adds the ability to deliver alarm notifications to users via telephone, using most SIP compatible phone system, excluding those requiring Cnonce. Messages are constructed in text and are delivered through a high quality text-to-speech engine. The engine supports multiple voices and languages.
Core Features
Deliver voice calls through any SIP compatible phone system. No dedicated hardware required. Messages generated by high-quality text to speech, and not a canned set of prerecorded files.
- Supports multiple languages concurrently, based on user preference.
- Allows users to acknowledge events.
- Supports requiring a personal identification number for additional security.
- Ties into the audit log to audit call events, successful message delivery, and user acknowledgements.
- Supports message consolidation.
Voice Notification Configuration
About SIP and VOIP
The Session Initiation Protocol, is a highly popular specification for implementing Voice Over IP (VOIP) based phone systems. The protocol itself, as the name suggests, is responsible for initiating communication sessions, and then other protocols such as SDP and RTP are used to actually transfer voice data. Ignition has these protocols built in, SIP is a peer-to-peer protocol, where one side talks directly to the other. However, it is possible to have Gateways that repeat and route data between the two parties. Sometimes phone calls on VOIP networks stay purely in software, but often a Gateway will transition the call to a traditional phone line.
By leveraging SIP, Ignition can call physical phones, soft phones, be worked into more complex PBX schemes, while avoiding the high cost of traditional, dedicated voice cards. To get started, though, you’ll need some sort of SIP Gateway. Asterisk is a popular, open source, system that is used by thousands of companies worldwide. If you simply want to connect to a phone line, there are several low cost devices that runs Asterisk.
Hosted SIP Services
The Voice Notification module uses Session Initiation Protocol (SIP) to place calls over VOIP networks. Once connected to a SIP Gateway, Ignition can call physical phones, softphones, or external systems without dedicated telephony hardware.
Asterisk-based PBX systems, hosted SIP services, or direct SIP devices can all be configured with this profile.

How to setup Ignition with AWS Chime
How to setup Ignition with AWS Chime
Link to Knowledge Base ArticleGateway Configuration
To get started with voice notification, add a new profile by going to Config -> Alarming -> Notification in the Ignition Gateway. You are only required to specify the host address of the SIP gateway, though depending on the Gateway, you may be required to enter a username and password.
There are additional settings that dictate how calls are managed, such as timeouts for answering, and the maximum amount of time that a call can take. Additionally, you can choose to link the notification profile to an audit profile in order to record important call lifecycle events.
After saving the profile, you should see the status update from “Unknown” to “Registered”, indicating that the Gateway has successfully registered with the SIP Gateway. If you see an error, verify that the settings are correct, and that the username and password are correct. The system log console can also be useful in determining what is wrong.
If you receive errors indicating that an “invalid parameter” has been used, try setting the local and public bind interface settings under the advanced options. These should be set to the IP address of the network card that is being used to communicate with the SIP Gateway. On some systems, especially Linux hosts, the default empty values result in this error.
Configuring Messages
The message played to the user during the phone calls is defined in the call script. The script dictates the overall structure of the call, defining the phrases and options, and the possible responses. The messages for each alarm are built off of a message template that can reference properties in the alarm. The script can be edited by selecting “manage scripts” next to the voice notification profile. Note: Although the link appears next to a particular profile, the scripts are shared across all voice notification profiles.
The role of each phrase in the script is explained on the settings page. Some parts of the script, such as the phrase requesting the user’s PIN number, will only be used if certain settings are configured on the notification block in the pipeline (in this case, the setting to require a PIN). As previously mentioned, the alarm message (for both active and clear) can reference any property of the alarm. The default message looks like this:
At {eventTime|hh:mm:ss}, alarm named {name} became {eventState} with a value of {eventValue}
In this case, the message refers to the alarm name, the eventState and eventValue (note: eventState is different than state. Event state is just the transition that triggered the alarm, such as “active”, whereas “state” is the full current state, such as “active, unacknowledged”), and the eventTime. Notice that the event time is formatted to only use the time, and not include the current date.
Scripts can be created for different languages. When the system attempts to deliver a notification, it will look to see if the target user has a preferred language. If so, and the language has both a script defined, and a compatible voice installed, the user will be notified in that language.
Alarms also allow you to define a custom message, relevant to that particular state. If a custom message is defined, it will be used instead of the default message in the script.
The Call Lifecycle
A call is initiated when an alarm event enters the notification profile block in a pipeline. When this occurs, the target users are collected, based on the defined call roster, and the current schedule. Only users who have phone contact details defined will be selected for phone notification.
The voice system can only call one number at a time, and so it takes the first contact off of the queue and initiates the call. The user is given up to the “answer timeout” to answer. After picking up, the user will be asked to enter their pin number, or press any number to continue. The call is not considered “answered” until this action occurs, so the message will be repeated until the answer timeout expires. By acting in this way, the system is able to confirm that a human has actually answered, and the call will then be audited as successful.
Once past the initial challenge, the user will then hear the alarm messages. After each message, they will be asked to either acknowledge, ignore, or repeat the message. Selecting “acknowledge” will cause the alarm to be acknowledged in the alarming system, likely causing it to drop out of the alarm pipeline (dependant on pipeline settings). Ignoring the alarm indicates that the user has heard the message, but cannot or does not want to acknowledge the alarm.
Once the call has completed, the notification system will check the alarm events against the pipeline fallout conditions, and move on to the next call. The system will cycle through all alarms and all contacts (and all phone numbers for each contact) until everyone has been notified, or the pipeline settings have caused all events to drop out.
Pipeline Configuration
The voice notification system is accessed through the Notification Block in the Designer's pipeline configuration, like all other notification methods. As with other methods, you select a call roster, and can optionally turn on consolidation. There are only two options which can be set on the notification block:
Require PIN: If selected, the user will be required to enter their personal identification number in order to hear the message. The user’s PIN number is specified on their profile in the user management system. If false, or if the user does not have a PIN specified, the user will only be required to press any key to continue.
Allow Acknowledgement: If true, the user will be given the opportunity to acknowledge the alarm. If false, they will only be able to hear the alarm and continue.
Create a Voice Notification Profile
-
Go to the Config section of the Gateway.
-
Select Alarming > Notification from the menu on the left side.

-
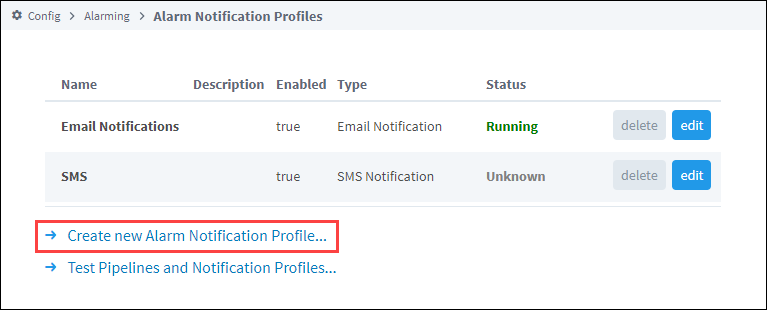
Click on the Create new Alarm Notification Profile link.
-
Add Alarm Notification Profile Step 1 window will appear. Select the VOIP Voice Notification radio button and click Next.

-
On the New Alarm Notification Profile page, configure your settings. Enter the Gateway Address or domain name of your SIP Gateway. You may be required to enter a username and password. There are also some additional call settings that may need to be set up depending on how you want to manage your calls, and based on your preference. Refer to the table below for a description of all settings.
-
When completed, click Create the New Alarm Notification Profile. Your new Voice Notification Profile will be displayed with a status of Registered with VOIP Host.

Once your Notification profile is created, you can use it in an Alarm Pipeline.
VOIP Voice Notification Profile Settings
The following table describes the settings on the Alarm Notification Profiles page for a VOIP Voice Notification profile.
Main
| Setting | Description |
|---|---|
| Name | Name for this alarm notification profile. |
| Description | Description of the |
| Enabled | Whether the profile is enabled or disabled. |
VOIP Gateway Settings
| Setting | Description |
|---|---|
| Gateway address | The ip address or domain name of your SIP gateway. |
| Username/Account | User or account name for this profile. |
| Password | Enter a password for the account. |
| Password | Re-enter password for verification. |
| Outbound Proxy | The proxy to use, if any. |
Call Settings
| Setting | Description |
|---|---|
| Max Call Duration (minutes) | The length of time, in minutes, that any particular call is allowed to take. The call will be terminated if it lasts longer than this limit. (Default is 5.) |
| Answer Timeout (seconds) | How long, in seconds, to wait for an answer before moving on to the next contact. (Default is 60.) |
| Voice Rate | Adjusts the desired voice rate. (Default is Normal.) |
Auditing
| Setting | Description |
|---|---|
| Auditing | If an audit profile is selected, events such as phone calls and acknowledgements will be stored to the audit system. Note that alarm acknowledgements are also stored to the alarm journal. |
Advanced Settings
| Setting | Description |
|---|---|
| Authorization Id | Some services require a separate authorization name, in addition to the user/account name. If left blank, the username specified above will be used. |
| SIP Port | SIP Port. (Default is 5,060.) |
| RTP Port | RTP Port. (Default is 8,000.) |
| Local Bind Address | Local bind address for the profile. |
| Backup Local Bind Address | New in 8.1.40 The bind address for backup systems. |
| Public Bind Address | Public bind address for the profile. |
| Media Debug Enabled | If true, call audio will be recorded to the Ignition temp directory. The audio file will be generated after receiving a response from the SIP server. (Default is false.) |