Linux - Install
- Dual-Core Processor (64)
- 4GB RAM
- 10GB free HD space
Also, it is assumed that you are familiar with operating a shell, and you have root or superuser privileges to run the Ignition installer.
Download and Install Ignition on Linux
-
Go to the Inductive Automation website at www.inductiveautomation.com
-
Select Download Ignition in the upper right corner of the page. The browser will determine what operating system you're running and will bring up Download for Linux.
-
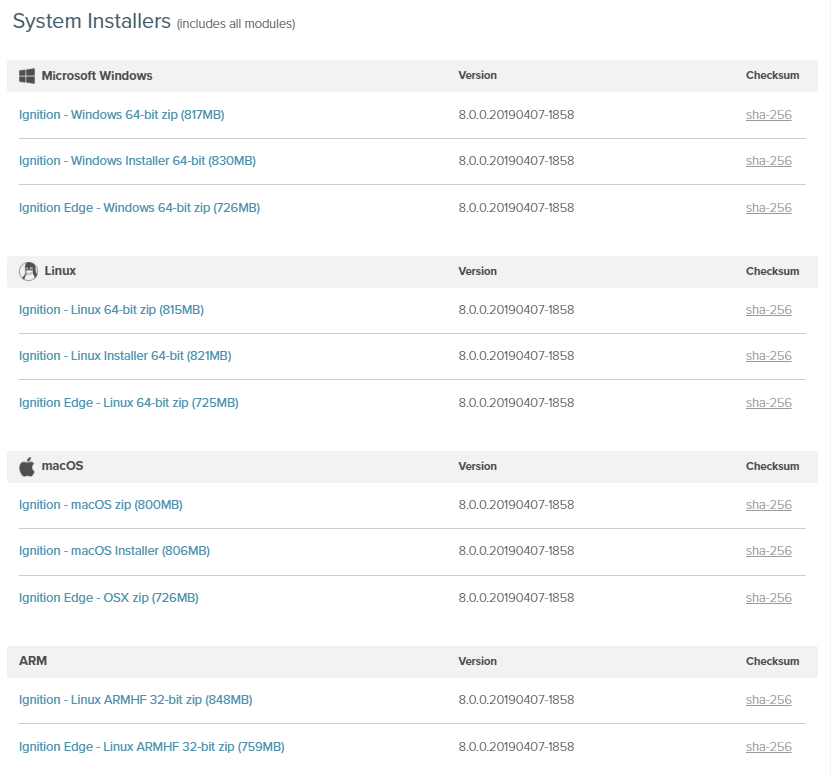
Click Download for Linux. The downloaded file is Ignition-X.X.X-Linux-x64-installer.run. If you want to see what other operating systems are supported, click on the Other operating systems and versions link and scroll down to System Installers.
 caution
If you choose the wrong installer, an Error window is displayed letting you know the correct installer to use for your machine.
The installer will install files in the following locations:
/usr/local/bin/ignition(unless a different installation directory was used) – contains binaries, web server files, startup scripts and the uninstall executable/var/lib/ignition/datacontains application-generated files, temporary files, driver directories, and the internal database/var/lib/ignition/user-libcontains modules and JDBC jars/var/log/ignitioncontains the wrapper.log and other log files/etc/ignitioncontains configuration files. Symbolic links to these files are created in /var/lib/ignition/data -
You must run all the commands as root. Prefix everything with
sudoor first run:sudo su -
Open a command shell and navigate to the installer executable by running the following command from the command line:
sudo chmod +x ignition-x.x.x-linux-xxxinstaller.run -
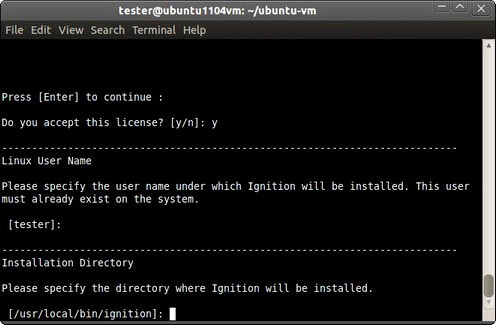
Start the installer executable. The installer can run in a graphical mode or command line mode. If you are running the installer in a shell in a graphical environment, the graphical installer opens automatically. If you are running the installer in a headless Linux installation or through an SSH shell, the text installer opens automatically. To start the text installer in a graphical environment, run the following command:
sudo ./ignition-X.X.X-linux-xxx-installer.run --mode text -
Agree to the licensing terms.
-
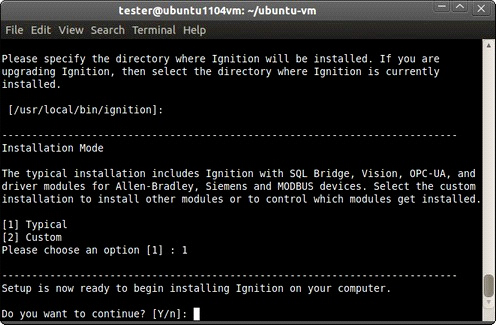
Ensure the installation directory is the default directory at:
/user/local/bin/ignition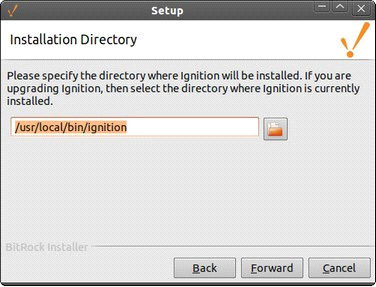
-
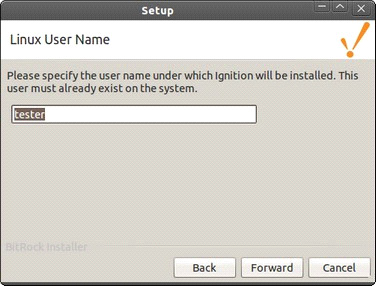
Specify the user name under which Ignition is to be installed. For Ubuntu installations, the user that invoked sudo is used by default. For other Linux installations, this field is initially blank.
The Linux installer requires a user name to set the permissions on the folders created by the installer. This user is then able to start and stop Ignition, run the Gateway Control Utility, and the command line interfaces.
The binaries in the installation folder are still owned by root and cannot be modified without root access. The selected user must already exist on the system before starting the installer.
-
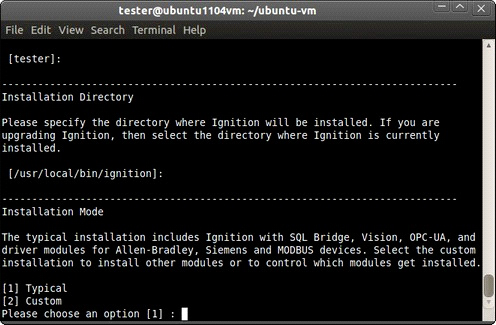
Select either the Typical or the Custom installation mode.
The Typical mode installs everything that you need to get started.
The Custom mode lets you add optional modules, such as the OEE Downtime module. It also lets you control and select which modules get installed.
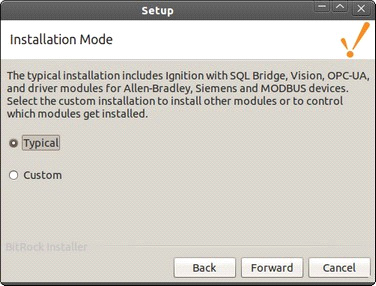
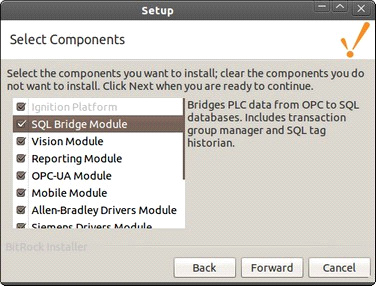
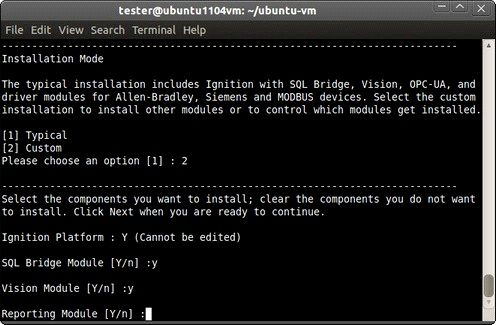
If you select Custom Mode, the Select Components window is displayed.
-
In Graphical mode to view a brief description of the module, click on the module name. Selecting the check box next to a module installs the module as part of the Ignition installation. Clearing the check box next to a module prevents the module from being installed.
-
In Text mode a list of all the modules are displayed one at a time. Type y to install the module, and type n to prevent the module from being installed.
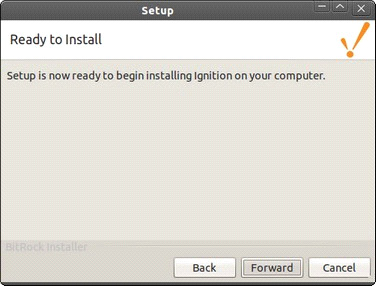
Ignition is now ready to be installed. At this point, you can click the Back button (graphical mode) to change your selections. For the text mode, you can only abort the installation at this point by typing n.
-
-
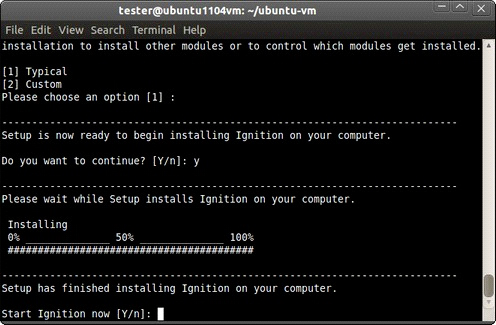
Click Forward (graphical mode) or type y (text mode) to finish the installation.
-
When the installation is complete, click Finish (graphical mode) or type y to start Ignition (text mode). Ignition is started as a background process.
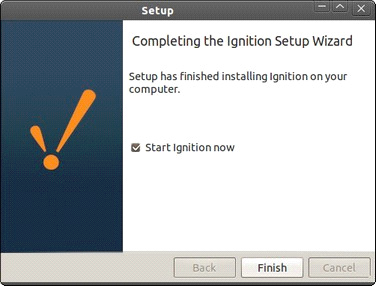
At this point, your web browser should open, bringing you to the start of the system commissioning process at http://localhost:8088/welcome. If a web browser doesn't automatically open, then you can open it yourself, and navigate to the commissioning URL.
Ignition Service
Stop and Start Ignition
After installation, you can start and stop Ignition with the following commands:
/etc/init.d/ignition start
/etc/init.d/ignition stop
Remove Service
When installing under Ubuntu, Ignition starts automatically whenever the computer reboots. If you wish to stop this behavior, you need to use the update-rc.d tool to remove the service (uninstalling Ignition also removes the service) as follows:
/etc/init.d/ignition stop
update-rc.d -f ignition remove
rm /etc/init.d/ignition
When installing under other Linux distributions, use that distribution's method to automatically start a program after reboot. For example, this command auto-starts Ignition installed in a Fedora 15 system (run as root user):
chkconfig --level 2345 ignition on
Set the System PATH
For Ubuntu installations, the installation directory is automatically appended to the system PATH. You can start programs like the Gateway Control Utility from the command line without specifying a complete path to the installation directory.
Note that after installation, you need to close and reopen the command shell for the PATH change to take effect. For other Linux installations, you need to manually add /usr/local/bin/ignition (or your installation directory) to any script that can set the system PATH (such as .profile or .bashrc).
Automated Installation on Linux
You can automate Ignition installation across different machines using scripts. Ignition is then installed silently from a command shell without showing any user prompts.
Keep in mind that the installer cannot automatically start the Gateway after a silent installation. Use the /etc/init.d/ignition start command as shown in example below.
Command line example
sudo ./ignition-8.x.x-linux-x64-installer.run --mode unattended --prefix /somefolder/bin/ignition --unattendedmodeui none
/etc/init.d/ignition start
Flags
-- mode unattended (ensures that no prompts appear during installation)
-- prefix /somefolder/bin/ignition (optional flag; if a value is set, then Ignition is installed in the specified folder, otherwise Ignition is installed in /usr/local/bin/ignition by default)
-- serviceuser username (allows a Linux system user to be installed (that is, a user that cannot log in to the OS))
-- unattendedmodeui none | minimal (the none flag does not display any sort of graphic during installation; the minimal flag displays a small progress bar and nothing else)
Uninstalling Ignition on Linux
Be sure to back up your Gateway and unactivate your Gateway license.
During a new Ignition installation, an uninstaller executable is created in the installation directory: the default directory is /usr/local/bin/ignition
When Ignition is uninstalled, the settings database and folder in /data is backed up to /data_<current date>, and modules and user-supplied JDBC jars in /user-lib are backed up to /user-lib_<current date>. Also, the Ignition service is removed from Ubuntu Linux installations automatically.
Run the Downloaded Installer
To run the uninstaller,
-
Open a command shell and navigate to
/usr/local/bin/ignition(or your installation folder). -
As
rootorsudo, run./uninstall
Linux Ignition installations before 7.3 used a zip file that did not form an installation. Since these installations were never created with an installer executable, no uninstaller executable was ever generated. This is true even if using a 7.3 or later installer executable to upgrade an installation from before 7.3. For installations before 7.3, you must manually remove the Ignition folders using the commands below.
/etc/init.d/ignition stop
*Ubuntu only* update-rc.d -f ignition remove
rm /etc/init.d/ignition
rm -rf /usr/local/bin/ignition
*Recommended* mv /var/lib/ignition/data /var/lib/ignition/data_<current date>
*Recommended* mv /var/lib/ignition/user-lib /var/lib/ignition/user_lib_<current date>
*Recommended* mv /etc/ignition /etc/ignition_<current date>
rm -rf /var/log/ignition