Image Access Instructions - Azure
Creating a Virtual Machine Using the Ignition Cloud Edition Image
Similar to AWS, you can create a virtual machine (VM) using the Cloud Edition Image available on the Azure Marketplace. The instructions below demonstrate how to create an Azure virtual machine running Cloud Edition.
Create a Virtual Machine from the Azure Marketplace Listing
-
Access your Azure console.
-
Click on Marketplace.

-
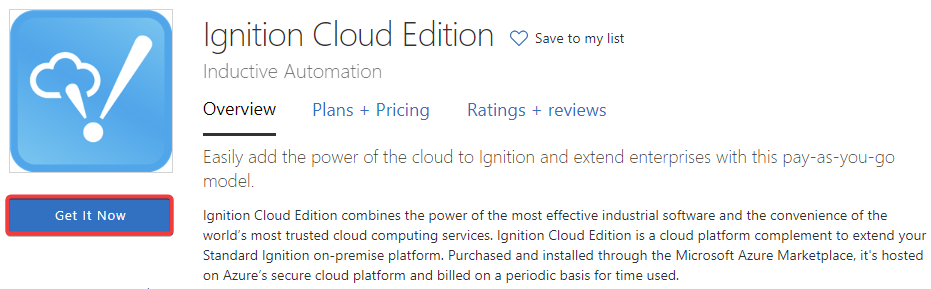
In the Azure Marketplace, search for "Ignition Cloud Edition". Click on the Ignition Cloud Edition image.
 note
noteIf you've created a virtual machine from the Ignition Cloud Edition Image before, steps 4 and 5 may not appear. In this case, skip to step 6.
-
On the Ignition Cloud Edition page, click Get it Now.
-
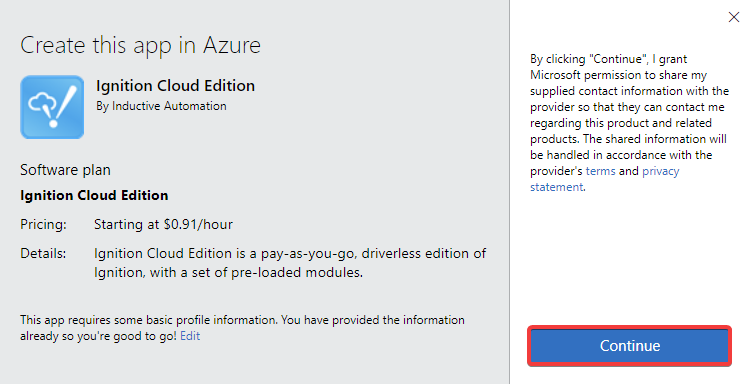
Click Continue on the Azure popup.
-
Click Create on the information page.

-
You will be taken to the Create a virtual machine page. Complete the prompts to create your VM. For specific guidance through this form, see the Virtual Machine Creation Process Example section below. Once complete, click on Review + create.
-
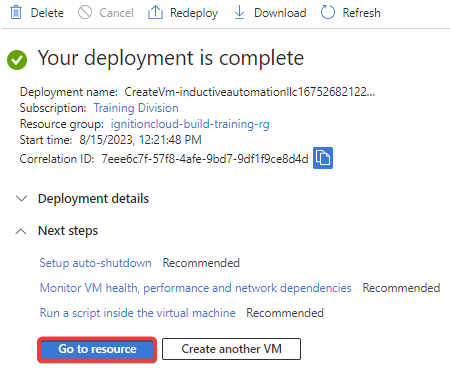
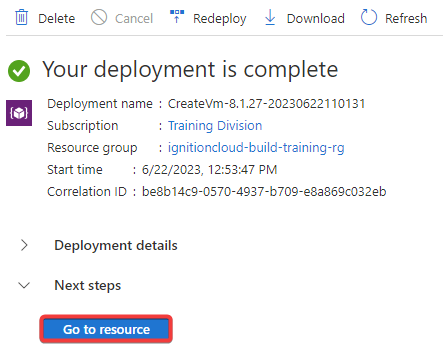
Azure will begin creating your requested resources. After your resources are finished building, click on Go to resource under Next steps to go to your VM overview.
Create a Virtual Machine From Your Recently Created
This method assumes that you have already created a previous virtual machine using the Azure Marketplace Cloud Edition Image.
-
Access your Azure console.
-
Click on More services.

-
Click Marketplace under the General section.

-
Click on Recently created in the My Marketplace section.

-
Click on the Ignition Cloud Edition image.

-
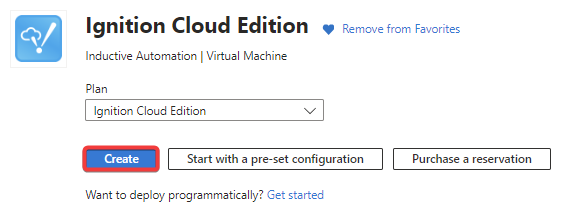
On the Image Description page, click Create. This will open a wizard for you to enter details about your new VM.
-
Complete the prompts to create your VM. For specific guidance through this form, see the Virtual Machine Creation Process Example section below. Once complete, click on Review + create.
Since we started creating the VM from the image that is already located in our Subscription, we do not need to manually select a Subscription or Resource Group during this process.
-
Azure will begin creating your requested resources. After your resources are finished building, click on Go to resource under Next steps to go to your VM overview.
-
From the VM overview page, copy the public IP address and paste it in a different tab to access the Gateway.
Virtual Machine Creation Process Example
This section demonstrates how to configure various settings when creating your VM.
-
The Basics page contains many fundamental properties, explained below.
-
Begin by selecting your Subscription and Resource Group in the Project details section.

-
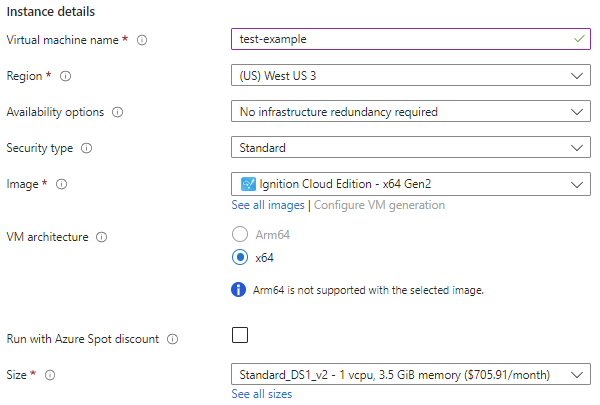
In the Instance details section, fill out the required fields (name, region, image, and size), and configure any other settings you'd like. The image you select should be called Ignition Cloud Edition.
-
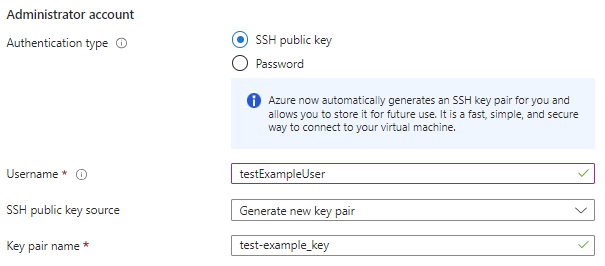
In the Administrator account section, you can choose what kind of authentication you want to use, along with other security features.
-
-
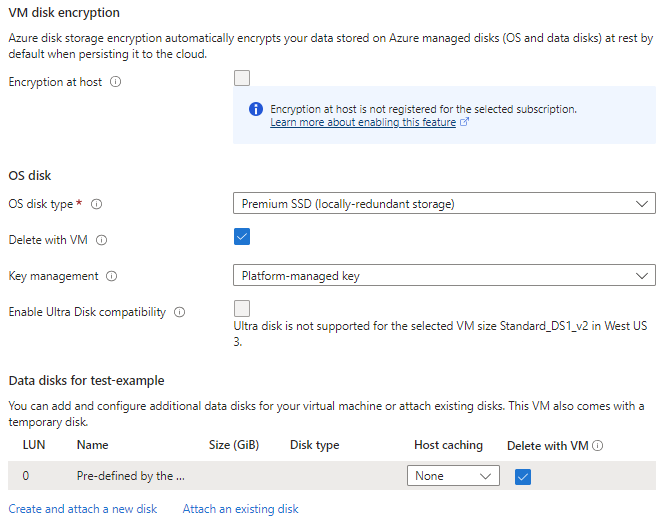
The Disks page will allow you to configure various storage elements, such as encryption and adding more data disks. The only settings we will change in this example are checking both Delete with VM settings to be true.
-
The Networking page will allow you to do things such as create a virtual network, subnets, and more.
-
You can select your virtual network and configure other networking properties in the Network interface section. In this example, we will create a virtual network only.
noteIf you are using this virtual machine for demonstrative or testing purposes, we recommend enabling the Delete public IP and NIC when VM is deleted setting.
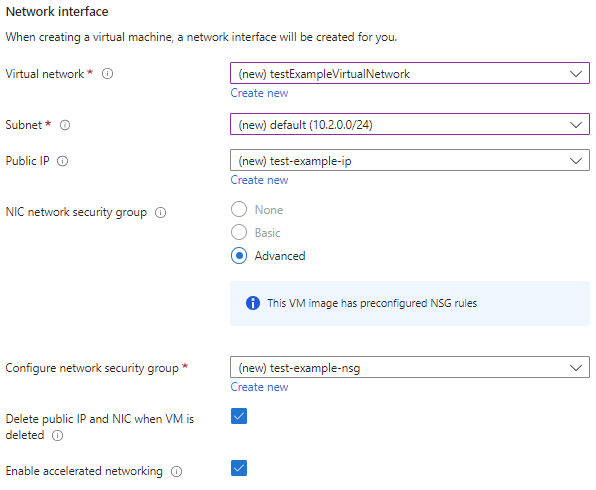 note
noteThe Azure Marketplace Image listing will preconfigure ports 80 and 443 (needed to access the Gateway via non-SSL and SSL, respectively) to already be open as inbound rules.
-
The Load balancing section will allow you to configure a load balancer to help with network traffic. In our example, we will leave this blank.

-
-
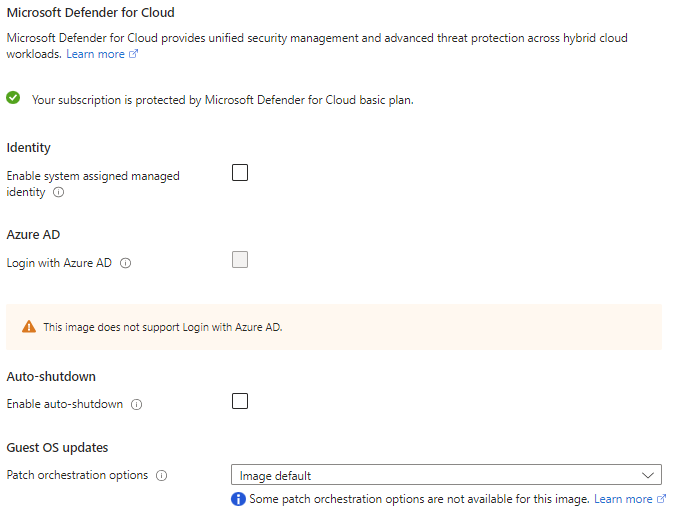
The Management page will allow you to configure authentication features, auto-shutdown, and more. We do not need to modify any settings here so each setting for our example will be default.
-
Next is the Monitoring page, in which you can set up alerts and diagnostics information. Similar to the Management page, our example will not change any of these settings.

-
After Monitoring, the Advanced page contains more specialized properties, which are explained below.
-
Extensions allow you to add new features such as antivirus software, after the VM has already been deployed. See Microsoft's documentation on extensions.

-
VM applications contain files you can download and install on your virtual machine. One benefit of using a VM application is allowing users to update programs on the VM without also needing to also update the VM itself. You can read more about VM applications on Microsoft's official documentation.

-
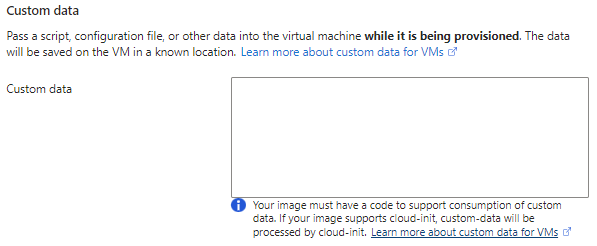
Custom data gives users the ability to pass scripts or other data to the virtual machine as the VM is being provisioned. More information about custom data can be found on Microsoft's official documentation.
-
The User data field is similar to the custom data field, with the main difference being that user data can be accessed until the VM is deleted. See Microsoft's documentation on user data.

-
The Performance (NVMe) section improves the disk performance of your VM when the Higher remote disk storage performance option is enabled. See Microsoft's documentation on when this setting can be utilized.

-
The Hosts, Capacity Reservations, and Proximity Placement Group sections allow you to configure various settings to isolate and reserve resources.
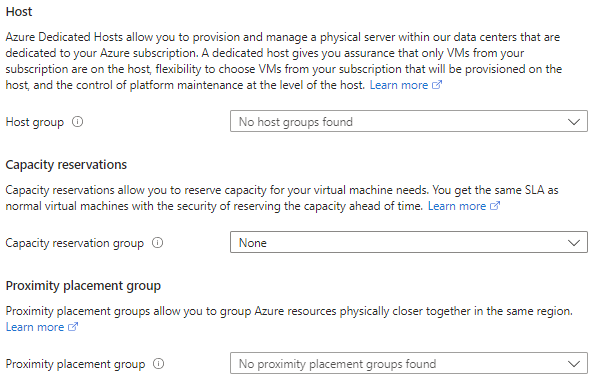
- Click here for Microsoft's documentation on Hosts.
- Click here for Microsoft's documentation on Capacity Reservation.
- Click here for Microsoft's documentation on Proximity Placement Groups.
-
-
Finally, the Tags page will help you organize and consolidate various resources. See Microsoft's recommendations on using tags for more information.

Below is a list of available resource tags:
- Auto-shutdown schedule
- Availability set
- Disk
- Network Interface
- Network security group
- Public IP address
- Recovery Services vault
- SQL Virtual Machine
- SSH key
- Storage account
- Virtual machine
- Virtual machine extension
- Virtual network
-
Once you have finished configuring your virtual machine, go to the Review + Create page. Azure will attempt to validate your settings and display a banner at the top of the page once validation is complete. Go through the summary of settings on this page. If you are satisfied with your choices, click the Create button.