Cloud Edition - AWS Networking and Security
This page details various networking and security settings you may need to configure for your Cloud Edition EC2 instance.
Basic Networking and Security Requirements
When creating an EC2 instance and launching Cloud Edition, there are some networking and security configurations you need to define, such as opening the specific ports Ignition uses. See the Configuring Security Groups section for more details on allowing traffic through ports.
The following is a list of configurable items you typically need when connecting to a Cloud Edition EC2 instance. Note that this is not a comprehensive list; it is meant to show the fundamental features that you need to set up for your EC2 instance. See the official AWS documentation for a full list of VPC features you can utilize in your architecture.
- Virtual private clouds (VPC)
- Subnet
- IP addressing
- Routing (route tables)
- A way to route traffic
Examples
The following examples show how to configure the bulleted items in the Basic Networking and Security Requirements section above. These examples are demonstrative, and may not reflect how you want to configure your own network and security.
Virtual Private Clouds (VPC)
Your AWS region will likely have a default VPC. While you can use the default VPC for your EC2 instance, the steps below will help guide you through creating a dedicated VPC.
-
Go to the VPC Service in your AWS Console, and click on Create VPC.
 note
noteIn addition to the VPC, you can customize Availability Zones, public and private subnets, endpoints, and more here. In this example however, we will only be configuring the VPC.
-
Configure the VPC settings you want. We are only using an IPv4 CIDR block, and not IPv6, so our configuration below is fine as is. Once you are done, click Create VPC.

-
You should now be able to select your newly created VPC when creating your EC2 instance.

Enabling DNS Hostnames and DNS Resolution
If you created your VPC only like in the example above, you may also need to enable DNS hostnames and/or DNS resolution. The steps below show how to enable DNS hostnames and resolution after you create your VPC.
-
Go to the VPC Service in your AWS Console.
-
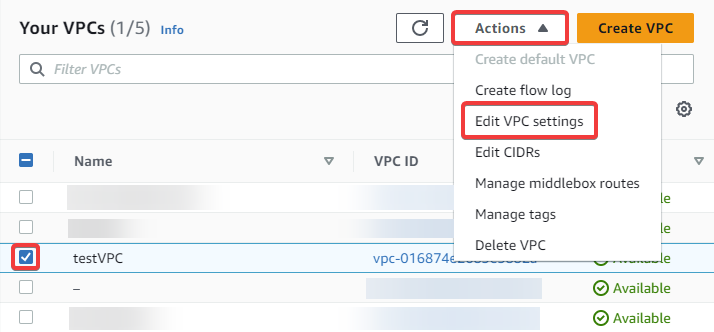
Select your VPC, then click on Actions on the top left, followed by Edit VPC settings.
-
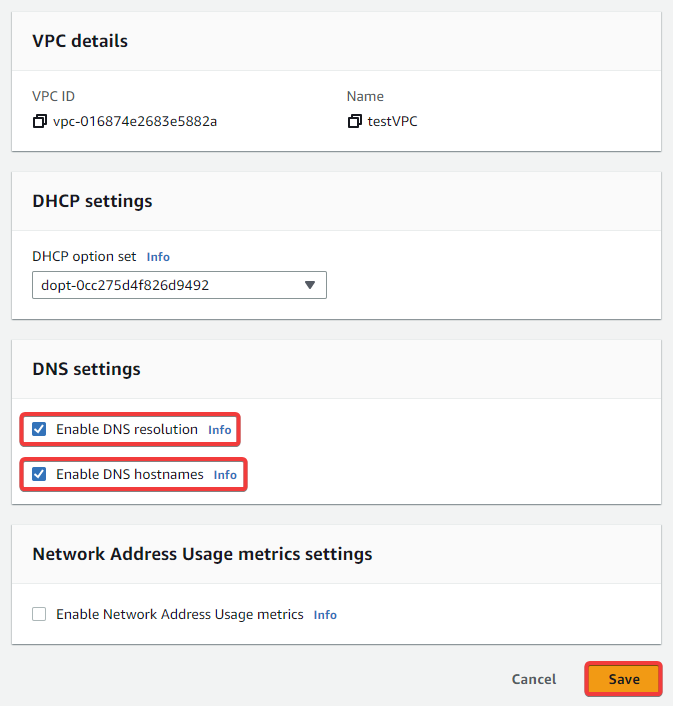
Enable DNS resolution and DNS hostnames, then click Save.
Creating Subnets
-
Go to the Subnets Service in your AWS Console.
-
Click on Create subnet.

-
Select the VPC to create the subnet in.

-
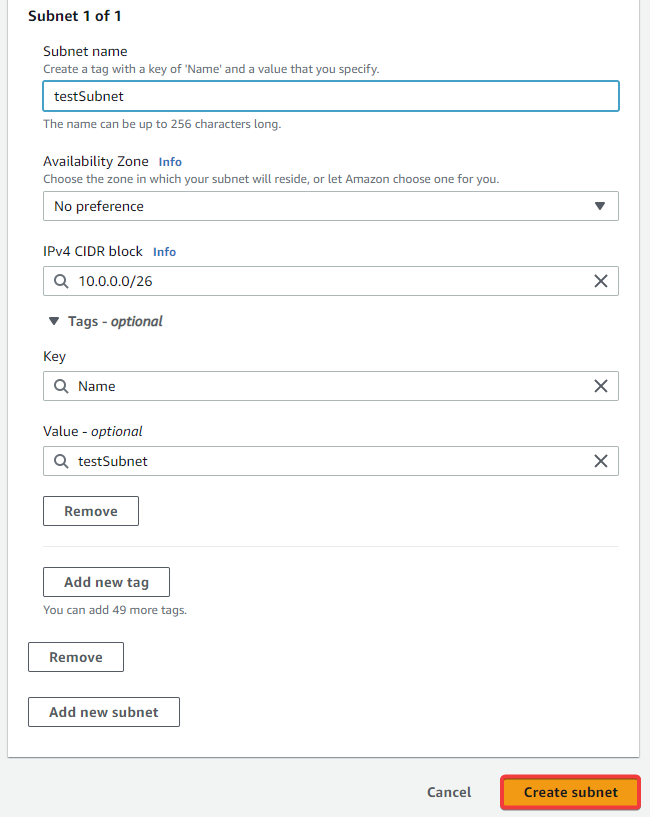
You will be prompted to configure the settings for your subnet. Fill out the form, then click Create subnet.
Configuring Security Groups (IP Addresses and Ports)
You may need to create inbound or outbound rules in the security group your instance is using to allow network traffic through your firewall.
Ignition Cloud Edition will default to using port 80 if not using SSL and port 443 when using SSL, instead of ports 8088 and 8043, respectively. See the Gateway Port Reference page for more information on webserver ports.
Inbound and Outbound Rules
The following example shows how to configure your security group to allow traffic. While you can configure security group rules when creating an EC2 instance, we will configure rules through the Security Groups console.
Security groups allow all outgoing traffic by default, including incoming traffic in response to outgoing traffic. You will not be able to configure outbound rules when creating a new EC2 instance; however you will be able to configure outbound rules on the security group itself, as demonstrated below.
-
Go to the EC2 Service in your AWS Console.
-
Click on Security Groups under the Network & Security section.
 note
noteYou can also set up security groups when creating your EC2 instance.
-
All your available security groups should show up as a list. Click on either the security group ID of the security group you want to modify, or check its checkbox to select it.

-
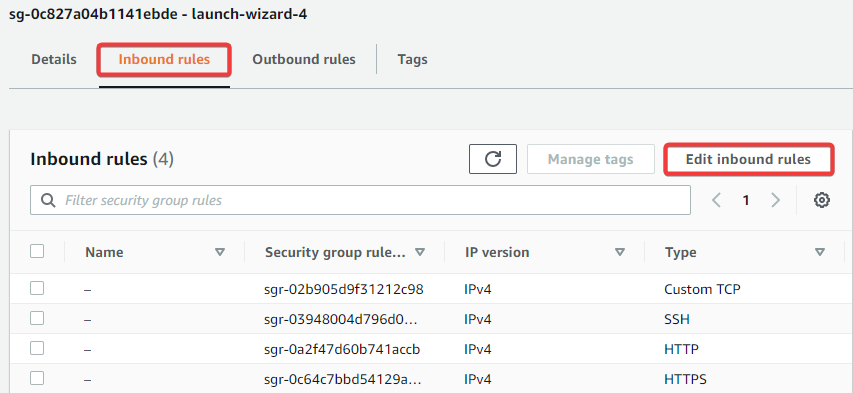
You should have a few tabs to select from, including Inbound Rules and Outbound Rules. Click on the tab you want to edit the rules for, and then click on the applicable edit button.
-
Configure, add, remove, or modify your rules. Once you are finished, click on Save rules.
 Notes
Notes-
The screenshot above shows a rule configuration where all IP traffic is allowed. For security purposes, we recommend configuring your rules to allow only trusted IP addresses.
-
A Custom TCP rule is required to allow Gateway Network traffic, which uses port 8060.
-
-
Your security group should now be using the updated rules and allow traffic flow through the specified ports.
Route Tables
Route tables are created automatically when you create your VPC. You can also create multiple custom route tables for a single VPC.
-
Go to the Route tables service in your AWS Console
-
Click on Create route table.

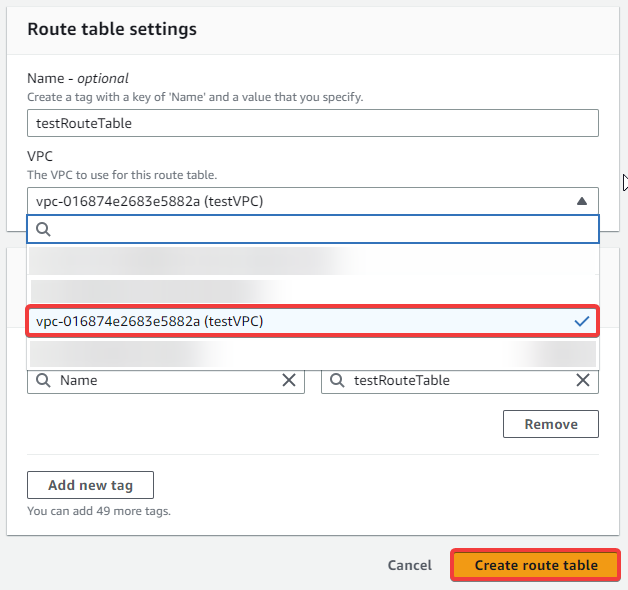
-
You will be prompted to give your route table an optional name and select the VPC to use for your route table. Complete the form and click on Create route table.
Internet Gateway
Internet gateways allow traffic and communication between your VPC and the internet.
This example uses internet gateways, which are easy to set up but may be less secure than other options. For security purposes, you may want to explore different methods of connecting to the internet. See the official AWS documentation for connectivity options.
-
Go to the Internet gateway service in your AWS Console.
-
Click on Create internet gateway.

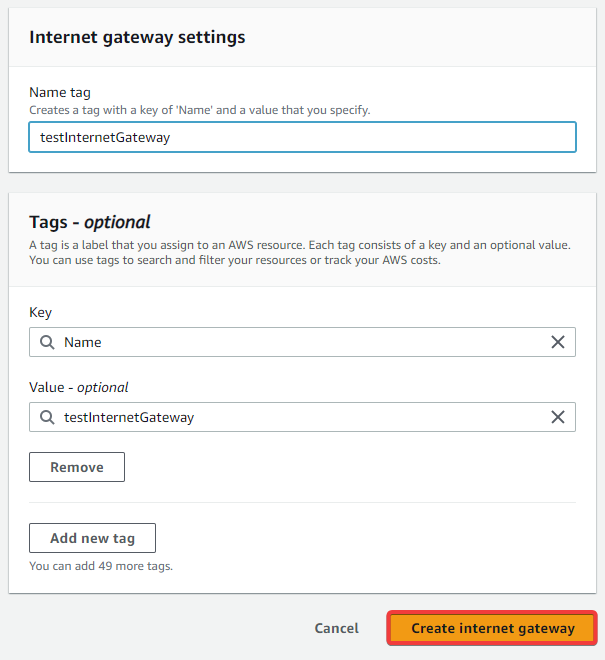
-
Name your internet gateway, then click Create internet gateway.
-
Your internet gateway is now created, but is detached from your VPC. To attach your internet gateway, go back to the Internet gateway service.
-
Select your internet gateway, then click on Actions, followed by Attach to VPC.

-
Select the VPC you want to attach the internet gateway to, then click Attach internet gateway.

Creating a Gateway Network (AWS Instances)
After configuring your security group's inbound and outbound rules, ports, network and security, you can create a Gateway Network with two Cloud Edition Gateways hosted on AWS.
-
Go to the EC2 Service in your AWS Console.
-
Click on Instances under the Instances section.

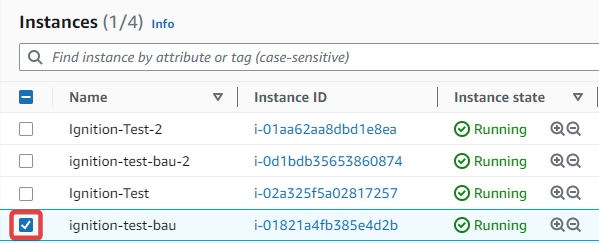
-
Select the target AWS instance you want to connect to by clicking on the target's checkbox. Information about the instance should populate on the bottom.
-
On the Details tab, make a note of your target Gateway's IP address, then go to the Gateway you want to make the outgoing connection from.

-
On the Gateway that will be making the outgoing connection, go to the Gateway webpage's Config page > Networking > Gateway Network > Outgoing Connections > Create new Outgoing Gateway Connection...

-
Fill out the Gateway Network Settings page using the information you gathered from your AWS instance, then click Create New Outgoing Gateway Connection.

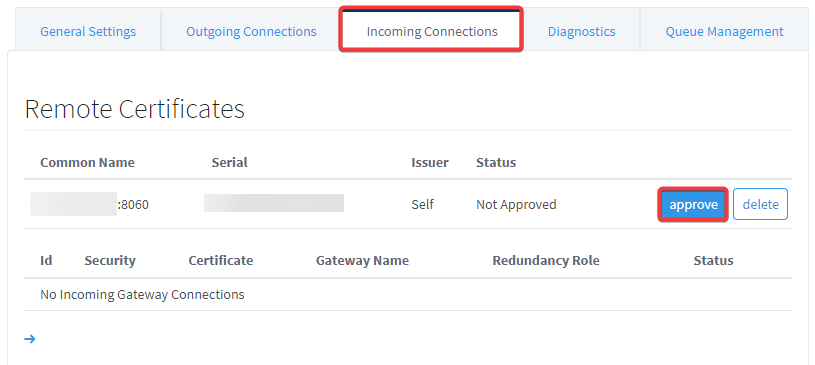
-
After setting up your Outgoing Connection, navigate to the target Gateway's Config page > Networking > Gateway Network > Incoming Connections. The target Gateway should have an Incoming Connection request from the outbound Gateway. Click on approve to approve the certificate, then Confirm.
-
The outbound Gateway will now show up under the certificate. Click on More, then approve, then Confirm.
-
The Gateway will take a few seconds to establish the connection. If you run into any issues creating your Gateway Network, contact the Support Department.