Cloud Edition - Azure Networking and Security
This page details various networking and security settings you may need to configure for your Cloud Edition virtual machine.
Basic Networking and Security Requirements
The following is a list of configurable items you need when connecting to a Cloud Edition virtual machine. Note that this is not a comprehensive list; it is meant to show the fundamental features that you need to set up for your virtual machine. See the official Azure documentation for a list of networking features you can utilize in your architecture.
- Virtual network
- Subnet
- Network Security Group (NSG)
- Public IP
The virtual network and available subnets are configured during the same process on Azure.
Additionally, you will need to allow traffic through your firewall to the *.microsoft.com and *.digivert.com domains if you are using port 80 or 443. Without this, your Gateway will go into trial mode.
Examples
The following examples show how to configure the bulleted items in the Basic Networking and Security Requirements section above. Each example demonstrates how to create their respective resources through both the virtual machine creation wizard and Azure services. These examples are demonstrative, and may not reflect how you want to configure your own network and security.
Creating a Virtual Network
You can create a virtual network during the virtual machine creation process or through Azure services.
Virtual Network - Virtual Machine Creation Process
-
Begin by accessing the Create a virtual machine wizard. You can find instructions on creating your virtual machine on the Image Access Instructions - Azure page.
-
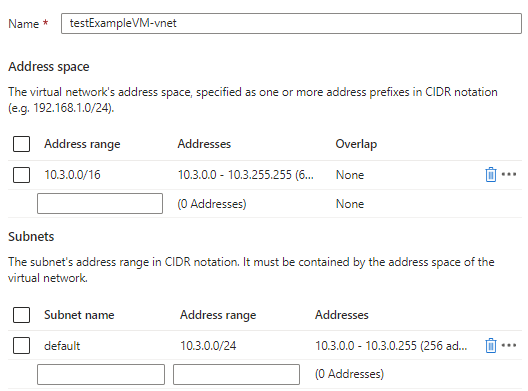
Complete the wizard steps until you reach the Networking page. Note that the virtual network field is already filled out, using your virtual machine name as part of the name of the virtual network.
noteIf you selected a Resource Group on the Basics page, Azure will attempt to use a pre-existing virtual network originating from the chosen Resource Group.

-
From here, you could also choose another virtual network to use or configure the new virtual network. If you want to configure the new virtual network, click Create new. This will allow you to specify a different address range and subnet(s). In this example, we will use the default address range and subnet.
Virtual Network - Azure Services
-
Go to your Azure services on the Azure console's home page.
-
Click on More services.

-
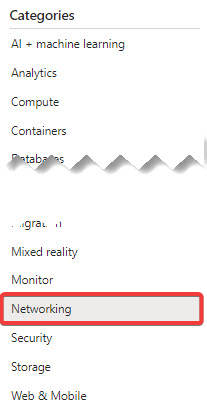
Click on Networking in the Categories sidebar.
-
Click on Virtual networks in the Networking foundation section.

-
Click on Create in the upper left corner.

-
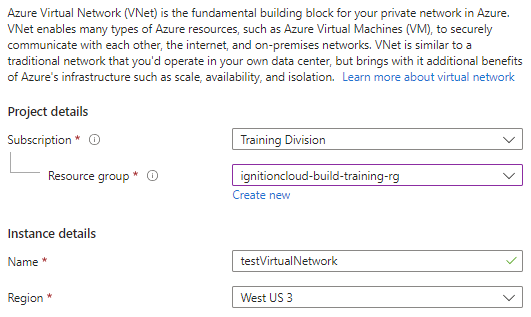
A virtual network creation wizard will appear and start on the Basics page. Begin by selecting the subscription, resource group, and region your new virtual network will reside in, and give your virtual network a name.
-
Click Next: IP Addresses on the bottom.
-
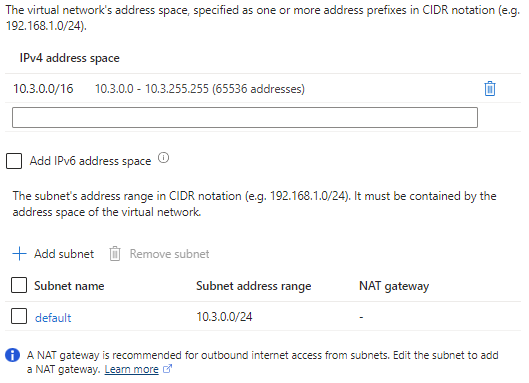
The IP Addresses page contains settings to configure address spaces and subnets. We will use the default address space and subnet here.
-
Click Next: Security.
-
The Security page allows you to enable or disable various security settings.
noteSince this example is demonstrative, we are using the default Disabled settings. For security purposes however, we recommend enabling security features for your virtual network.

-
Click Next: Tags once you finish configuring security.
-
The Tags page allows you to group and consolidate various resources by applying the same tag. We will not set up any tags for our example.

-
Click Next: Review + create.
-
Azure will now attempt to validate your settings, and will show a banner at the top of the page once validation is complete. Review the summary of your chosen settings. If you are satisfied with your choices, click Create.
Create a Network Security Group
Azure's Cloud Edition Image will come with preconfigured network security group rules with ports 80, 443, and 22 open. You can still create your own during the virtual machine creation process or through Azure services.
When creating a new network security group from the wizard, ports 80, 443, and 22 will be open by default. Creating a network security group through Azure services will require you to manually open the specified ports.
Port 22 is typically used to get admin access and shell into the virtual machine. Since port 22 is open by default, it may be prudent to remove this rule depending on your network architecture. Port 80 is required to access the Gateway in a non-SSL environment, while port 443 is required to access the Gateway using SSL. Keep in mind that you will still need to enable SSL/TLS on the Gateway before using port 443.
Regardless of how you utilize your network security group, we recommend limiting access to required IP addresses only for security purposes.
Network Security Group - Virtual Machine Creation Process
-
Begin by going to the Create a virtual machine wizard. You can find instructions on creating your virtual machine on the Image Access Instructions - Azure page.
-
Complete the steps until you reach the Networking page.
-
Azure will create a new network security group based off the name of your virtual machine. To edit it, click Create new.
 note
noteWhen creating a network security group through the virtual machine creation wizard, the new network security group will be configured with the image's network security group rules. Ports 80, 443, and 22 will already be open and allow incoming traffic to hit those ports.
-
You will be taken to a list of inbound and outbound rules. From here, you can add more rules by clicking Add an inbound/outbound rule at the end of each list.
 note
noteIf you want to add or modify your rules later, you can edit your network security group in Azure Services.
-
After you finish configuring your network security group, click OK at the bottom.
Network Security Group - Azure Services
-
Go to your Azure services on the Azure console's home page.
-
Click on More services.

-
Click on Networking in the Categories sidebar.

-
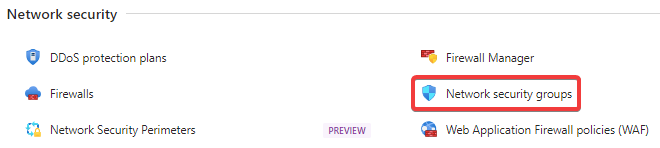
Click on Network security groups in the Network security section.
-
Click on Create in the upper left corner.

-
A network security group creation wizard will appear and start on the Basics page. Begin by selecting the subscription, resource group, and region your new network security group will reside in, and give your network security group a name.

-
Click Next: Tags on the bottom.
-
The Tags page will allow you to group and consolidate various resources by applying the same tag. We will not set up any tags for our example.
-
Click Next: Review + create.
-
Azure will now attempt to validate your settings, and will show a banner at the top of the page once validation is complete. Review the summary of your chosen settings. If you are satisfied with your choices, click Create.
-
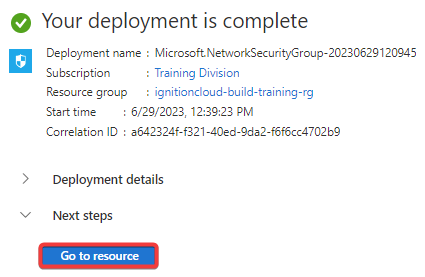
After Azure has finished deploying your network security group, click on Go to resource.
-
Once you reach your resource, you can begin specifying which ports you want to open and limiting access to your Gateway by specifying IP addresses in your inbound security rules. To do these actions, begin by clicking Inbound security rules in the sidebar under Settings.

-
Click on Add in the upper left corner.

-
Change the Source field's value to IP Addresses.

-
Two new fields will now appear. Put the IP addresses you want to allow access from in the Source IP addresses/CIDR ranges. If you would like to also define a port to allow traffic from, you can use the Source port ranges field.
 note
noteAlternatively, you can also put IP addresses you want to deny access from by setting the Action property to "Deny".
-
Add the ports you want to be open and accessible in the Destination port ranges field.
 note
noteIf you have not done so already, you will need to open ports 80 and 443 in order to access the Gateway webpage via non-SSL and SSL, respectively.
-
Choose the protocol you want, as well as whether you want to allow or deny access from the specified IP.
 note
noteUse the TCP protocol when setting an inbound rule to open ports 80 and 443.
-
Set the name and priority of the inbound rule.
-
Click Add. Your inbound security rule will become active and added to your network security group.
Creating a Public IP
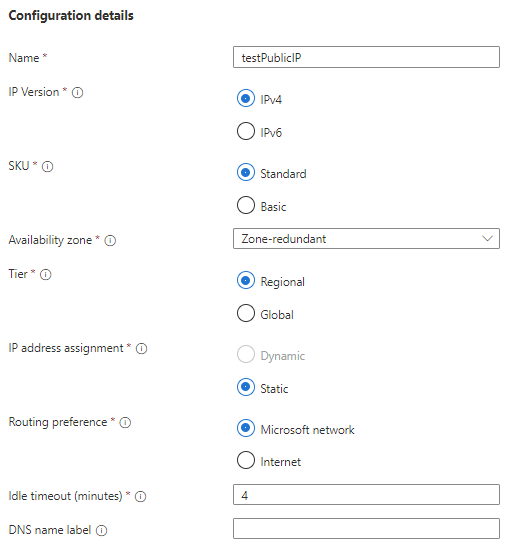
You can create a Public IP in the virtual machine creation wizard or through Azure services. However, creating a public IP through Azure services will give you a few more options to configure, including:
- IP Version
- Availability Zone
- Tier
- Idle Timeout (minutes)
- DNS Name Label
Be careful when creating your public IP, as you will not be able to change many of its settings after creating it.
Public IP - Virtual Machine Creation Process
-
Begin by going to the Create a virtual machine wizard. You can find instructions on creating your virtual machine on the Image Access Instructions - Azure page.
-
Complete the steps until you reach the Networking page.
-
Azure will create a new public IP based off the name of your virtual machine. To edit it, click Create new.

-
From here, you can set the name, SKU, and routing preference.

-
Make your selections, and then press OK at the bottom.
Public IP - Azure Services
-
Go to your Azure services on the Azure console's home page.
-
Click on More services.

-
Click on Networking in the Categories sidebar.

-
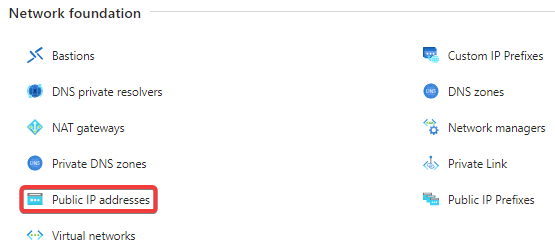
Click on Public IP addresses in the Network foundation section.
-
Click Create in the upper left corner.

-
You will be taken to a public IP creation wizard. Begin at the Project details section and select the subscription and resource group you'd like to deploy your public IP in.

-
Under Instance details, select the region you want to deploy this resource in.

-
The Configuration details section contains all the properties that are specifically related to public IP addresses. In this example, we will leave everything as the default setting.
-
Click Next:Tags at the bottom.
-
The Tags page will allow you to group and consolidate various resources by applying the same tag. We will not set up any tags for our example.

Once you are done with your tags, click Next: Summary.
-
Azure will now attempt to validate your settings, and will show a banner at the top of the page once validation is complete. Review the summary of your chosen settings. If you are satisfied with your choices, click Create.