Navigation - Menubar
You can set up a special menu within the Menubar that allows you to navigate throughout the project using the scripting functions. They can be simple, like swapping to a window, or be more complex in how they navigate around the project. The benefit of using the Menubar for navigation is that it keeps navigation tucked away instead of using up valuable screen space.
Menubar Navigation Example
In this example, we'll set up sibling and child options on the menubar. This example assumes you have at least an Overview window created.
-
In the menubar of the Designer, click on Project then select Client Events.

-
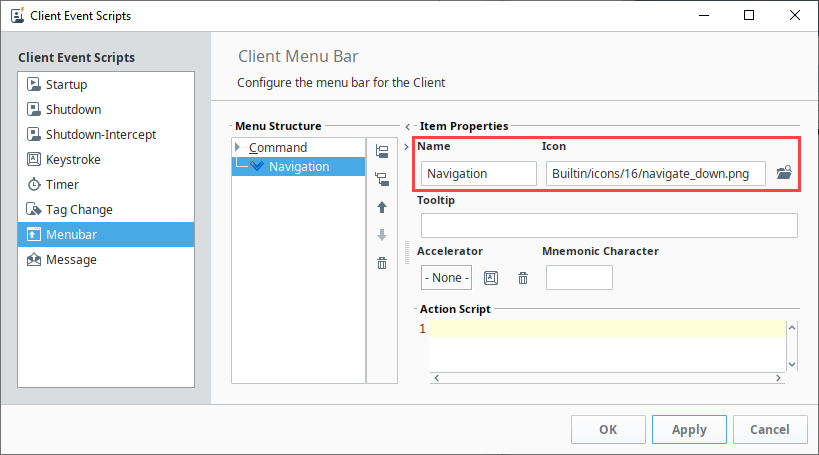
This opens the screen below in the Client Event Scripts space. Click on the Menubar under Client Event Scripts.
-
Select the Add Sibling
 icon to add a Menu Item. Update the Name to a new menu option (i.e., Navigation). You can also add a path to an icon if desired.note
By default, there are three commands under the Command menu option: Logout, Lock Screen, and Exit.
-
Click the Apply button.
-
Click the Add Child
 icon to add a new option under the Navigation menu.
- Give the menu item a name that is appropriate for the window it will be navigating to (i.e., Overview).
- Add a script that will swap to the window.
Code Snippet - Menubar navigationsystem.nav.swapTo("Overview")
-
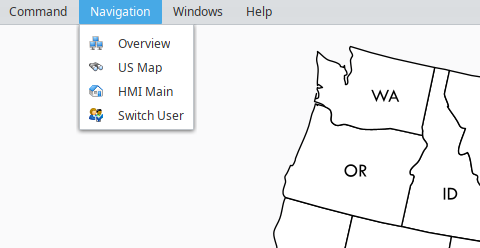
Repeat step 5 to add as many windows as needed. New groups of windows can even be nested within the parent Navigation Menu.
-
Click OK to save your new menu structure.
-
Save your project.
-
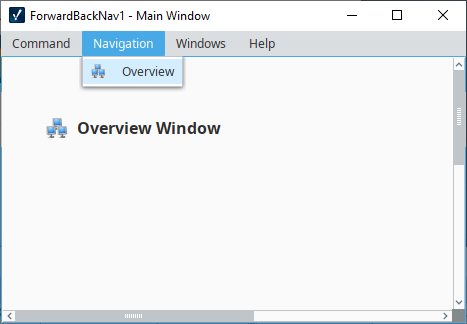
Now you can open the Client to navigate from one window to another using the menubar structure. Notice that the Navigation menu option is located in the menubar because it was created as a sibling, where as the window added as a child is listed under the Navigation tab.