Navigation - Two Tier
Two Tier Navigation is similar to the Tab Strip navigation strategy. It's good for small and regular size project structures where windows are grouped, and lets you organize your main windows into different sections making navigation easy for users. It uses two levels of tabs to navigate around various areas of your project. Once you select a first tier tab, a different set of tabs appear in the second tier to switch between different windows.
This works a bit differently than the default Tab Strip navigation, as the first tier Tab Strip will actually not do any window swapping, which will instead be left up to the second tier of tabs. The Two Tier approach has a docked window that contains multiple sets of tabs. One set is used as a higher level of grouping of windows, and is used to conditionally swap out another set of tabs based upon user selection.
In the image below, the top tier of tabs contains the HMI Screens and Administration tabs. Clicking on HMI Screens makes a second tier of tabs appear (the set containing Overview, Alarms, and Empty). Clicking on the Administration tab would make a different set of sub tier tabs appear. Thus, the top tier of tabs isn't directly responsible for any sort of window navigation. Rather, it's used to make other sets of tabs appear.

Two Tier Navigation Example
In this example, we are using the 2-Tier Tab Nav project template which is selectable upon project creation. This comes with two tiers of tab strips and several default tabs. We will add one tab on the first tier and two tabs on the second tier.
-
Right click on the First Tier Tabs in the Project Browser to add another tab. Select Customizers > Tab Strip Customizer.
-
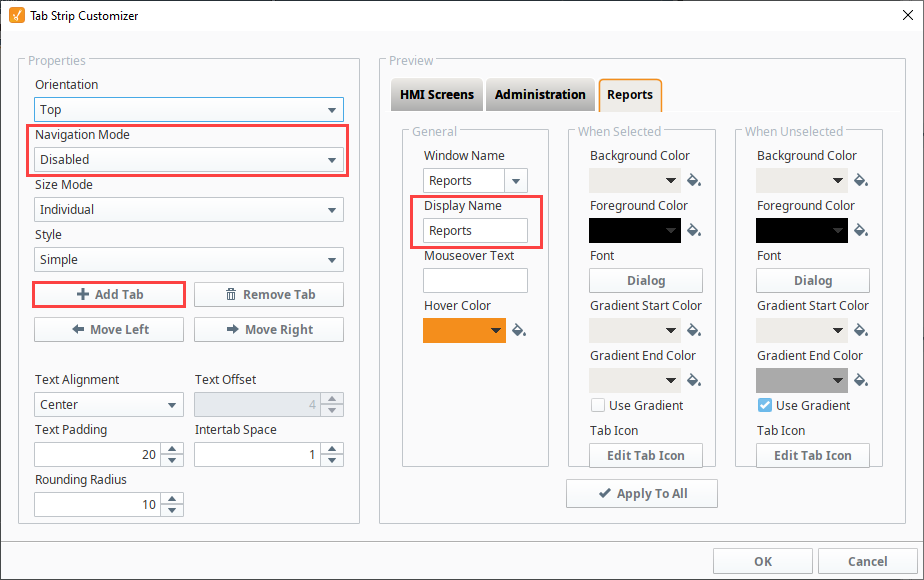
To create a new tab, click Add Tab, and position it on the tab strip any where you like.
-
Enter your Window Name and Display Name. Make sure the Navigation Mode is set to Disabled since this first tab strip is not swapping to any windows.
-
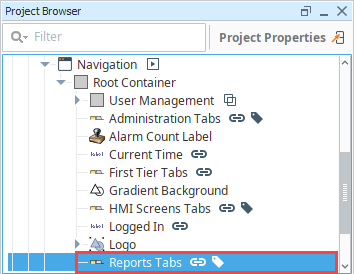
Now let's create a second tier category of tabs for the Reports tab. The easiest way to do this, is copy the second tier of tabs from either the HMI Screens or Administration tabs in the root container of the Navigation folder of the Project Browser. Paste it in the root container of the Navigation folder giving it a unique name identifying what it is (i.e. Reports Tabs).
-
Right click on the Reporting Tabs Tab Strip of the Designer and select the Customizers > Tab Strip Customizer.
-
Add tabs like you would for a normal Tab Strip, but only add tabs fitting that category of windows. In this step, we are adding two tabs: Report 1 and Report 2. Click OK to create the new tabs.
noteThis example assumes you already have some main windows created in your Project Browser (i.e., Report 1 and Report 2).
-
The second tier tabs can be shown or hidden depending on what tab is selected in the first tier.
- Select a second tier Tab Strip (i.e.,Reports).
- Go to the Property Editor, select the Visible property and set it to true, and then select its binding
 icon.
icon. - Select the Expression binding and set up an expression to be true when the appropriate first tier tab is selected, as shown in the image below. Click OK.
{Root Container.First Tier Tabs.selectedTab} = "Reports"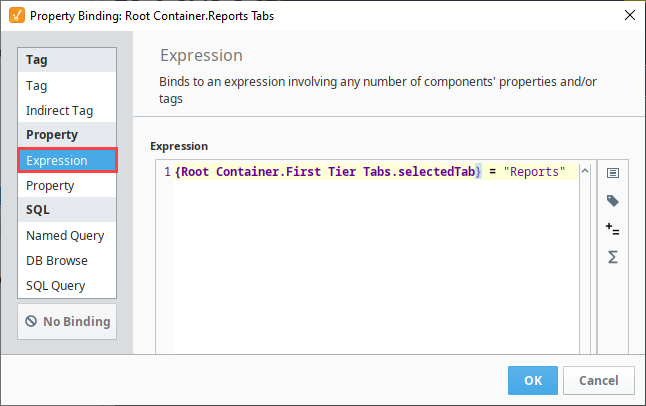
-
Save your project.
-
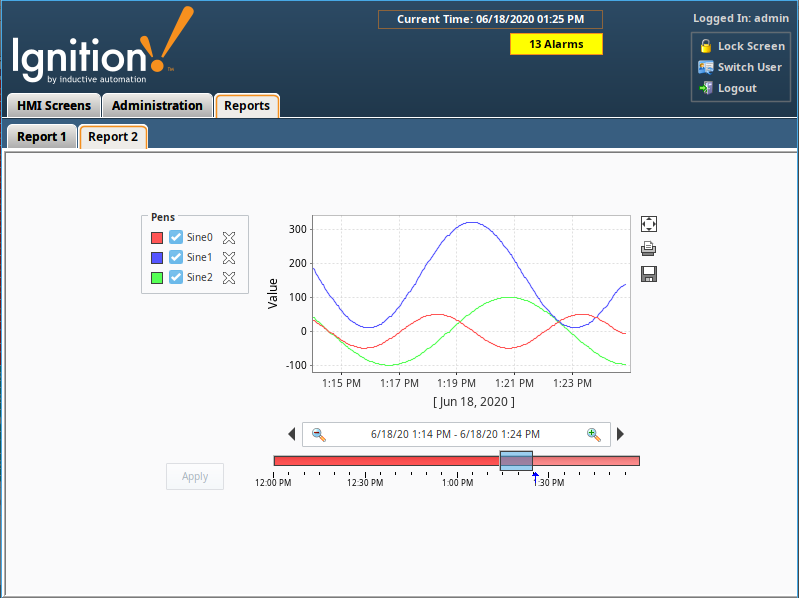
Open your project in the Client, click on the various tabs to see your first and second tier tabs switch between the different windows.
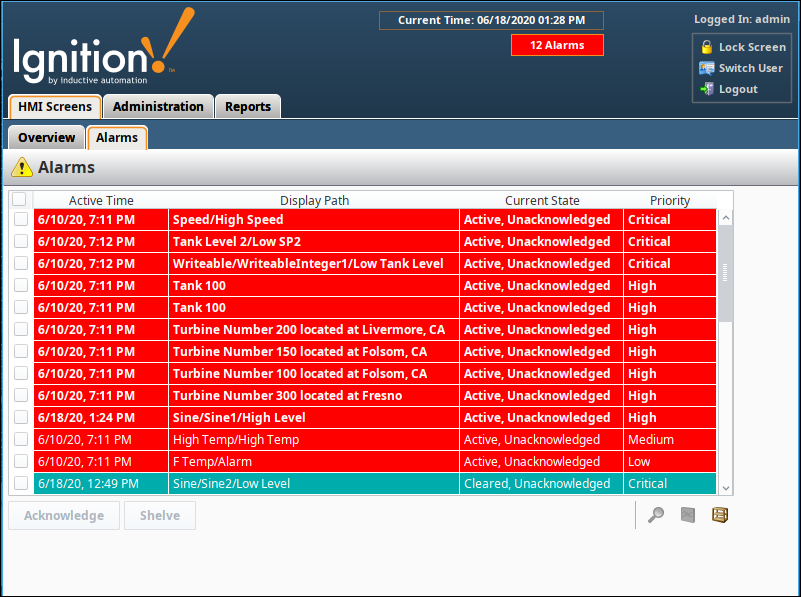
The following images show the first and second tier tabs for HMI Screens and Reports tabs.
The HMI Screens tab shows the Overview and Alarms windows on the second tier.
The Reports tab shows the Report 1 and Report 2 windows on the second tier.