Using Touch Screen Mode
It is very common to deploy Ignition Vision projects on touchscreen computers, such as industrial panel-PCs acting as Human Machine Interface (HMI) or Operator Interface Terminal (OIT). In situations where the PC does not have a keyboard attached, Touch Screen mode can be used to assist with user input. For this reason, all of the Input components in Vision can be enabled for touch screen.
Under normal circumstances, you don't have to do anything special other than enable Touch Screen mode on your project. This will allow the operator to activate Touch Screen mode when they log in. You can also enable Touch Screen mode via scripting.
Touch Screen-enabled Input components all have an expert level property called Touch Screen Mode. This property has three settings:
- Single-Click: The keyboard will appear on a single click
- Double-Click: The keyboard will only appear after a double-click
- None: Disable touch screen support on the component. The component will no longer invoke the touch screen keyboard.
Enabling Touch Screen Mode
Touch screen support is built into Ignition. Turn it on through the Project Properties or scripting in the Designer.
-
From the Project Browser, click on the Project Properties
 icon, or from the menubar go to Project > Project Properties. The Project Properties window is displayed.
 -
Scroll down to Vision > General page, to see the Touch Screen options.
- Touch Screen Mode Enabled: By default, this is enabled, which means an operator can activate the mode on the Startup screen. All Clients can operate in touch screen mode. When Touch Screen mode is enabled, clicking on numeric and text entry boxes will pop up on-screen keyboards that can be used for data entry. You can optionally set the width of any scrollbars (number of pixels wide/tall)
- Touch Screen Mode Active on Startup: This option sets the Clients to start up with the Touch Screen mode active.
-
Change the settings as desired then click OK.
noteMake sure Comm Read/Write is enabled in Project Properties of the Designer.

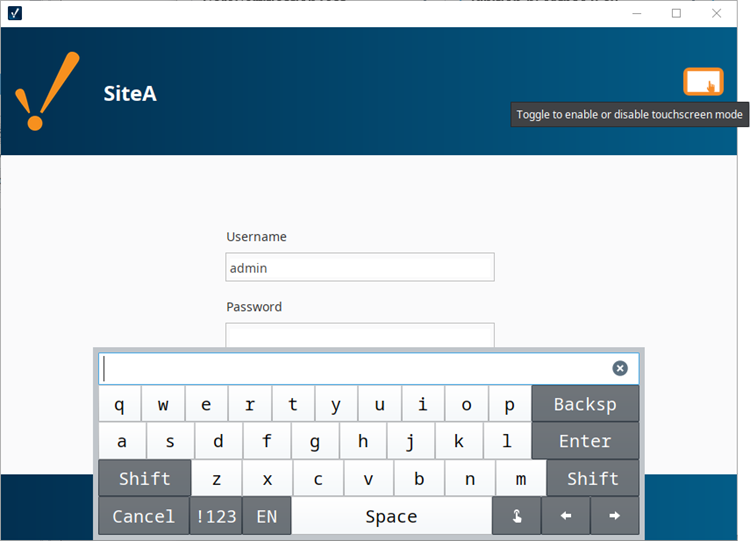
These settings are helpful for mixed-use projects, that is, those that are launched on both touch screen devices and traditional computers and laptops. Once Touch Screen mode is enabled through Project Properties, the Touch Screen icon will appear on top right corner of the project login screen. Click in any of the login fields to bring up the Touch Screen keyboard.
Invoke the Touch Screen Keyboard with Scripting
To handle touch screen logic via scripting, the general pattern is to respond to a mouse event, popup up a keyboard, and then set the component's value to whatever was entered in the keyboard. For example, for a text field, you would write a script like this:
if system.gui.isTouchscreenModeEnabled():
    currentText = event.source.text
    newText = system.gui.showTouchscreenKeyboard(currentText)
See also system.gui.setTouchscreenModeEnabled.
Change the Size of the Touch Screen Keyboard
You can control the size of the Touch Screen keyboard that is displayed in a Vision client.
-
In the Designer, go to Project Properties > Vision > User Interface.
-
Change the percentage for the Touch Screen Keyboard Width property to anything you want.

-
When you launch a Vision client, the Touch Screen keyboard will be displayed in the default percentage of 75%. After you're logged into the client, the Touch Screen keyboard will be set at the value you entered into the Touch Screen Keyboard Width property field.
The Touch Screen Keyboard Width setting controls both the alphanumeric keyboard and the numeric keypad.
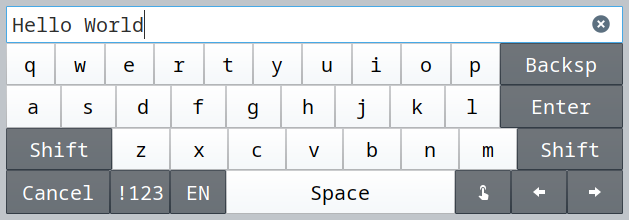
Alphanumeric Keyboard:
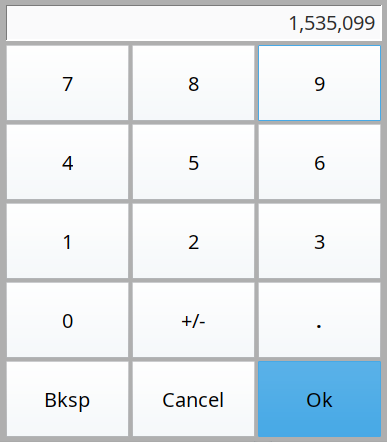
Numeric Keypad: