Dynamic Alarm Attributes
Dynamic Setpoints
Dynamic attributes allow alarm properties to change based on tag values or expressions. Using dynamic setpoints in alarming is useful in situations like when an operator needs to frequently change the high or low setpoints for an alarm evaluation. This way, the setpoint values based on the Tag or Expression bindings can be updated as needed, and the alarm evaluation will automatically update to match the adjusted values.
To Configure Dynamic Setpoints on an Alarm
Consider that you have a tank you'd like to configure an alarm for when the levels go beyond a high or low setpoint. Rather than hardcoding values in the Setpoint properties, you can bind alarms to tags in the system to make them dynamic. This example uses an OPC tag called Tank Level, and two Memory tags: a High SP tag with a value of 85 and a Low SP tag with a value of 20.
-
Double-click on the Tank Level tag to open the Tag Editor.
-
Select Alarms, and click on the Add
 icon to create an alarm named High SP.
 -
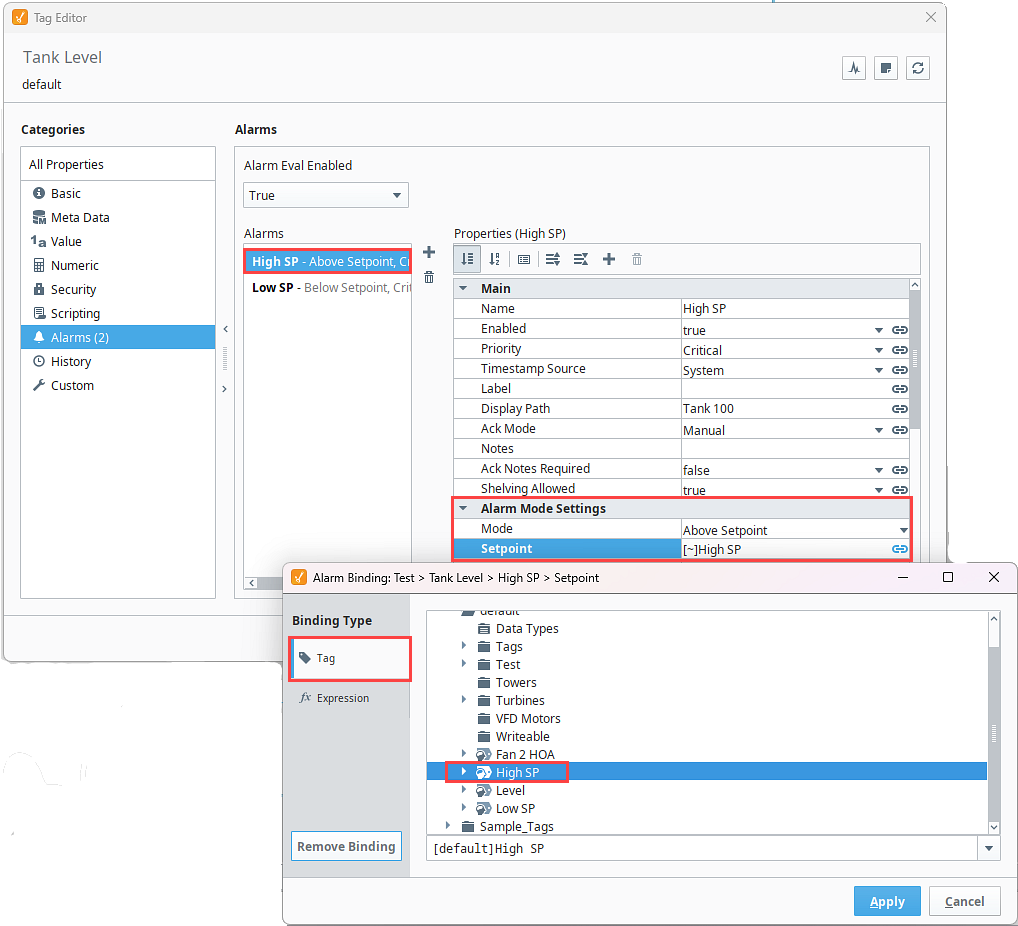
Under Alarm Mode Settings, set the Mode to Above Setpoint.
-
Click on the Binding
 icon for the Setpoint property.
 -
Select the Tag tab and navigate the tag tree to bind the Setpoint property to the High SP tag.
-
Click Apply.
-
Repeat steps 2-6 using the Low SP tag to create a Low SP alarm.
-
Click OK.
Now, the tank alarm will be evaluated based upon the high and low setpoints of each tag. To test it, change the value of the Tank Level tag to 99, and you'll notice it activates the alarm.

Dynamic Enabling and Disabling
Enabling Based on Machine State
Allowing a dynamic condition to determine if an alarm is enabled or disabled is possible inside the alarm's properties, such as to indicate whether or not a machine is on. This example uses two tags: one for the alarm and one to determine the running state of the machine. The tag that will determine whether the machine is on or off will be named Machine On in this example and must be a boolean data type.
-
Select a tag that has the alarm you want to configure. The one we will use for this example is named Machine 100 Alarm.
-
Select Alarms, and click on the Add
icon to create an alarm named Machine 100 Alarm. -
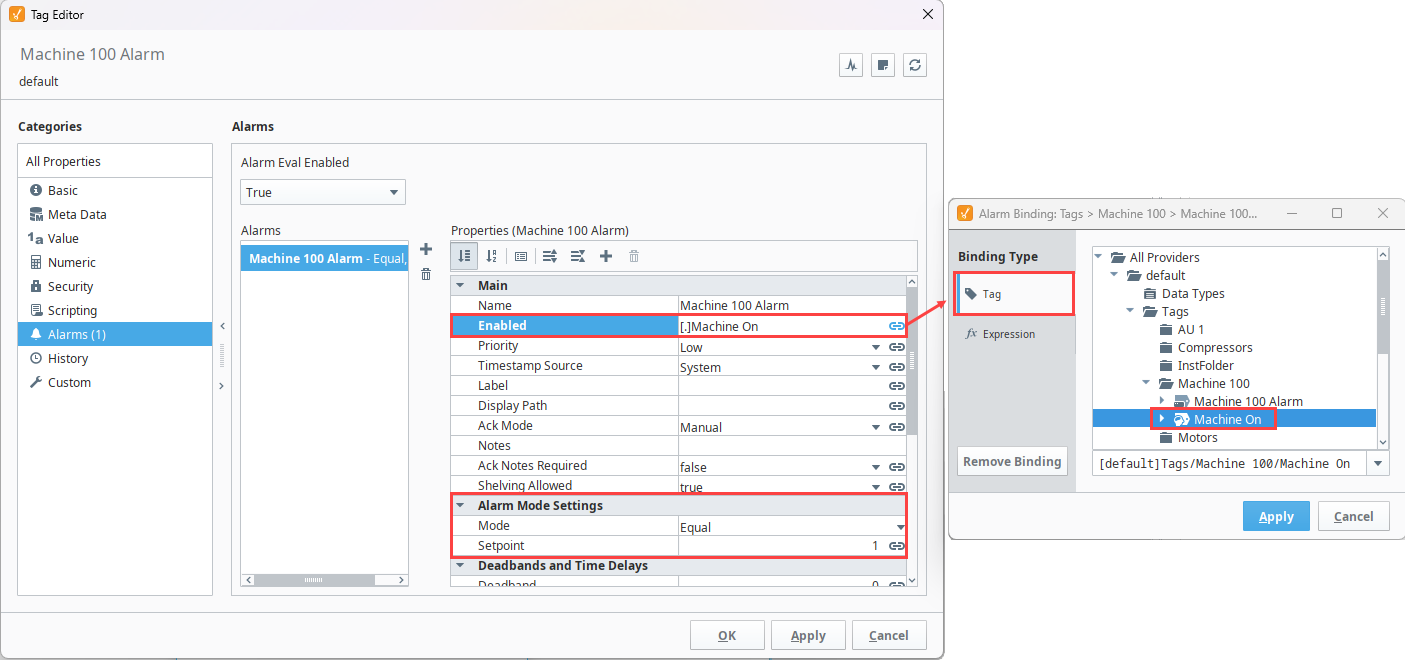
Click the Binding
icon for the Enabled property and bind it to the Machine On tag. -
Set the Mode to
Equaland the Setpoint to1. -
Click Apply.
-
Click OK to save your changes.
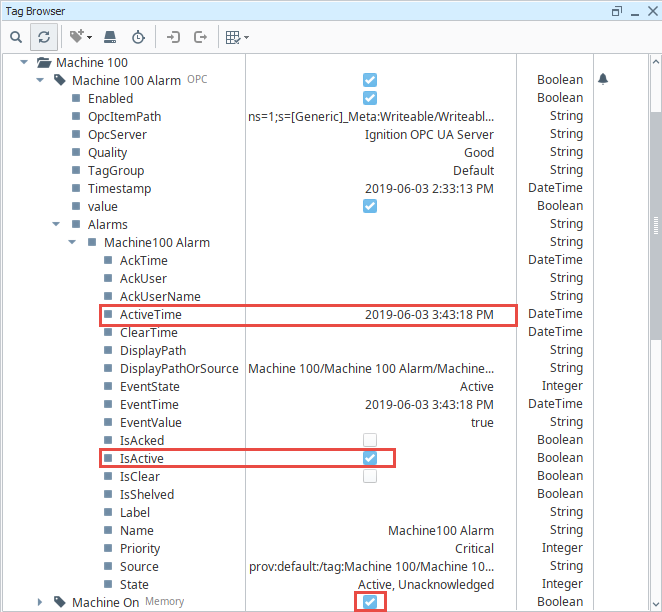
Now, the alarm will only be evaluated based upon the state of the Machine On tag. Set the Machine to true. In the Tag Browser, expand your Machine 100 Alarm tag, and you'll notice the IsActive is now active.
Enabling Based on Time of Day
There may be occasions when you only want alarms to be evaluated at certain times of the day. This example demonstrates how to automatically enable and disable alarms for specific times of the day. Although we will use an expression here, this can also be achieved by binding the alarm's Enabled property to a tag.
-
Select a tag from the Tag Browser to configure the alarm. The one we will use for this example is named Machine 100 Alarm.
-
Select Alarms, and click on the Add
icon to create an alarm named Machine 100 Alarm. -
Click the Binding
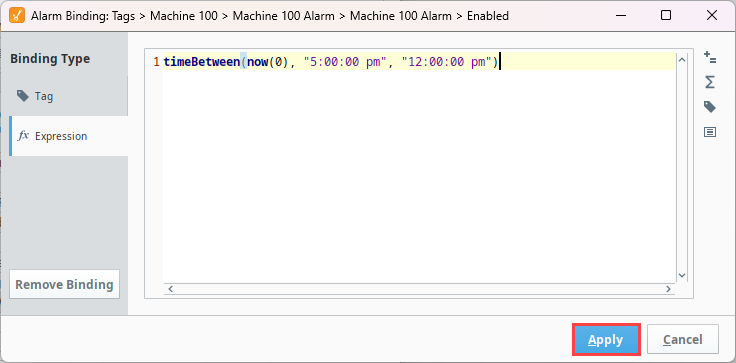
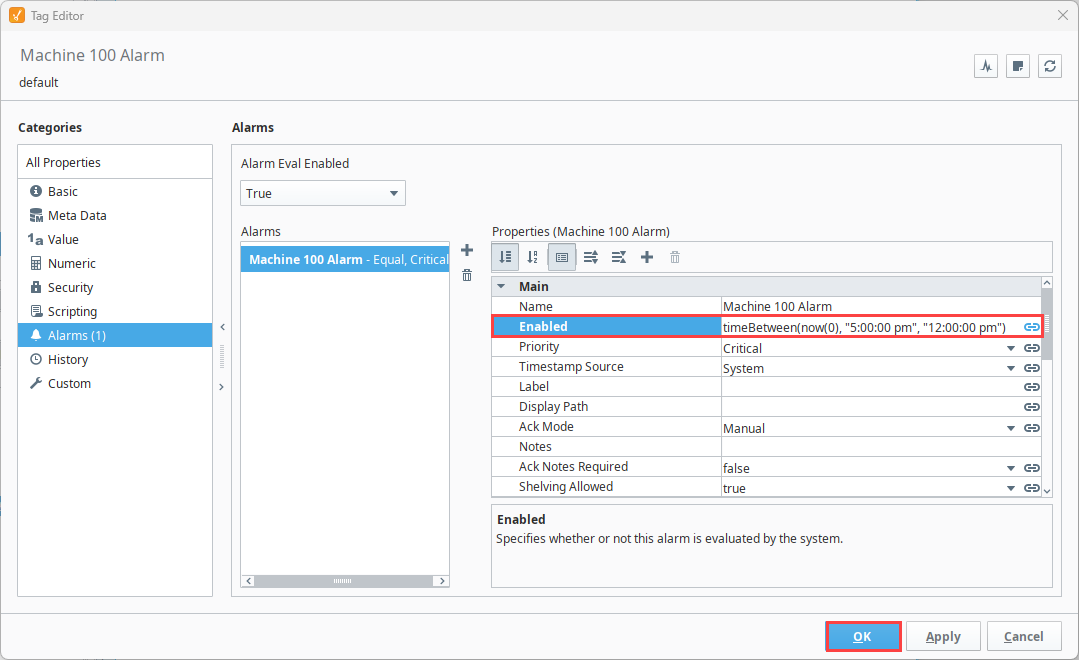
icon for the Enabled property and select the Expression tab on the Alarm popup. -
Enter the code block below to return a value of
trueif the time is between the hours of 5pm and 12pm, andfalseif it is not.timeBetween(now(0), "5:00:00 pm", "12:00:00 pm") -
Click Apply.
-
Click OK to save your edits.
The alarm will now be evaluated when the system clock falls between the time specified in the expression.