Launcher Settings
Launcher Settings
Each launcher has its own settings. To access the settings on a launcher, click Settings on the top right of any launcher window.
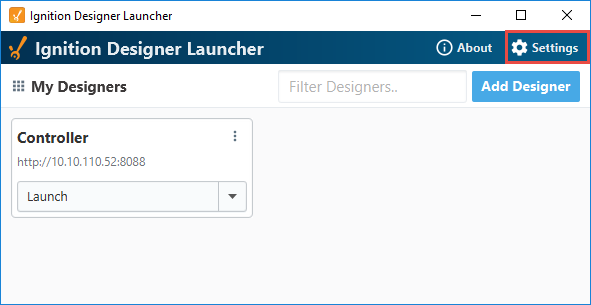
The Settings popup window will appear, listing settings for the Launcher to use. There are some shared settings, such as those under the General tab.
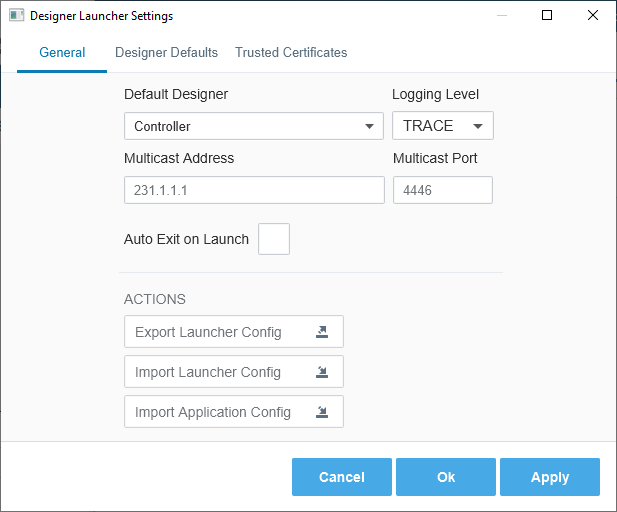
Property Settings
The following tables represent common property settings in the Designer Launcher, Vision Client Launcher and Perspective Workstation. There are a few settings that are unique to each launcher application and are addressed on the corresponding launcher page.
General Property Settings
General Settings (Design Launcher, Vision Client Launcher and Perspective Workstation)
| Property Setting | Description | JSON Name |
|---|---|---|
| Default Application | When set, the Launcher will attempt to automatically launch the specified Application on Launcher startup. If left blank no application will automatically start. | default.application |
| Logging Level | Level of logging that will be used for the Launcher. Useful for our support team, but can be used to help troubleshoot problems with the Launcher. | logger.level |
| Multicast Address | The address that will be used to listen for multicast broadcasts from Gateways. | multicast.address |
| Multicast Port | The port that will be used to listen for multicast broadcasts from Gateways. | multicast.receive.port |
| Auto Exit on Launch | Automatically close the Launcher window when an application is started. | autoexit |
Default Property Settings
Default Settings (Designer Launcher and Vision Client Launcher)
| Property Setting | Description | JSON Name |
|---|---|---|
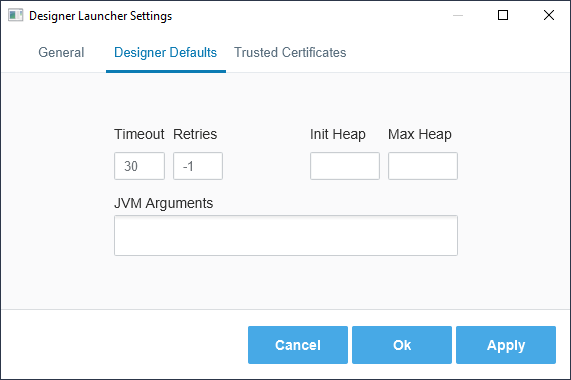
| Timeout | Maximum number of seconds allowed for any Gateway communication. Any communication that exceeds this amount will cause the Launcher to abort and try again (if multiple retries are configured). | timeout |
| Retries | The number of times the Launcher will to attempt to contact a Gateway when launching an application. Available values are:
| retries |
| Initial Heap | Amount of heap memory to be allocated to the application on startup. | init.heap |
| Max Heap | Maximum amount of heap memory allocated to the application. | max.heap |
| JVM Arguments | Arguments to append to client startup. These should start with a -D and be separated by semi-colons. Mostly used by our support teams to aid with troubleshooting. | jvm.arguments |
Trusted Certificates Property Settings
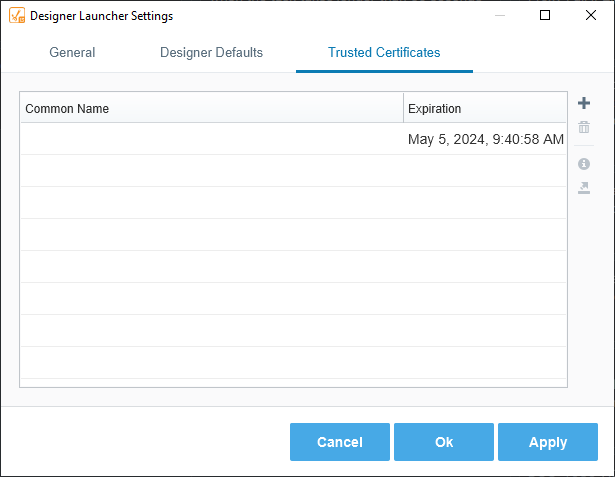
The Trusted Certificates tab shows the list of trusted security certificates by their common names and their expiration dates. Users can also add, delete, view certificate details, and export by clicking the respective icons on the right-hand side of the listed certificates. More information on adding certificates is included under Adding Security Certificates to Clients.
Launcher JSON Configuration Files
The settings for each launcher are stored into a configuration file.
Linux/Mac
~/.ignition/clientlauncher-data

Windows
C:\Users\username\.ignition\clientlauncher-data
On Windows systems, if the Launcher was installed under "all users", then the configuration files are located in directories under:
C:\Users\username\AppData\Roaming\Inductive Automation\
In either case, each type of launcher gets its own JSON configuration file. Launcher and application settings can be modified directly from this configuration file. In addition, some administrative settings are only available in the JSON configuration file. Configuration changes must be made while the Launcher is closed. Notable settings are listed below.
| Settings | Description |
|---|---|
| lock.configuration | Determines if users are able to make changes to the Launcher from the GUI.Set to true to disable the Launcher's Settings menu, prevent users from managing any application from the GUI, and remove the ability to add new applications from the GUI. Defaults to false. |
| version.updates.prompt | When a launcher attempts to launch an application, it checks the Gateway version against the Launcher's download version. If the Launcher has not been updated within a set number of Gateway updates versions (see version.updates.revision.diff ), the launcher will prompt the user to upgrade the Launcher. Setting this property to false will disable this update check. Disabling this property is discouraged, as newer launchers could have beneficial features or security updates. |
| version.updates.revision.diff | Dictates the number of revision differences before a launcher will prompt the user to upgrade. Defaults to 3, meaning 3 minor version updates (for example, 8.1.0 to 8.1.3 would trigger the update prompt, but 8.1.0 to 8.1.2 would not). |
| trust.store | New in 8.1.19 Allows the Launcher to specify which trust store to use. See the Trust Stores section for more details. |
Trust Stores
The table below lists possible values you can use to utilize different trust stores.
| trust.store value | Windows | Mac OS | Linux |
|---|---|---|---|
system | Windows-ROOT | KeychainStore | ca-certificates |
user | Windows-MY | KeychainStore | ca-certificates |
jvm | Java internal cacerts | Java internal cacerts | Java internal cacerts |
The OS trust stores detailed in the table above will be used by running Designers, Vision Clients, and Perspective Workstations once launched. Default is jvm. which will match existing behaviors of launchers that support certificate imports from within the application. All trust store types which are not jvm require launching Clients and Designers against Gateways which include support for the specified type. Retargets also conform to this requirement. Additionally, non-jvm trust stores will map to their named Java Trust Store, with the exception of ca-certificates.
To change the trust.store value for your launchers, you will need to first exit the launcher (if it isn't already closed), then edit the trust.store property in your launcher's .json file. This file is typically located at
C:\Users\[YOUR USERNAME]\.ignition\clientlauncher-data.
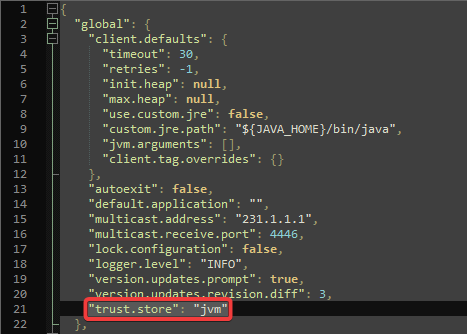
The trust.store property is the last property in the global class
Aside from specifying the trust.store value that you would like the launcher to use, there may be additional, operating system-specific steps you need to go through.
Windows
- Make sure the Launcher you want to update the trust store for is closed.
- Reinstall the .crt file. You can do this by opening the .crt file and clicking Install Certificate....
- Select which users you would like to install the certificate for. Note that you may need administrative permissions to install the certificate for the local machine.
- Select the store where you want the certificate to reside.
- If you are installing the certificate for the current user, you should put the certificate in the
Personalstore. - If you are installing the certificate for the local machine, you should put the certificate in the
Trusted Root Certification Authoritiesstore.
- If you are installing the certificate for the current user, you should put the certificate in the
- Once the wizard finishes installing the certificate, press Finish to complete the operation.
MacOS
- Make sure the Launcher you want to update the trust store for is closed.
- Add your certificate to your operating system's KeychainStore.
- Make sure that the certificate you added is trusted either manually or automatically.
Linux
-
Make sure the launcher you want to update the trust store for is closed.
-
Run the following commands in the terminal:
Linux Terminal Commands$ sudo apt-get install -y ca-certificates
$ sudo cp local-ca.crt /usr/local/share/ca-certificates
$ sudo update-ca-certificates -
Your operating system will then copy any certificates to their appropriate directories and then update the certificate bundle.
For additional information on installing certificates in Linux's trust store, see Ubuntu's official documentation.
CA certificates will instead load PEM bundles or certificate directories as defined by the CA certificates package available for most Linux distributions. Because of this, CA certificates also support two additional system properties, which are listed in the table below:
| Property | Description |
|---|---|
ignition.net.ssl.certDir | System property to use when you are using ca-certificates and want your certificate to load an openSSL compliant certificate directory. |
ignition.net.ssl.pemBundle | System property to use when you are using ca-certificates and want your certificate to load a PEM bundle. |
Adding Security Certificates to Clients
Security certificates can be installed to all of our launchers in multiple ways. This is generally only required when the Gateway hosting the application has SSL enabled, and is using either self-signed certificates or certificates signed by a certificate authority internal to a particular organization.
The process is listed below. Note that you will need to repeat the steps below for each applicable Gateway.
-
Navigate to the Gateway web interface.
-
Download the certificate. Most web browsers provide this functionality, usually via the address bar or some other means.
-
Once you have a copy of the certificate, place the certificate into the following directory:
{user folder}\.ignition\clientlauncher-data\certificates
When adding certificates to this directory, they are trusted immediately with no further action required by the user.
Additionally, there are two more ways to manually add security certificates to the launcher. Both of these methods will mimic the behavior of certificates imported using a trust store. Using the Trusted Certificates tab of the Designer Launcher's settings allows any server with that certificate in its chain of trust to be trusted going forward. However, if you only want to add a single server, you should use the Manual tab on the Add Designer pop up. The process for trusting a single server's certificate uses the Designer Launcher, but the procedure is the same for the Vision Client Launcher, and the Perspective Workstation.
To add a Trusted Certificate and allow all servers with that certificate to be accepted, click the Add icon on the Trusted Certificates tab of the Designer Launcher Settings.
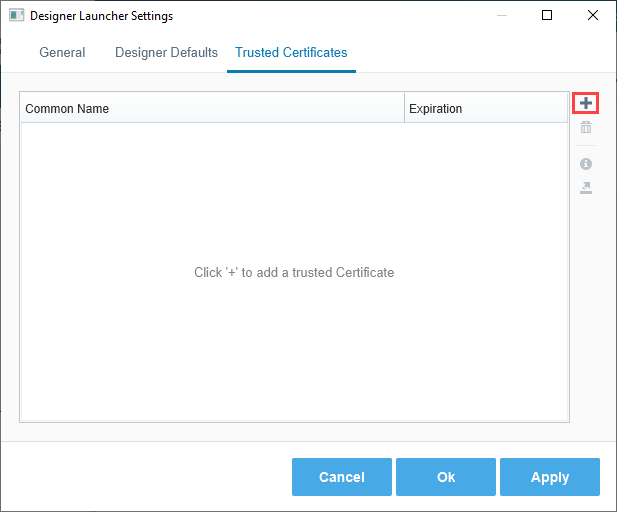
To manually trust a single server's security certificate:
-
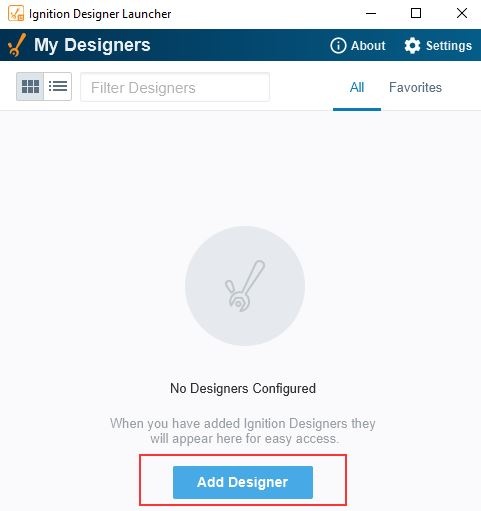
Open the Designer Launcher, and select Add Designer.
-
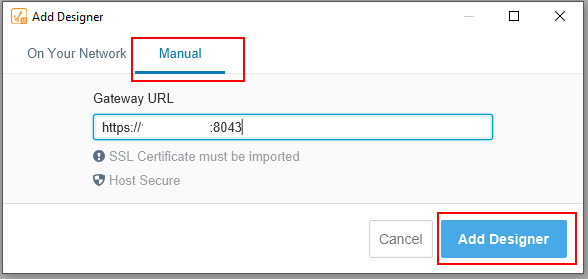
Select Manual, and search for your secure gateway server (https and port 8403). The designer launcher will detect the certificate and the message SSL Certificate must be imported will be displayed. To view the certificate, click on Add Designer.
-
Once you’ve reviewed the certificate, select Trust Certificate to import the certificate.
noteThe certificate will be imported to this directory on your client pc: C:\Users{user}.ignition\clientlauncher-data\certificates.
-
The secure designer will now be added to your Designer Launcher with a green lock icon next to the Gateway URL.
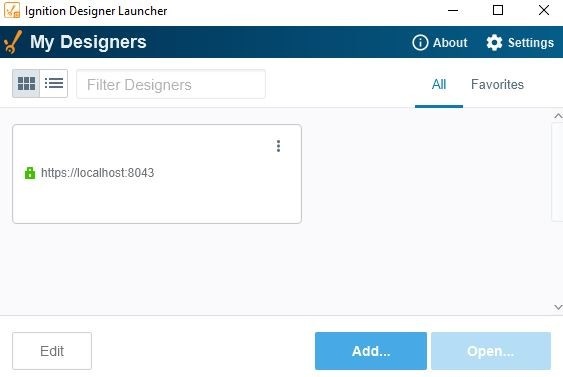
As stated above, the directory where the Trusted Certificates are now stored is under:
{user folder}\.ignition\clientlauncher-data\certificates
When the Gateway's SSL certificates are signed by a recognized Certificate Authority, no additional configuration is required on the launcher.
Options Menu
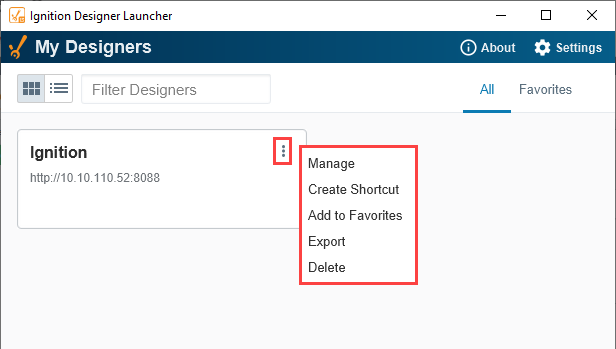
There is a three dots menu on the applications in each of the launchers and Perspective Workstation. When you click on the three dots menu, a dropdown list appears. There are five options available.
Launcher Options Table
| Options | Description |
|---|---|
| Manage | Allows you to configure/update property settings for your application. These properties are unique to each launcher application. |
| Create Shortcut | Creates a shortcut of the application and shows up as an icon on your desktop. |
| Add to Favorites | Creates a Favorite in your application and puts it under the Favorites tab located in the upper right corner. Your application is marked with a star icon denoting a Favorite. |
| Export | Exports the application launcher and configuration settings to a JSON file. It defaults to the application name and you provide the folder path. |
| Delete | Deletes/removes the application name from the Launcher application. |
To view the property settings under the Manage option, refer to the specific launcher application: Designer Launcher, Vision Client Launcher and Perspective Workstation.