Deploying Pre-Configured Launchers
You can deploy a pre-configured launcher to remote systems to avoid installing and configuring the launcher on each machine individually. This approach involves installing and configuring a launcher on one system, packaging the launcher files into a compressed archive, and then extracting that archive on another system.
This page describes how to package the components of a configured launcher and deploy them to another system.
Benefits of a Pre-Configured Launcher
Deploying a pre-configured launcher provides the following benefits:
- The launcher's configuration remains consistent regardless of where it is deployed.
- Required directories and launch files (including SSL certificates stored in the
clientlauncher-data/certificatesdirectory) are included with the deployment. - The local cache used to launch applications remains separate from the launcher configuration, keeping the deployment portable and lightweight.
This page uses a Vision Client Launcher. The same procedure can be used to deploy the Perspective Workstation or Designer Launcher.
Components of a Configured Launcher
A pre-configured launcher consists of the following components:
- The launcher executable
- The JRE for the launcher
- The configuration JSON file
If the configuration JSON file isn't located in the correct directory, the launcher will create a new, empty configuration file.
Configure the Launcher
-
Install a Vision Client Launcher on a system of your choice and take note of the installation directory. You will copy files from this directory in the next section.
- On Windows systems, this is commonly at
C:\Program Files\Inductive Automation\Ignition. - On Linux systems, this is commonly at
/opt/ignition/.
- On Windows systems, this is commonly at
-
Configure one or more applications in the launcher.
-
Verify that the Gateway Address is reachable from the systems where the launcher will be deployed.
The launcher is now fully configured and ready to be packaged for deployment.
Package the Launcher
These steps package the configured launcher into a single ZIP file for deployment.
-
Navigate to the launcher installation directory. This directory contains the launcher and the
jrefolder.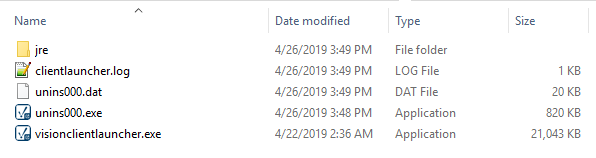
-
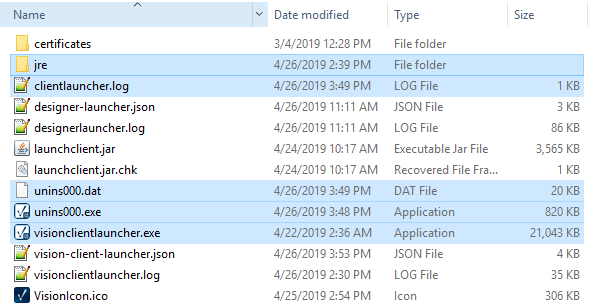
Copy all files from the launcher installation directory into the client launcher data directory. This includes the launcher executable, the
jrefolder, and any supporting files in the directory.- On Windows systems, this is located under the home directory at
C:\Users\userName\.ignition\clientlauncher-data. - On Linux systems, this is located at
/home/user/.ignition/clientlauncher-data.
- On Windows systems, this is located under the home directory at
-
Navigate back to the
.ignitiondirectory, which contains theclientlauncher-datafolder.
-
In the
.ignitiondirectory, create a new folder named.ignition. info
infoThis temporary folder structure ensures that the launcher extracts to the correct hidden directory when deployed on another system. Some operating systems require you to rename the folder using a trailing period (
.ignition.) to create a leading dot. -
Copy the
clientlauncher-datafolder into the newly created.ignitionfolder.tipCopy the folder rather than moving it to avoid disrupting the existing launcher configuration on the source system.
-
Compress the new
.ignitionfolder into a ZIP file.
You now have a ZIP file that can be deployed to another system.
Deploy the Launcher
-
Copy the ZIP file to the target system.
-
Extract the ZIP file into the user’s home directory.
- On Windows systems, this is located at
C:\Users\userName. - On Linux systems, this is located at
/home/user.
- On Windows systems, this is located at
-
Navigate to the launcher executable located under
.ignition/clientlauncher-data. -
Run the launcher.
-
(Optional) Create a shortcut to the launcher.
Redundant Gateways
The Vision Client Launcher supports redundant Gateway configurations. When the launcher connects to a master Gateway, the backup Gateway address is stored in the launcher configuration file.
If the master Gateway is unavailable when the launcher starts, the launcher attempts to connect to the backup Gateway. If neither Gateway is reachable, the launcher alternates between them until a connection is established or the launcher is closed.
SSL Support
When SSL is enabled on a Gateway, the Vision Client Launcher can use the associated security features.
Certificates Signed by a Certificate Authority
If the Gateway uses an SSL certificate signed by a recognized Certificate Authority (CA), no additional launcher configuration is required.
Self-Signed Certificates
If the Gateway uses a self-signed SSL certificate, the certificate must be available locally to the launcher in the .ignition/clientlauncher-data/certificates directory under the user’s home folder.
When a certificate is placed in this directory, the launcher automatically attempts to add it to the local keystore when launching an application.
Troubleshooting
If the Vision Client Launcher fails to start an application, review the launcher log files in the .ignition/clientlauncher-data directory under the user’s home folder. Each launcher writes to a corresponding log file.
- Designer Launcher writes to
designerlauncher.log - Perspective Workstation writes to
workstation.log - Vision Client Launcher writes to
visionclientlauncher.log
Locking the Launcher Configuration
You can lock a launcher configuration to prevent users from making changes. For more information, see the Launcher Settings page.