Creating Translation Lists
Project Translation Overview
This page explains how to create new languages, add translation terms, and build lists you can reuse across projects. Translations are managed in the Translation Manager, a global database stored in the Gateway and shared across all projects.
You can create translations for single words or longer phrases, edit or remove existing terms, and import or export translation lists for use in other environments. Once a translation is defined, it can be applied anywhere in your projects without additional configuration.
- Vision Table components do not support translation. However, the Vision Alarm Status Table and Alarm Journal Table components do.
- For text properties with bindings, translations occur after the binding is evaluated.
Component vs Global Terms
The translation system supports two types of terms, global terms and component terms.
-
Global terms are stored in the Gateway's shared translation database. They can be applied across all projects, windows, and components. Global terms are recommended for most cases because they only need to be defined once and are automatically reused whenever the same key appears.
-
Component terms are available only in Vision and are defined in the Translatable Terms panel for a specific component or window. A component term always takes precedence over a matching global term. Component terms are useful when a translation must differ in a specific context. For example, you may have a global term for "Tank", but in one Vision window you want it to display as "Barrel". Adding a component term ensures that window shows the context-specific translation.
Add a New Language
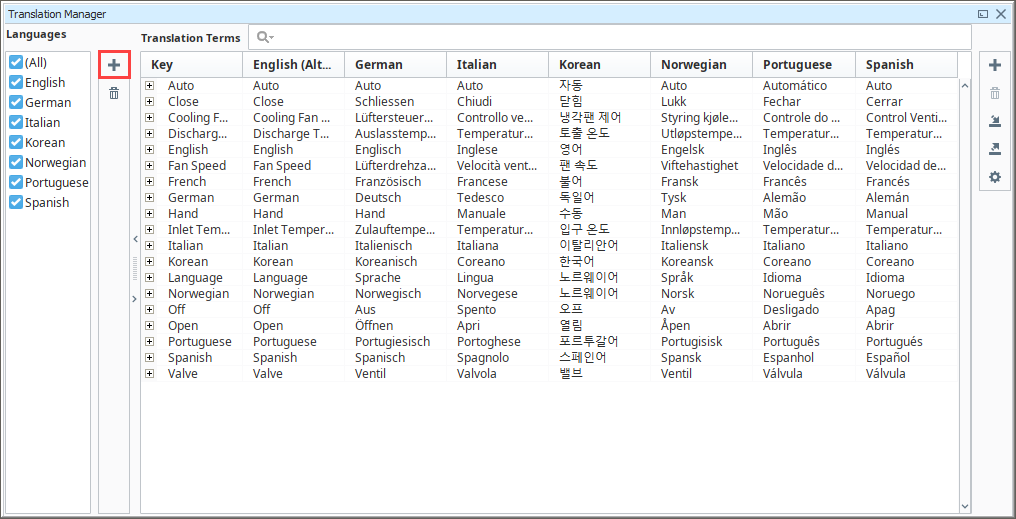
Before creating translations, you must define the languages that your project will support. The Translation Manager comes with English, French, German, Italian, Korean, Norwegian, Portuguese, and Spanish defined by default, but you can add any number of additional languages that are available. Once added, a language is available for all projects.
-
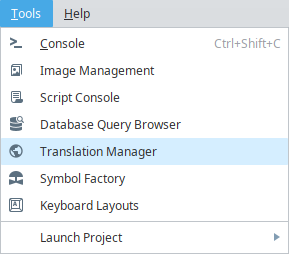
In the Designer, go to the menu bar and select Tools > Translation Manager.
-
In the Translation Manager, click the Plus icon next to Languages on the left side.
-
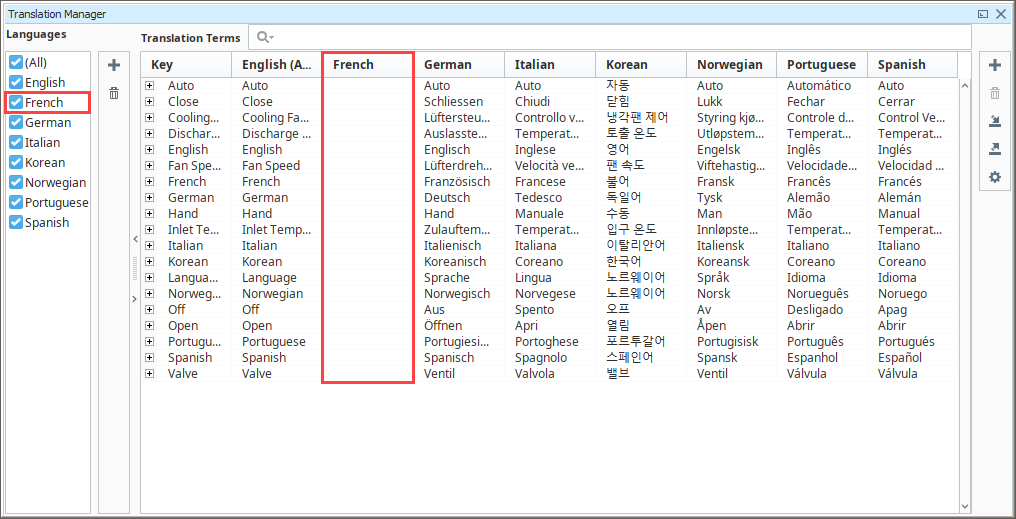
In the Add Language dialog, select the language you want from the dropdown.

Optionally, check Include regional variations to make region-specific codes available (for example, French (Canada) vs. French (France)).
-
Click OK.

The new language will appear in the Languages panel and as a new column in the Translation Terms table.
Add Global Translation Terms
Global translation terms are shared across all projects and are the preferred way to manage most translations. Component-level terms (Vision only) should only be used when a translation needs to override a global definition in a specific context.
There are two ways to add global terms:
- Directly in the Translation Manager
- From the Translatable Terms panel in Vision
The steps below show how to add a global term directly in the Translation Manager.
-
In the Designer, go to the menu bar and select Tools > Translation Manager.
-
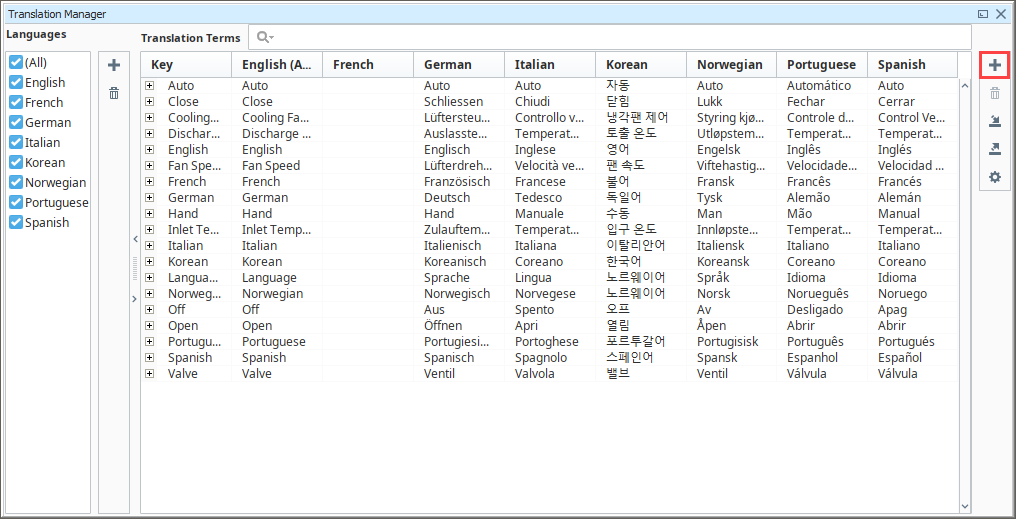
In the Translation Terms table, click the Plus icon on the right side.
-
A dialog will appear at the bottom of the table. Enter the base term for the Key column. In this example, we will use Tank.
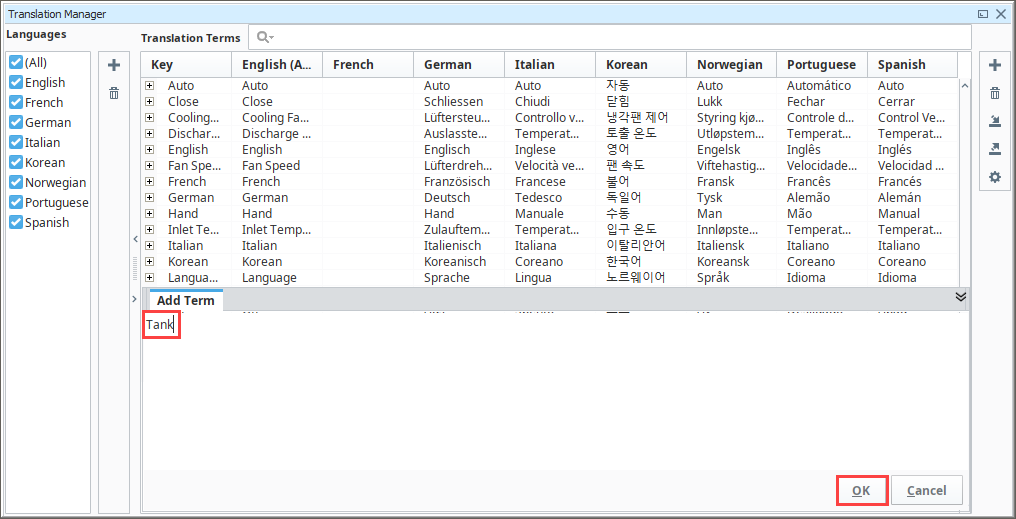
-
Click OK.
-
Click the + next to the new key to expand the translation fields for each language that has been added.
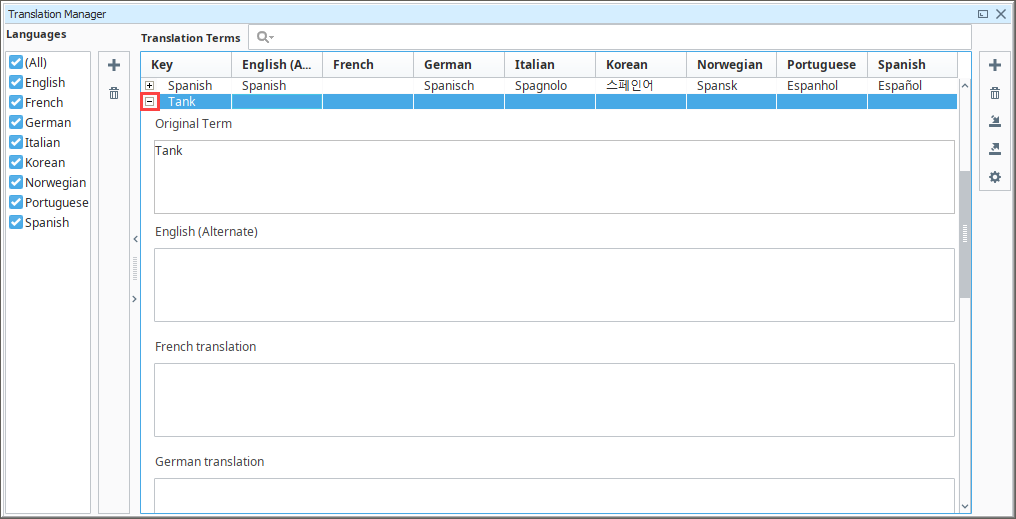
-
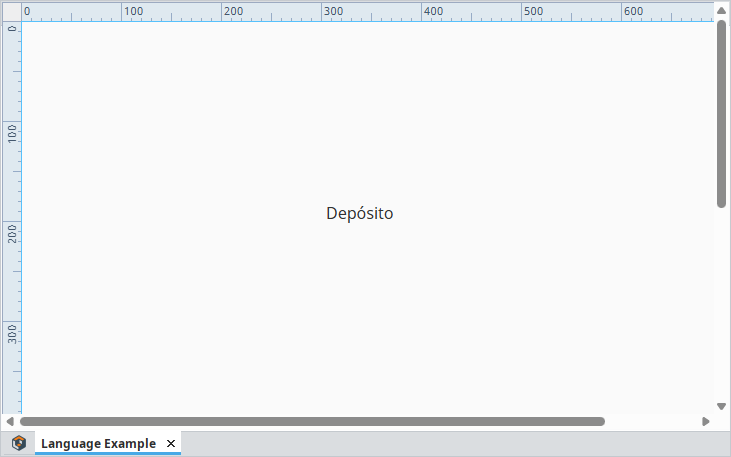
Enter translations for each available language. In this example, we will use "Depósito".
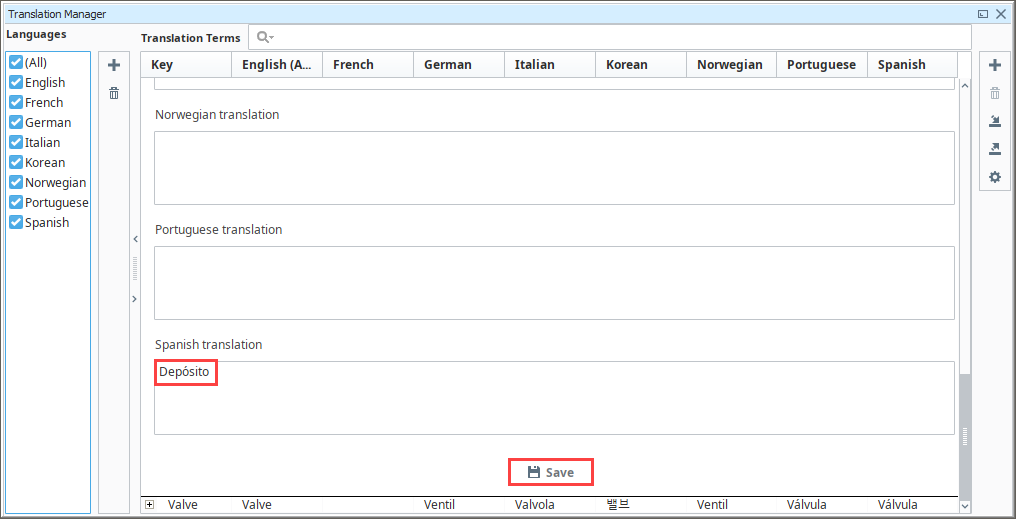
-
Click Save.
The term is now available globally across projects.

Testing Global Terms
After you add a global translation term, you can test it in your projects to make sure the translations apply correctly. The steps differ slightly depending on whether you are working in Perspective or Vision.
Perspective
-
In the Designer, open a View in the Project Browser.
-
Add a Label component and set the
textproperty in the Property Editor to the key you created in the Translation Manager.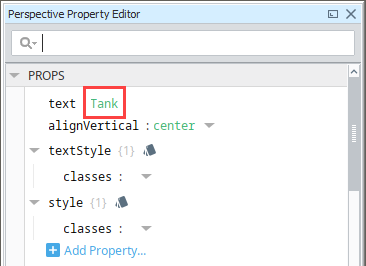
-
Change the session's
localeproperty (for example,es-USfor Spanish).
-
Verify that the component text updates to the correct translation.
Vision
-
In the Designer, add a Language Selector component to a window.

-
Add a Label component and set the
textproperty in the Property Editor to the key you created in the Translation Manager.
-
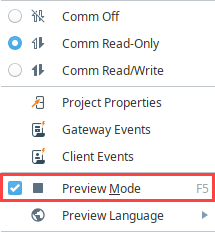
Switch to Preview Mode.
-
Use the Language Selector dropdown to toggle between languages.

-
Verify that the component text updates to the correct translation.

Add Component Level Translation Terms
Component level translation terms are only available in Vision.
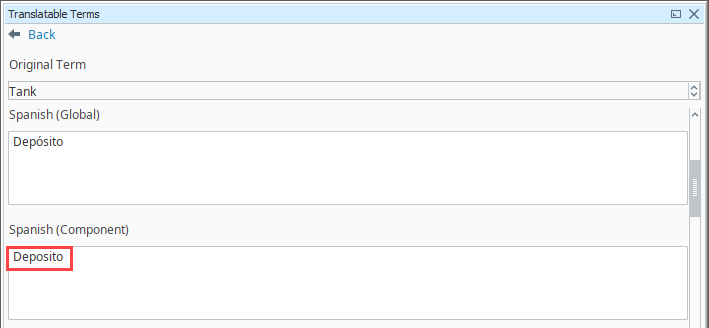
Component terms are defined in the Translatable Terms panel. This panel lists all the terms used by a component, or an entire window if opened at that level. Component terms always override global terms with the same key, allowing you to provide translations in context when a translation needs to differ in a specific window or component.
-
In the Designer, add a Label component to a Vision window.

-
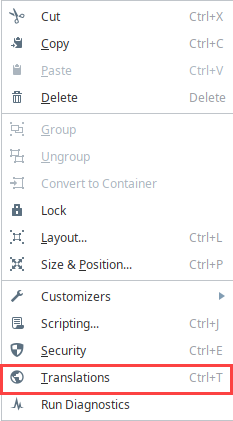
Right-click the component and select Translations to open the Translatable Terms panel.
-
Double-click the component column of the chosen language to open the and enter the translation to the Component field. In this example, we added an alternate translation in Spanish (Component).
-
Add a Language Selector component to the window.
-
Switch to Preview Mode and switch languages to verify the text updates.

Translation List Import and Export
Importing and exporting translation lists makes it easier to manage large projects. You can quickly share terms across environments, send lists to third parties for translation, and keep multiple projects up to date.
Export Terms
You can export all terms in the Translation Manager or only selected terms.
-
In the Designer, go to the menu bar and select Tools > Translation Manager.

-
Click the Export Terms
 icon on the right side of the Translation Manager.
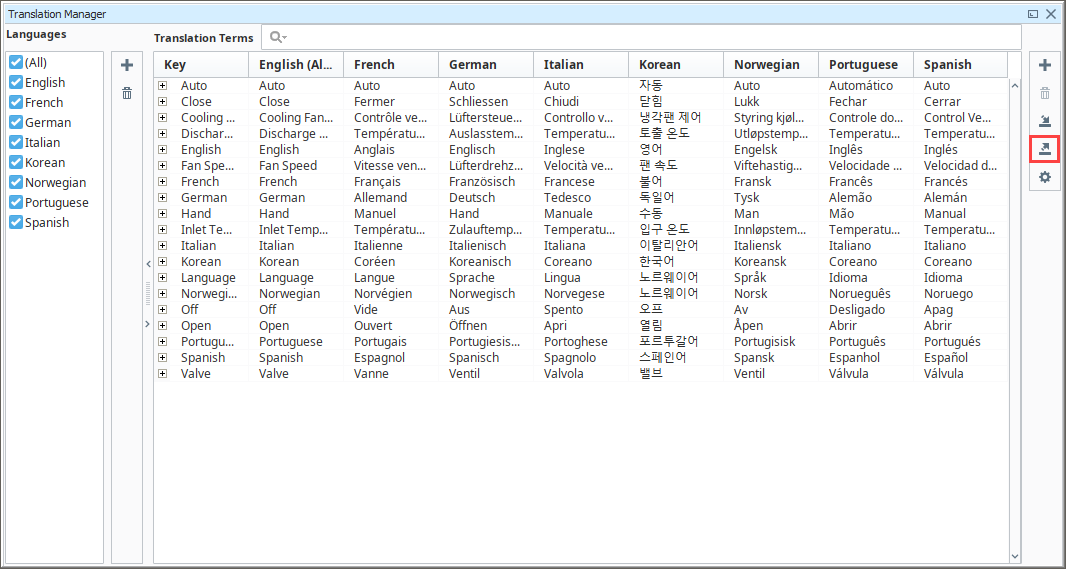
-
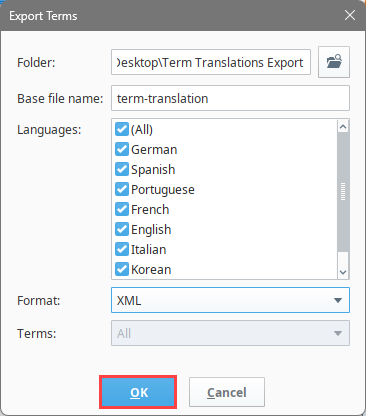
In the Exported Terms dialog, configure the following:
- Folder: Choose where to save the exported files.
- Base file name: Enter the base name for use for the exported files.
- Languages: Select the languages you want to export. A separate file will be created for each language.
- Format: Choose PROPERTIES or XML. XML supports UTF-8 encoding.
- Terms: Select All or Selected depending on whether you want to export every term or only those highlighted.
-
Click OK to generate the files.
-
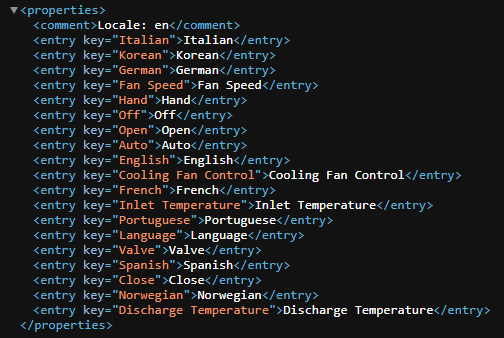
Go to the export folder and confirm the files were created and verify the contents. For this example, an XML file was exported.
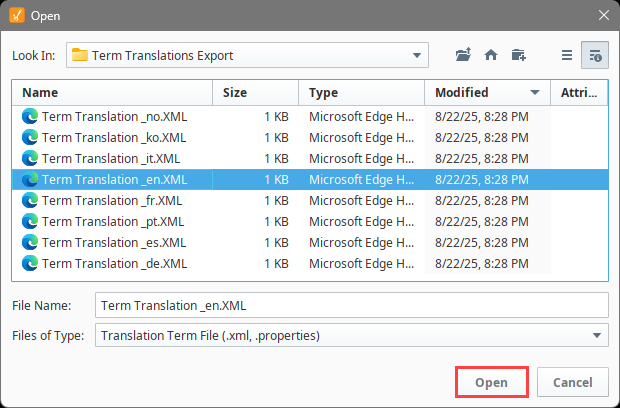
Import Terms
You can import translation files back into the Translation Manager to quickly populate terms in another project or environment.
-
In the Designer, go to the menu bar and select Tools > Translation Manager.
-
Click the Import Terms
 icon on the right side of the Translation Manager.
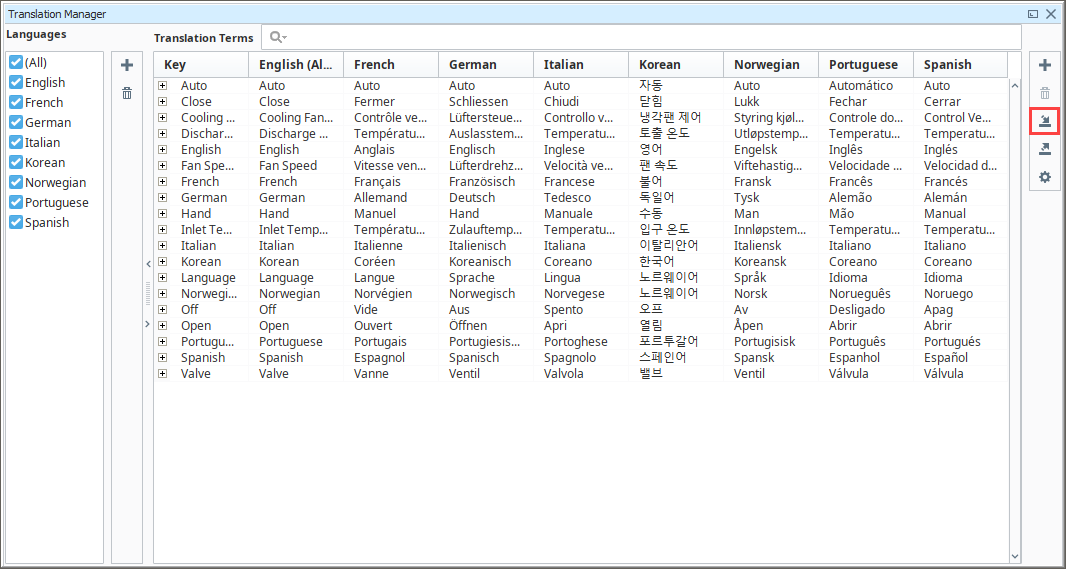
-
In the file browser, select the translation file you want to import, and click Open.
-
In the Import Terms dialog, choose either Import All or Import Selected depending on whether you want to import every term or only those highlighted.
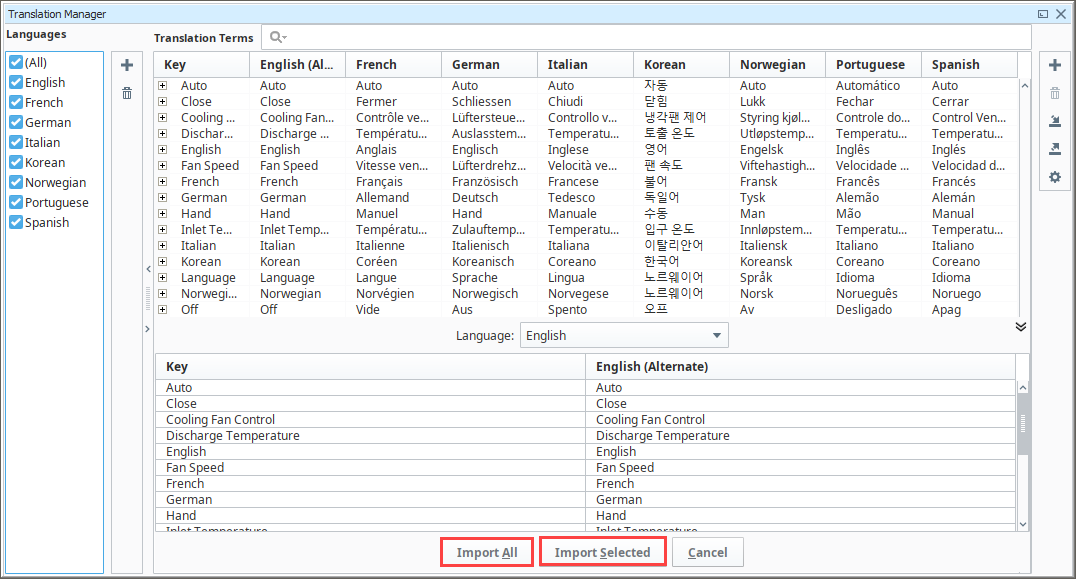
-
Verify the imported terms appear in the Translation Manager.
If a term already exists in the Translation Manager, importing will overwrite it with the values from the file.