Block Group
The Block group is a type of transaction group that stores data vertically. Whereas, a Standard group stores the information horizontally in a single row. Block groups share many of the same features as the Standard group. They can be bidirectional, insert into a database, or simply update the database. All the rows in a Block group are associated with a single database transaction therefore the process of writing to the database is very efficient.
Create a Block group
-
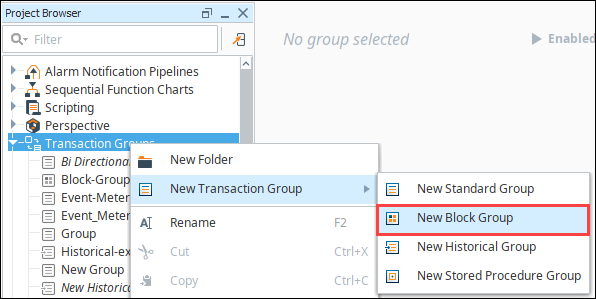
In the Project Browser, right-click on Transaction Groups and select New Transaction Group > New Block Group.
-
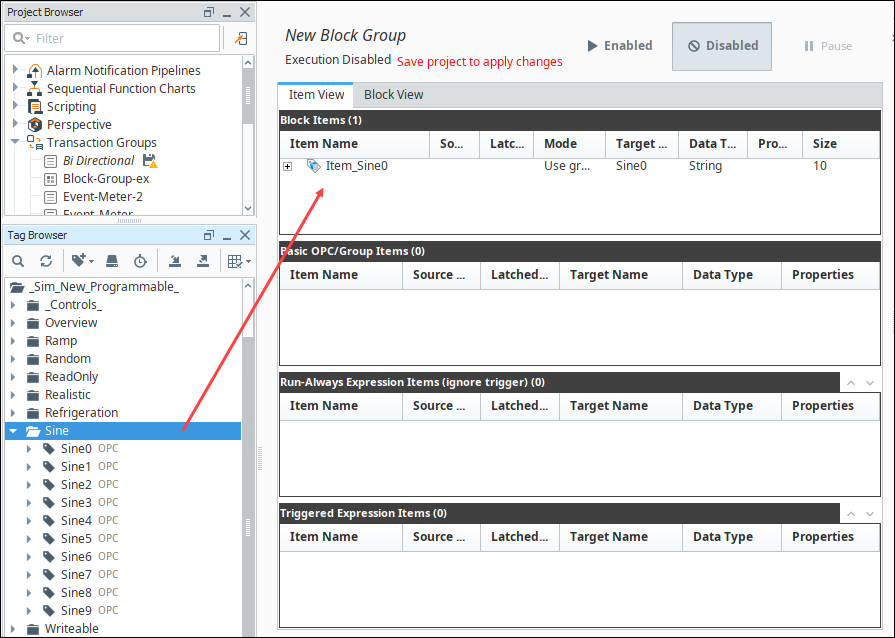
Give the group a name and click Create Group.
-
Drag a Tag folder into the Block Items section of the new Transaction Group.
-
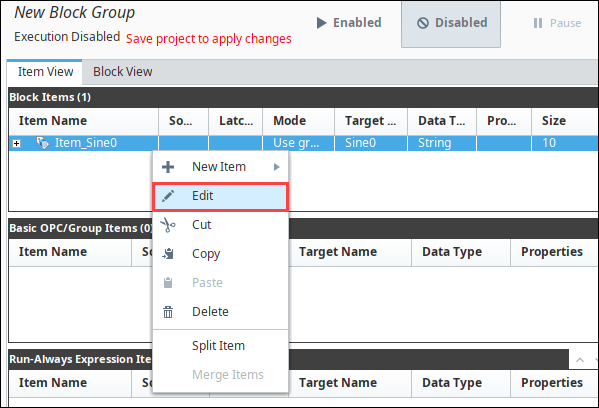
Select the item in the Block group, right-click and select Edit.
-
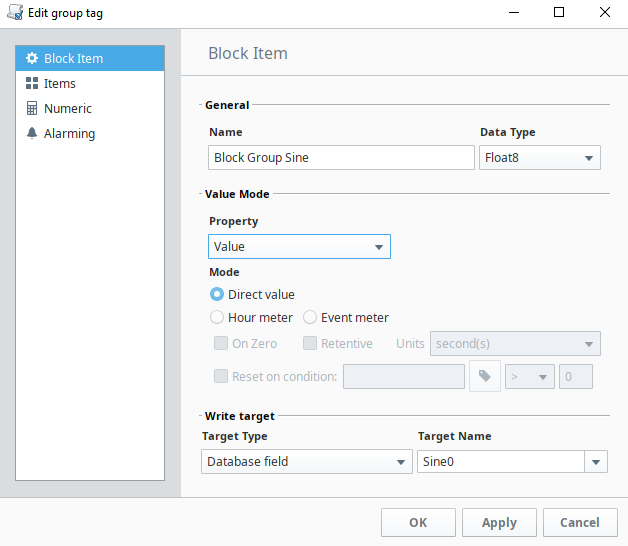
Change the Name, enter the Target Name to anything appropriate. Click OK.
-
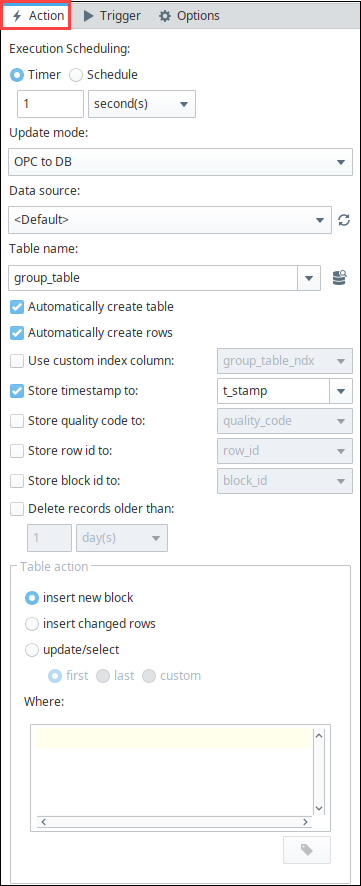
Configure the remainder of the group settings under the Action tab.
-
Select the group, and click Enabled.
-
Save the project to start the group.
DB to OPC Mode with Custom Where Clause
Like the Standard Group, block groups can be configured to retrieve records from the database, writing back to an OPC address or Tag. When using a custom WHERE clause, you can write the WHERE statement in such a way that multiple rows are returned, which would then update multiple items, which in turn write back to to OPC addresses. We could then add a dynamic OPC value as a "lookup" that would determine which set of rows to return.
This is a great way to retrieve multiple datapoints that are stored in a tall format on a database table, ideally when you're looking to retrieve multiple sequential rows. For example a table with the following content, a single block item targeting the "itemValue" column, and a "lookup" Tag or OPC item that the group will use in the WHERE clause.
Table Structure, Block Item, and Tags
| table_ndx | itemValue |
|---|---|
| 1 | 1 |
| 2 | 20 |
| 3 | 300 |
| 4 | 4,000 |
| 5 | 50,000 |
| 6 | 600,000 |
| 7 | 7,000,000 |
| Our Block Item | Our Tags (including lookup) |
|---|---|
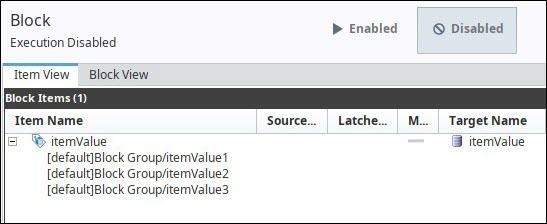 | 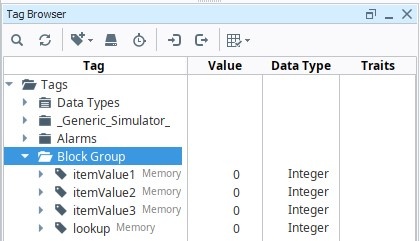 |
-
Set the "Update mode" for the group to "DB to OPC".
-
Set the Table action (under the "Action" tab) to "update/select".
-
Select the "custom" radio button.
-
Under the "Where:" text area, click the Tag icon, and select the "lookup" Tag, which adds a reference to the Tag like this:
{[default]Block Group/lookup}. -
Write the rest of the our condition. In this case, we'll say we want results from our table starting a value greater than our lookup value. Using the table specified above, we could write the following condition:
null_table_test_ndx > {[default]Block Group/lookup} -
Enable the group, and save the project.
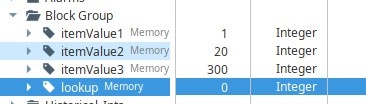
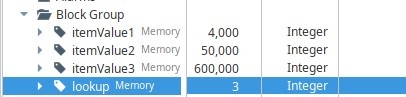
When the group is running, with an initial lookup value of 0, the group automatically grab table_ndx of 1, and write a value of 1 (from the first row) to itemValue1, a value of 20 (from the second row) to itemValue2, and so on.
If we set the value on lookup to 3, that means the first row in the result set will be row 4, setting itemValue1 to 4000, itemValue2 to 50,000, and so on.
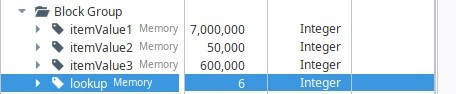
If you set the value of lookup to 6, then that will set the value on itemValue1 to row 7's value (7,000,000), but you'll notice the other Tags are retaining a value, which is notable since those items don't have a corresponding value to retrieve.
| Values on our Tags | Items in the Group |
|---|---|
 | 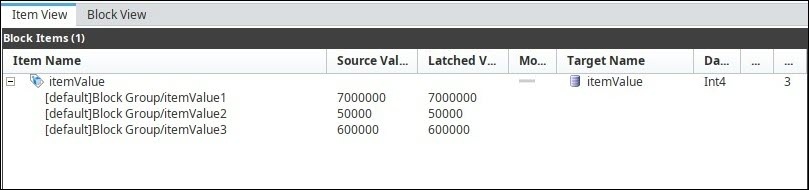 |
This is expected. By default, when a Block Group is configured like this, and some items can't receive updated values as a result of the dynamic WHERE clause not returning enough rows, the items will retain their previous latched value: that is to say, the group will not automatically clear or reset the values on the other items. Refer to Set NULL DB Values to Default.