Additional SECS/GEM Simulator Features
Default Variables
Each simulator is initialized with a number of status variables and equipment constants for demonstration purposes. The status variables and equipment constants are "live" objects within the simulator. This means that the standard SECS/GEM commands (such as S1F3) can be run to view the variable definitions and current values. Equipment constant values can also be changed using the S2F15 command. See the "Simulator SDL file" section below for information on how to change the values directly in the simulator.
Import Status Variable Definitions
If you can capture status variable definitions from an existing tool using the S1F11 command, you can automatically create status variables within the simulator. Save your capture to a .txt file with the following format (substitute your own status variables):
{
   "body":[
      [
         {
            "doc":"SVID, Status Variable ID",
            "format":"U4",
            "value":268435456
         },
         {
            "doc":"SVNAME, Status Variable Name",
            "format":"A",
            "value":"LMMode"
         },
         {
            "doc":"UNITS, Units Identifier",
            "format":"A",
            "value":""
         }
      ],
      [
         {
            "doc":"SVID, Status Variable ID",
            "format":"U4",
            "value":268435457
         },
         {
            "doc":"SVNAME, Status Variable Name",
            "format":"A",
            "value":"LMState"
         },
         {
            "doc":"UNITS, Units Identifier",
            "format":"A",
            "value":""
         }
      ]
   ]
}
On the Simulator Variables page, click on the "Import status variable definitions" link. Choose your text file and click "Begin Import". If there were no errors during import, you will be returned to the Simulator Variables page. You can see your new status variables in the tree under data > Status Variables or by viewing the raw SDL file. Note that all imported status variables have a format of "UNKNOWN" and a value of "UNKNOWN", due to the fact that the S1F11 command does not send status variable format or value. You must manually set these values before the status variables can be read by the simulator. After the format and value of the new status variables are set, you can save the simulator SDL file, and restart the simulator and its equipment connection. The new status variables will now be readable within the simulator.
Import Equipment Constant Definitions
If you can capture equipment constant definitions from an existing tool using the S2F29 command, you can automatically create equipment constants within the simulator. Save your capture to a .txt file with the following format (substitute your own equipment constants):
{
   "body":[
      [
         {
            "doc":"SVID, Status Variable ID",
            "format":"U4",
            "value":268435456
         },
         {
            "doc":"SVNAME, Status Variable Name",
            "format":"A",
            "value":"LMMode"
         },
         {
            "doc":"UNITS, Units Identifier",
            "format":"A",
            "value":""
         }
      ],
      [
         {
            "doc":"SVID, Status Variable ID",
            "format":"U4",
            "value":268435457
         },
         {
            "doc":"SVNAME, Status Variable Name",
            "format":"A",
            "value":"LMState"
         },
         {
            "doc":"UNITS, Units Identifier",
            "format":"A",
            "value":""
         }
      ]
   ]
}
On the Simulator Variables page, click on the "Import equipment constant definitions" link. Choose your text file and click "Begin Import". If there were no errors during import, you will be returned to the Simulator Variables page. You can see your new equipment constants in the tree under data -> Equipment Constants or by viewing the raw SDL file. Restart the simulator and its equipment connection. The new equipment constants will now be readable within the simulator.
Echo Responses
There are a number of SECS/GEM messages that are not implemented in the default simulator. However, you can still use this utility to provide a hard-coded response to these messages.
When creating an Echo Response, you are simply creating a dedicated response to a specified request. Echo Responses can be used to override the responses contained in the Simulator's SDL.
Additionally, you can create an Echo Response to a message that isn't included in the Simulator's Default Messages, allowing you to have the Simulator emulate another tool. In these cases, it you will need to capture the output of an actual tool's response to a message or know the exact format of the response. Furthermore, you will need to modify the Simulator's SDL file to include the message both the request and response.
Creating an Echo Response
On the Simulator Variables page, click on the Create echo response link.

The following properties will appear:
| Property Name | Description |
|---|---|
| Name | The name of the response. Used purely to help you identify specific responses when viewing the responses from the SDL. |
| Stream and Function | The Stream and Function that this Echo will respond to. |
| Echo Response | The message to return. If emulating another tool, you will want to modify the Echo Response to match an actual response from the tool. |
Example
- If you wanted to create a custom response to S1F1, specify Stream 1, Function 1, and use the Message Below:
{
   "header":{
      "stream":1,
      "function":2,
      "reply":false,
      "doc":"On Line Data"
   },
   "body":[
      {
         "format":"A",
         "value":"SimOne",
         "doc":"MDLN, Equipment Model Type"
      },
      {
         "format":"A",
         "value":"1",
         "doc":"SOFTREV, Software Revision Code"
      }
   ]
} - Click Save.
- Click the Save SDL File button.
- Restart the Simulator.
- Now, whenever the simulator receives an S1S1 message, it will response with your custom S1F2 message.
If you added a new function, you may also need to define the message in the messages section of both the simulator SDL file and the equipment connection SDL file. You may also need to add new format items to the items section of both SDL files. Failure to do so can result in "message not found" or "format not found" errors when you attempt to send the command to the simulator.
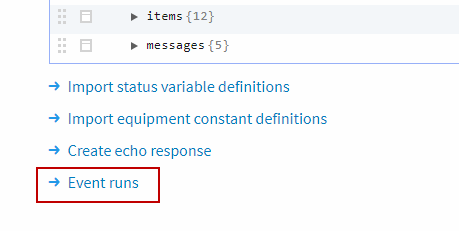
Event Runs
The Simulator features an Event Run feature, which allows you to create a list of S6F11 messages at fixed intervals that simulate report generation. An Event Run consists of one or more events, with each event containing a S6F11 message that will be sent to the simulator when the event fires.
Add Event Runs
Each simulator can have multiple event runs specified, each with a unique set of events. To access a simulators event runs, go to the Gateway Webpage Configure section and navigate to the SECS/GEM > Simulator page, and in the More menu to the right of the simulator select the sim variables option. At the bottom of the SDL editor tool, there will be a link for Event Runs that will take you to the page where new event runs can be created.
On the Event Runs page, a new event run can be created by clicking the Create new Event Run link, where you can specify the name of the new event run.
Add Events
Once an event run has been made, new events can be added to it that will execute in order from when the event was started. An event run can have any number of events within it. Events must be from S6F11 messages that have been previously captured, which can be copied from the Messages table in the database. To add a new event, navigate to the Event Runs page and click on the More menu to the right of the event run that you wish to add events to. Select the events option to navigate to the Events page where you can click on the Create new Event link to create a new event in that event run. Each event has a few different properties that can be configured.
| Property Name | Description |
|---|---|
| Event Name | The name of the event. |
| Index | The index of the event. Note, each event must have a different index in the event run. |
| Delay | The delay in seconds from the last event until this event fires. |
| Send Data | A JSON formatted message that will be sent to the equipment connection when the event fires. The message must include header and body fields. |
Below is an example of a message for the Send Data property.
{
   "header":{
      "stream":6,
      "function":11,
      "reply":true,
      "doc":"Event Report Send"
   },
   "body":[
      {
         "format":"U4",
         "value":2,
         "doc":"DATAID, Data ID"
      },
      {
         "format":"U4",
         "value":3,
         "doc":"CEID, Collected Event ID"
      },
      [
         [
            {
               "format":"U4",
               "value":1,
               "doc":"RPTID, Report ID"
            },
            [
               {
                  "format":"A",
                  "value":"150408103706",
                  "doc":"V, Variable data"
               },
               {
                  "format":"A",
                  "value":"OFF-LINE/HOST OFF-LINE",
                  "doc":"V, Variable data"
               }
            ]
         ]
      ]
   ]
}
Using Event Runs
To use an event run, it needs to be started. To start an event run navigate to the Event Runs page, and in the More menu to the right of the event run you wish to start select the start option. If at any time you wish to cancel the event run, simply select the cancel option from the More menu.
Import Events
Instead of manually entering in events, multiple events can be imported from previously captured messages in the Messages table by clicking on the Import Events link on the Events page. This will allow you to set up an import with various parameters.
| Import Parameter | Description |
|---|---|
| Datasource | The datasource to pull events from. |
| Equipment Name | The name of the equipment connection that the events are coming from. |
| Equipment Table Prefix | The prefix of the specified equipment's database tables. |
| Range Start | The starting date and time to import events from. |
| Range End | The ending date and time to import events from. |
Once the import parameters have been set up, clicking Begin Import at the bottom will start the import process, which will pull any possible events based on the specified parameters.